Depth of Field
Focusing on Nature
By Peter Rockstroh

This crisply-focused image of a Bay-headed Tanager (Tangara gyrola) taken at a private reserve in Caldas Department, Colombia illustrates how attention to proper focus, lighting, and exposure combinations can make a huge difference in photo quality. Image: ©Peter Rockstroh 2023.
Regardless of the make and model, or of how many functions and buttons your camera has, at the moment of exposure it can only do two things; the same two things any other camera can do. It can regulate how much light comes through the lens, and for how long.
This amount of light is called the exposure, and when calculated properly it can deliver the exact amount of illumination required to create an image that shows every detail and texture, from the darkest area to the lightest. The correct amount of light is adjusted with the right combination of aperture and shutter speed. The aperture of the exposure also defines the Depth of Field, a technical aspect of photography often overlooked while capturing images and only remembered when analyzing the photos later.
A lens can only focus on one spot, or at least on one distance plane. Anything at that distance following the curvature of the lens will be in focus. Anything closer or further away will not be in focus.
It’s that simple.
Depth of Field is the distance range within your image in which everything is perceived as in focus. The term has been losing popularity of late, largely because digital cameras have replaced film cameras and older manual lenses displayed a scale that allowed to read the range in focus. Most digital lenses no longer offer this feature.
The scale also allowed focusing at hyperfocal distance. This is the focusing distance for any given f-stop at which the largest range of the image is perceived sharp and in focus.
By now you may have noticed that I have used the phrase “perceived as in focus”, rather than in focus.
A ray of light going through a lens at focusing distance, unaffected by refraction, diffraction, or reflection, produces the smallest point in focus on film or sensor. Anything even slightly out of focus will display a halo. The farther from the focusing distance these points are located, the larger the halo around them. This halo is called a circle of confusion. The human eye cannot tell a point from a light spot up to a certain size. Within that size range, everything in a photo is perceived as being in focus.
Since these spots are projected onto a film or a digital sensor, the smaller the aperture, the narrower the spots being projected. That means that the smaller the aperture, the more depth of field will be in focus. What the small apertures (high f-numbers such as f/22, f/32, and F/45) achieve is displaying sharp detail that can range from the foreground to horizon.
People interested in landscape photography will immediately understand that if they want everything in focus, they should close the aperture to the smallest diameter (i.e., the largest f-number available on the lens) and deal with the consequences of low light otherwise.
They start photographing in the morning and as the day comes to an end and the light starts fading, they realize that they must use a tripod or change the sensitivity of their camera. Small apertures need a lot of light. By the time they have reached ISO/ASA 1,000, they’ve traded circles of confusion for pixels.
Illustration 1. A manual lens showing focusing distance, Depth of Field, and aperture ring.

Yes, the tools from the good old days now come in really handy. If you look at a standard manual lens (i.e., a 50 mm) from above, you will notice that the focusing mark is framed by two sequences of apertures opposite the focusing scale, which shows the distance to the object in focus.
Illustration 2. The small equalizer: Circles of confusion and the concept of Hyperfocal Distance.

Your focus mark (the broad white stripe in the center of the f-stop numbers) shows the focused distance. The sequence of f-stops on both sides shows the range of your Depth of Field at a given f-stop. You can see how your DOF becomes smaller as your aperture gets larger.
Now that you have understood the relation between aperture and Depth of Field, the next step is understanding the relation between focal length and Depth of Field.
In practical terms, the smaller the focal length, the larger your depth of field. For landscape photography most photographers use normal or shorter lenses. A normal lens has a focal distance approximately equivalent to the diagonal length of your film or sensor. For 35 mm film that is about a 50-55 mm lens; for medium format film (6 x 6 cm) it is a 90 mm lens. This definition has been is based on the fact that a normal lens captures the scene and projects a cone of light that covers the whole film area without light fall-off around the edges.
Illustration 3. Focusing distance, film coverage, and the normal lens.

A normal lens, apart from being defined by physical aspects, also has an angle of coverage quite like human vision.
Lenses shorter than the normal lens are considered wide angle lenses, and those longer than normal are considered telephoto lenses.
The short landscape lenses cover more area, with fisheye lenses sometimes covering over 180°. While using these lenses it is very common for the tips of your shoes showing at the lower edge of your images. The wider your angle of coverage, the wider your Depth of Field. Landscape photos that include a very detailed element in the foreground and crisp main subject and background, were most probably taken with a wide angle lens at hyperfocal distance.
Using a manual lens, the technique is very simple:
a). Choose the aperture at which you will take the photo (e.g. f/22), then;
b). Rotate the focusing ring so that the symbol for infinity stands opposite the left f-stop you chose (f/22) and;
c). The f-stop you chose on the right side will stand opposite to your closest focusing distance. When you take the photo, it will look blurry through the viewfinder, but everything from the closest distance to infinity will be in focus. Your focusing mark is pointing at the Hd.
Remember that the lower edge of the image should be at least as far as the closest focusing distance you just established with your focus adjustment.
As the focal length of a lens increases, the depth of field decreases. Ideally one would want a lens that allows you to take photos from a considerable distance, but with a good Depth of Field. As you get closer to your subject your DOF diminishes rapidly.
Distance Focal Length Aperture DOF
5 m 200 mm f/8 0.192 m
2 m 200 mm f/8 0.028 m
5 m 600 mm f/8 0.019 m
2 m 600 mm f/8 0.002 m
When you buy a long lens, there are a few things to be taken into consideration, such as ¿How do you photograph most of the time? ¿Do you sit in a blind in front of a feeder, or do you walk through wild lands searching for specific animals? ¿What is your budget? Depending on these issues, spend some time thinking about our needs in terms of focusing speed, minimum focusing distance, and personal image capture style.
Your lens should match the type of photograph you do on everyday basis.
Why discuss birds and Depth of Field?
Birds can be a tricky subject for photographers.
They are highly mobile and love to zip through contrast-y areas and otherwise torture photographers with their unpredictable behavior. To obtain a crisp image of a bird that is completely in focus you need a shutter speed close to 1/1,000 sec. If the light conditions allow that shutter speed it will probably be at your widest aperture. Using the numbers from the table above you’ll see that with the 600 mm lens your depth of field is less than 1’”/2 cm. Except for road-kills, most birds are wider than ~1”/2 cm.
To get a frame filling, whole-bird portrait , you can take it with the 600 mm from a distance of 16’/5 m, or with a 200 mm from a distance of 6.5’/2 m. If the bird is 4”/10 cm wide, your DOF with the 200 mm lens has a good margin of error, as the bird can move in that range and will still be completely in focus. The 600 mm won’t produce an image of the whole bird in focus, since its DOF is only a fraction of the bird’s width.
In order to photograph the same bird depicted the same size on both sensors, the 600 mm lens can do the job from much farther away, but when you compare the photos with the images from the 200 mm, the latter birds will be completely in focus, while the images with the 600 mm will have to focus on the eyes, knowing that the only way of getting a DOF of ~8”/19 cm would imply closing the lens to f/45 (-5 stops) and compensating the lack of light with a 5 stop increase in luminosity. That is a 32-fold amount of light, equivalent to slowing your exposure from 1/1,000 sec. to 1/30 sec. There are very few birds you can expect to photograph at such a slow shutter speed and get crisp results.
A roasted chicken would be one such case.
So, the challenge of photographing birds is not solved simply by employing a longer lens. Sure, a bigger lens provides a big advantage, but it won't be the solution to all the difficulties. With small birds it pays to take the time how to get close to them. Sometimes all it takes is knowing when their favorite trees or bushes are in fruit, or where they like to take a bath. Sometimes all it takes is luck. Sometimes a remote control.
BOKEH
Now if you’ve understood Depth of Field and circles of confusion, you'll find the next concept very easy to grasp.
Bokeh, a Japanese word meaning out of focus or fog, is used in photography to describe the quality of the parts of image out of focus. Lately it has become a very fashionable term, although it is not seemingly understood by everybody who employs it.
Bokeh refers to the quality of the area of the image out of focus. It is often produced on purpose using short lenses with very large apertures, to create images with a very narrow Depth of Field, showcasing a subject with crisp detail against a background of watercolor hues and large soft edge circles.These are no longer circles of confusion, au contraire!
No-one will confuse these circles generated by large apertures. Good lenses without any chromatic aberration will produce beautiful background patterns where colors melt into each other.
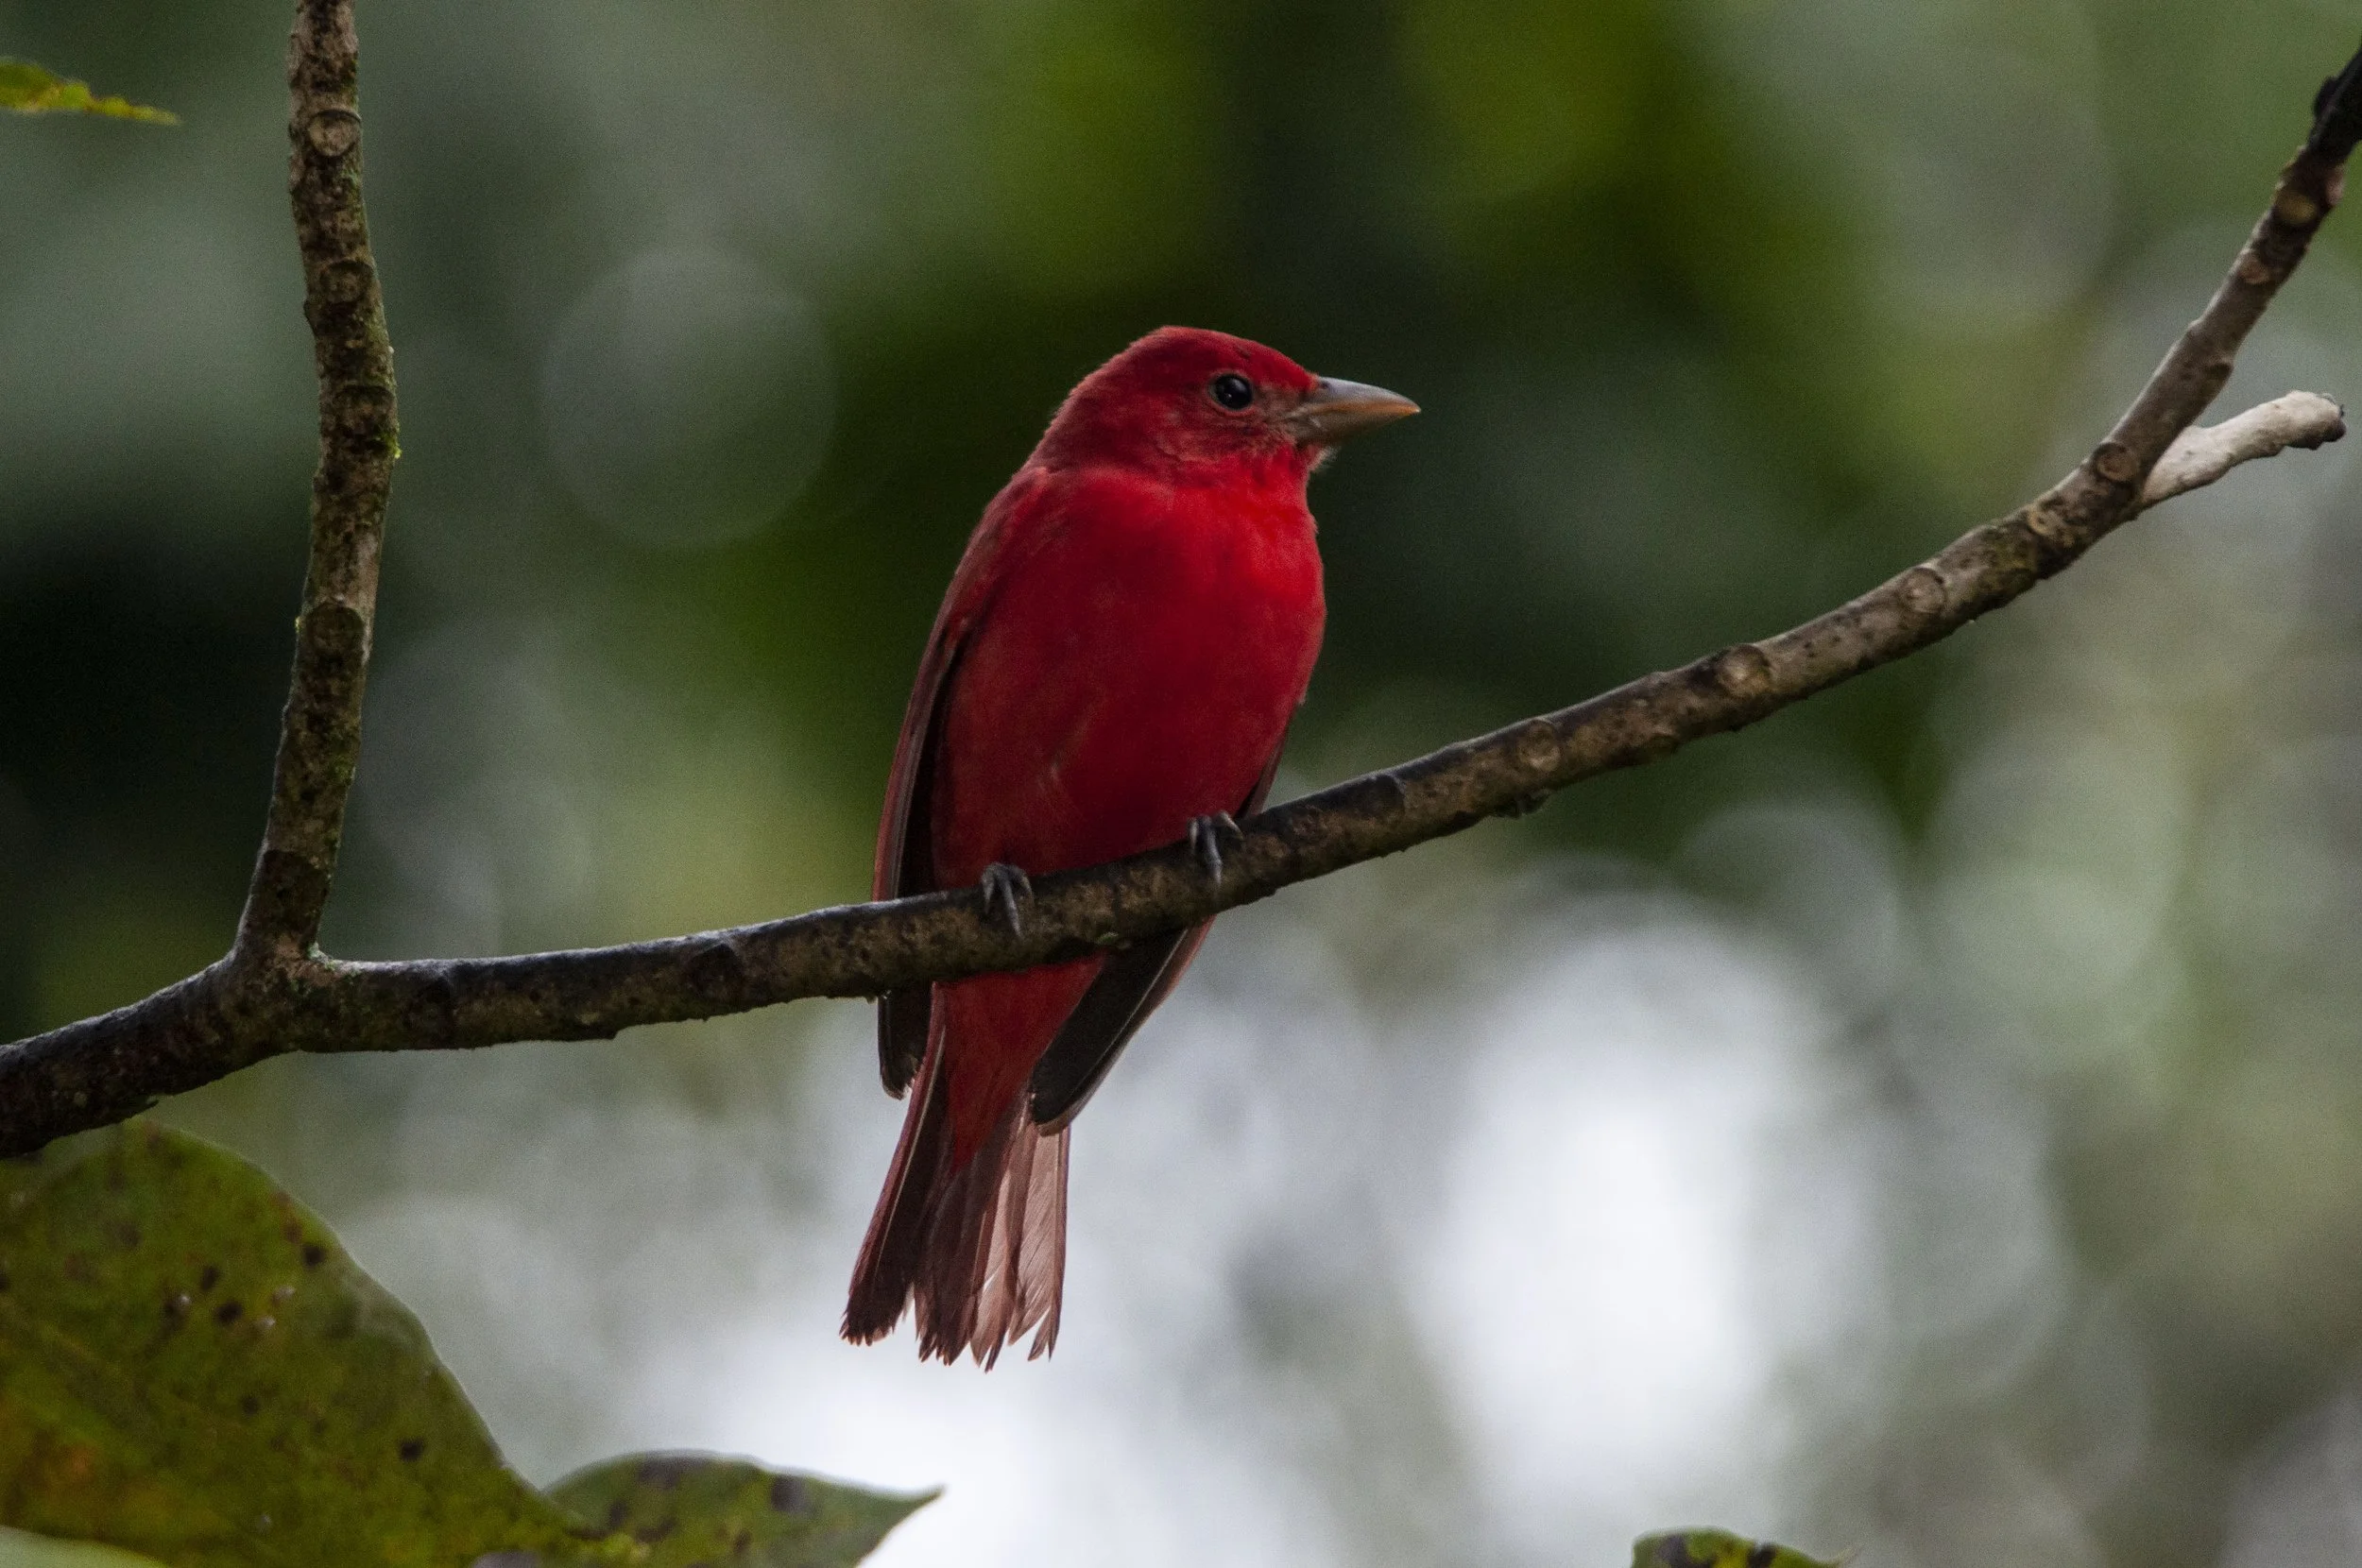
You can clearly see the difference between traditional Bokeh (large f/stop creating diffuse bubbles of color) when…
…shown with a backlit male Summer Tanager (Piranga rubra)…
…compared with normal background blur, as in this Malachite Kingfisher (Corythornis cristatus) portrait.

Examples from the Field

Desert Rose and volcano
I found this gorgeous flowering Adenium obesum in Tanzania, on our way to Lake Natron. I used a 24 mm manual wide angle, which is, to me, the best workhorse for this type of images.
The day was perfect; lots of sunlight, clear blue skies, no need for a light-meter. Sunny 16 at its best.
I set the lens at f/22 and placed the symbol for infinity opposite the f/22 mark on the lens. Wanting to cover a larger visual area, I framed it vertically, with the plant looming larger than life in the foreground, while Volcano Ol Donyoi Longai watches over the travelers, making sure they’ve got all they need.
Using a manual wide-angle lens (24 mm) and focusing on the tracks in the sand behind this Desert Rose, this image is sharp from front edge to back. The focusing point was established by educated guesstimate and rule of thumb: Hyperfocal distance (Hd) is 1/3 - <1/2 focusing movement* between foreground subject and horizon. Photos like this, where the foreground subject is rather large, have their Hd closer to 1/3.
Landscapes
When focusing at Hd and using a small aperture (f/22 or smaller), light passes through a very small opening and produces an image of very small spots, which our eyes interpret as sharp, as can be seen in Illustration N° 2. The narrow passage of light represented by the two red lines, still includes the three areas of the sample image: Fore-, middle, and background, squeezed together by perspective, yet all in focus.
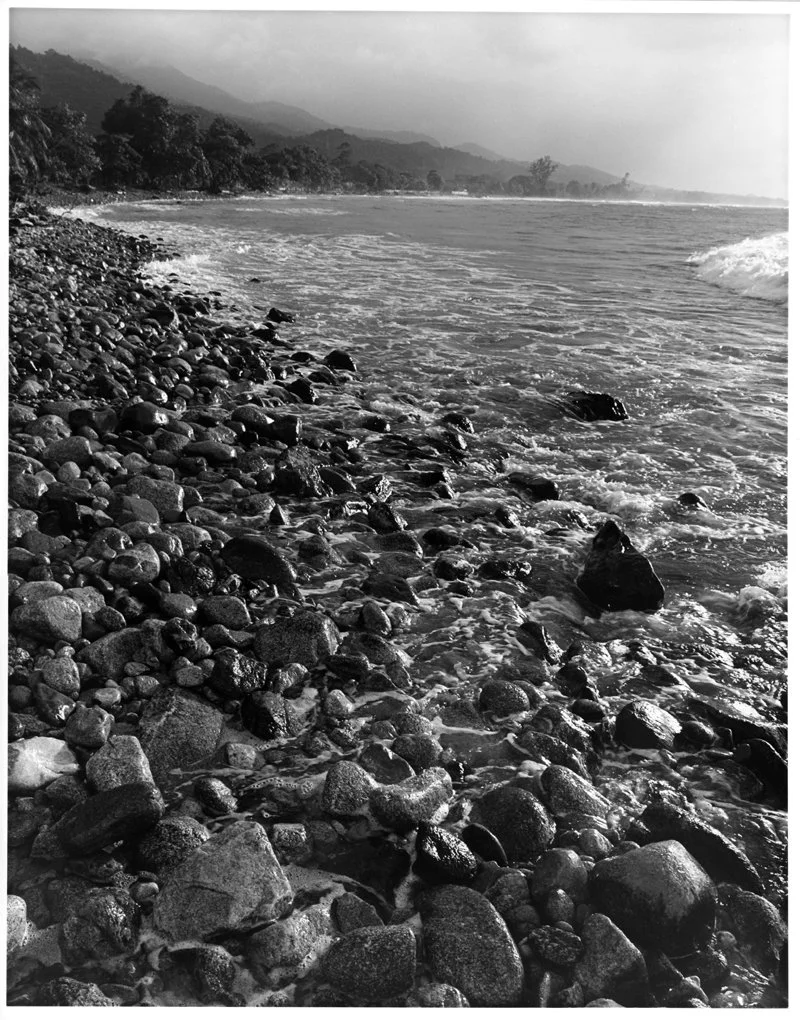
I particularly enjoy working landscape with short lenses, especially when I can use foreground elements to anchor the image and just unroll the carpet of landscape until the horizon. The image shown left of an incoming tropical storm at La Ceiba, Honduras, was taken at hyperfocal distance from a reading off the focusing ring. I was especially careful to make sure to include the wet and glistening stones, clearly in front, to contrast with the rest of the landscape, getting gradually lost in rain and fog.
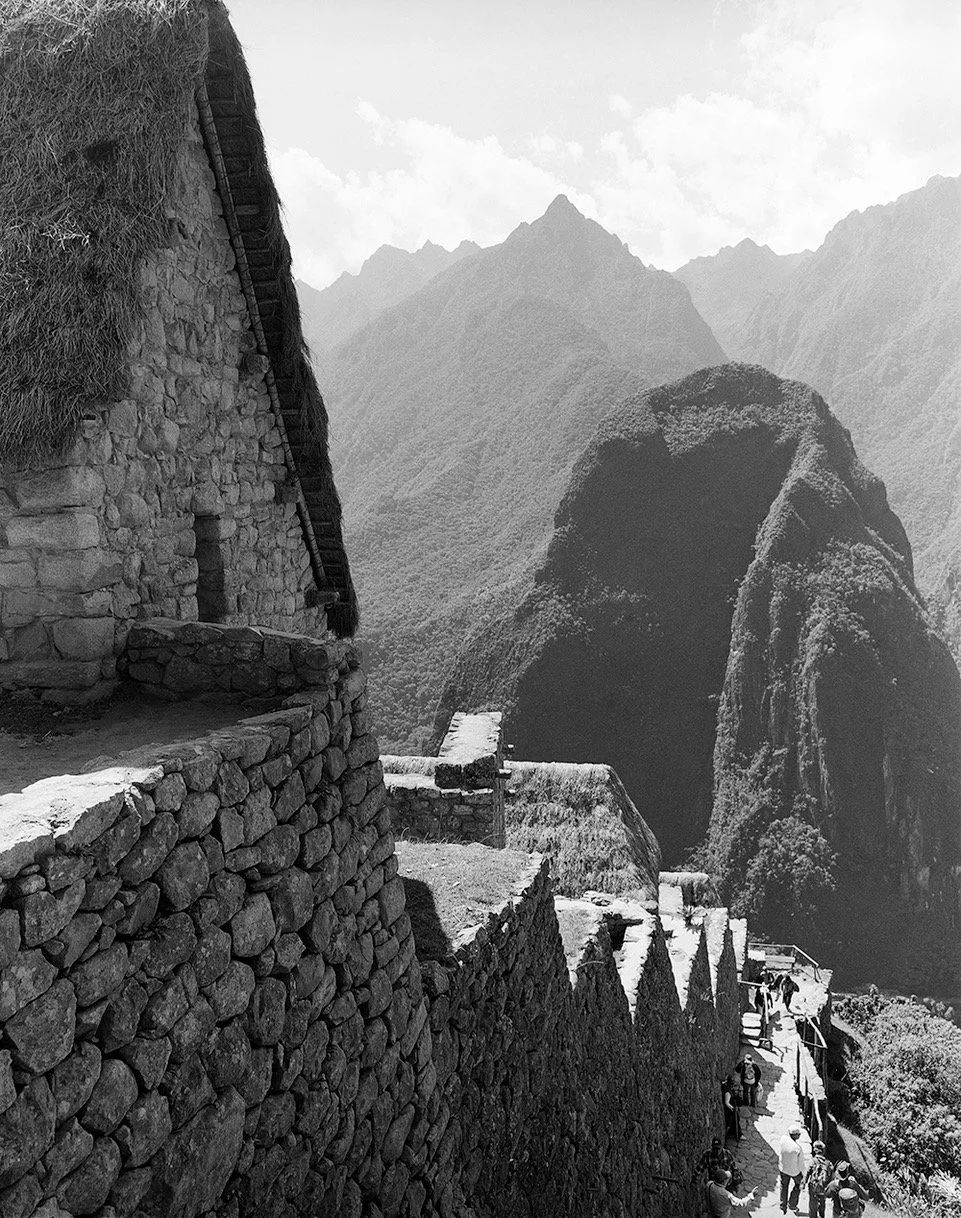
The idea of using hyperfocal distance to know where to focus, works the same when using a lateral focusing point on this vertical image. The photo of Macchu Pichu shown below was taken focusing on the third step of the wall, in order to to get the whole scene in focus.
In at least two cases the weather contributed creating a soft mood where the detail and contrast of the foreground melts into the background, without losing definition.
Animals
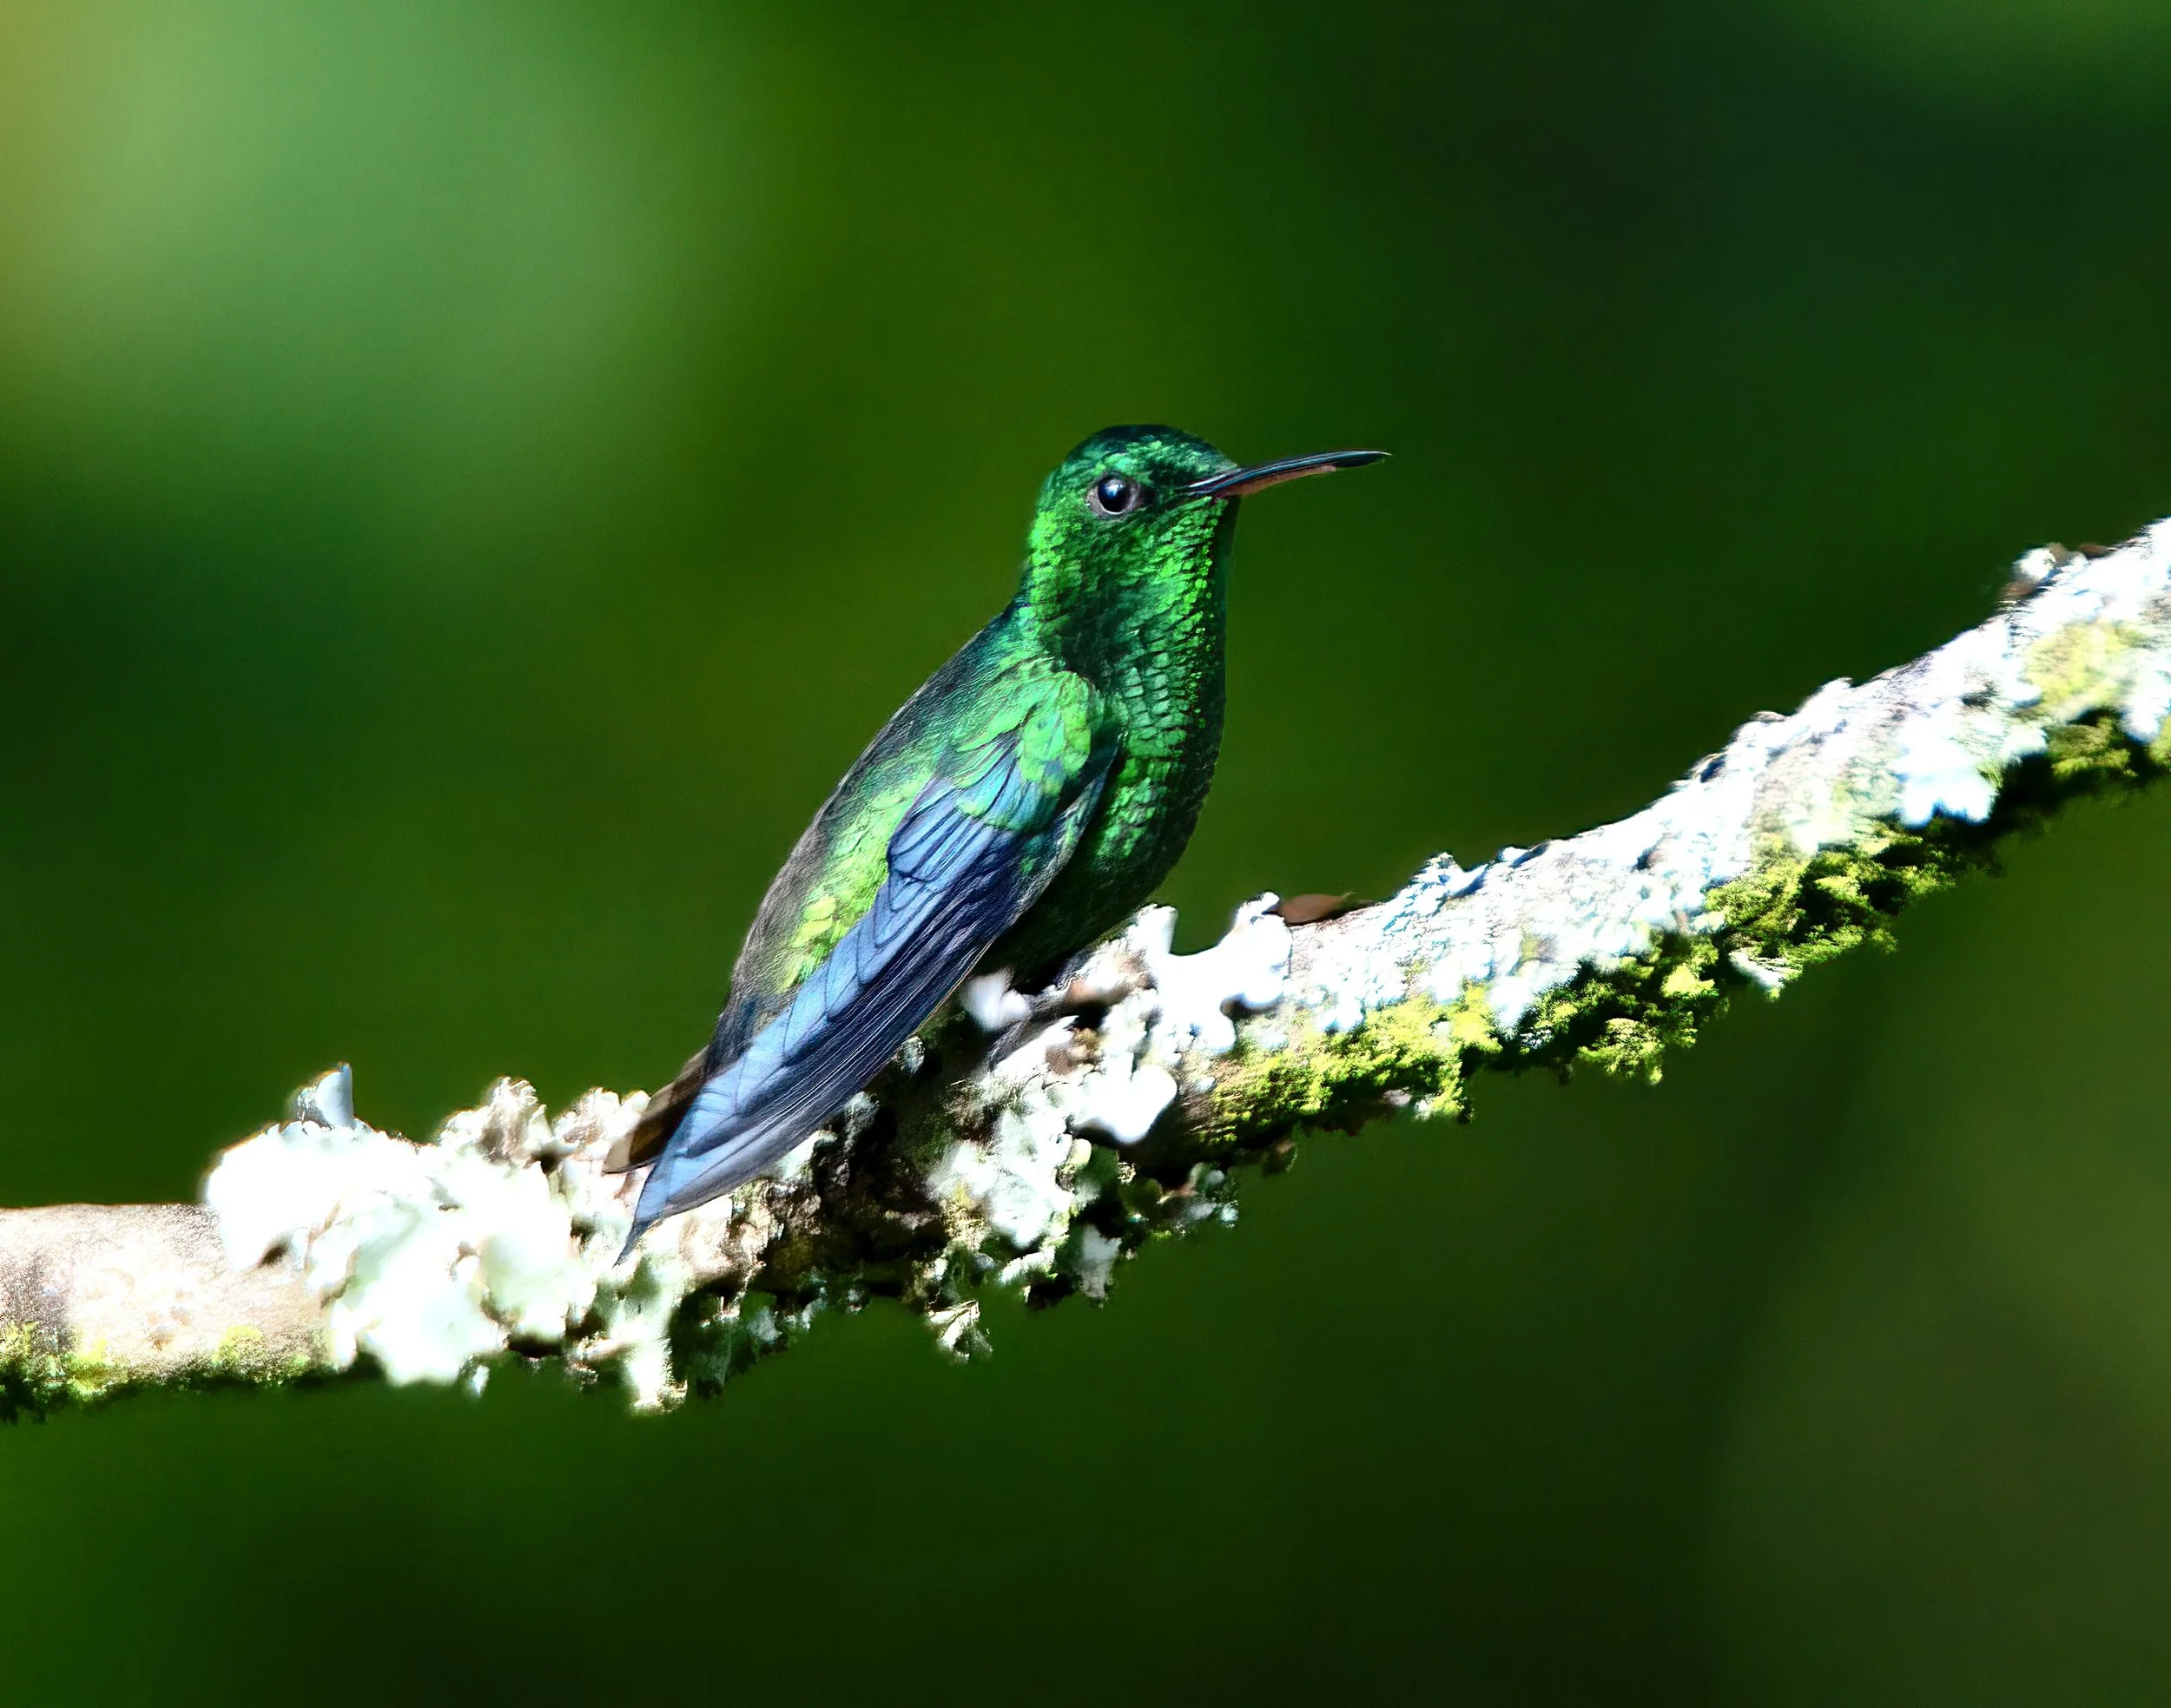
Rufous-tail Hummingbird
Hummingbirds are perfect subjects to illustrate the difficulties of Depth of Field calculations with long lenses.
When using flash, most cameras have a maximum shutter speed of 1/200 - 1/250 sec. This means that the flash synchronizes with the camera at a maximum shutter speed, above which the flash fires while the curtains are still moving.
If you test your gear taking photos of the feeder bottle (camera functions in Manual [M]), you only must find the right aperture for that distance and you can start photographing. At this shutter speed you are basically balancing ambient and artificial light. At 1/250 sec. You won’t be able to stop all movement, but can take very nice images as long as the eyes are in focus. This image of a Rufous-tailed Hummingbird (Amazilia tzacatl), taken from ~10’/3 meters with a 500 mm @f/22 has a DOF of ~1”/2.7 cm. The part of the bird in focus is the body, with wings and tail in a combination of motion blur and out of focus.
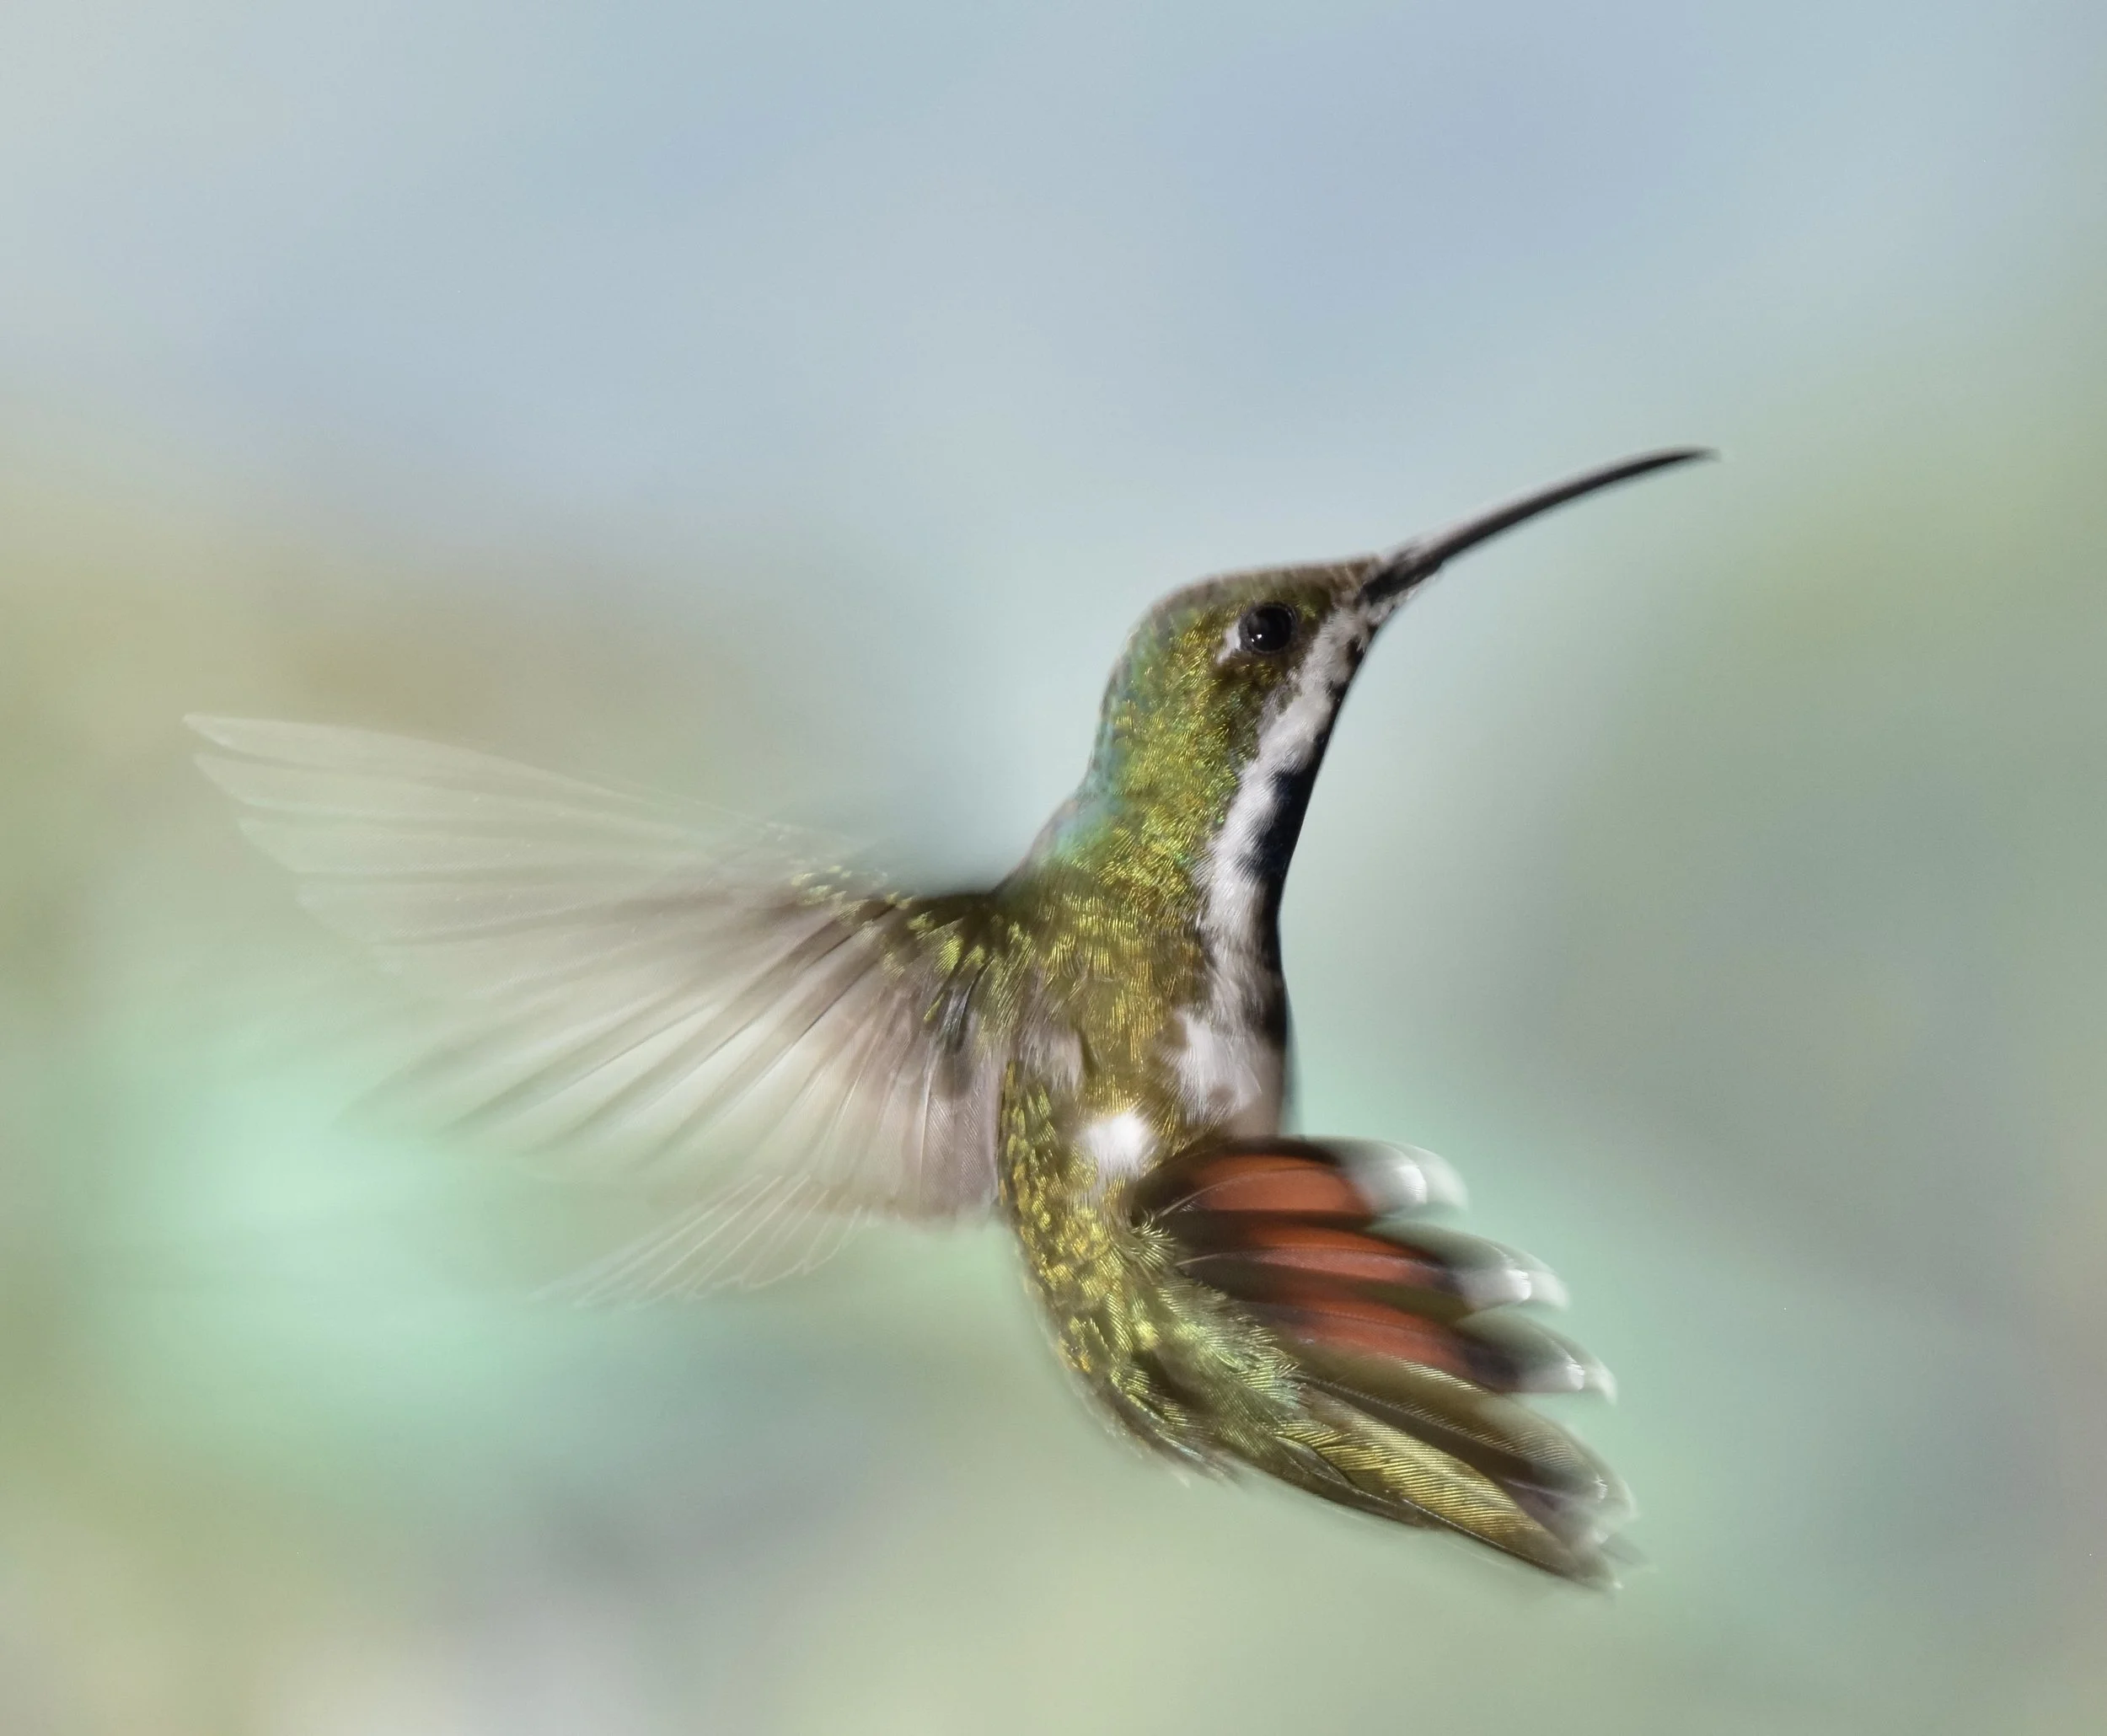
Parallel Hummer
Handheld images are possible but require very high shutter speeds to avoid motion blur. This hummingbird was photographed @f/7.1, which is a fairly wide aperture with a 150-600 mm zoom @ 550 mm lens. DOF for this combination was less than 1”/2 centimeters. For optimum results, the subject must stand parallel to the film plane when you take the photo.
In my experience, it is surprisingly common for some experienced photographers to start taking pictures at well visited bird feeders, then flip-out completely and forget what they learned over the past years. It is very important to check every couple of photos as to how your critical focus is and how sharp the resulting images are. Never let your enthusiasm convince you that the images on the screen of the camera are as good as you are seeing them in life.
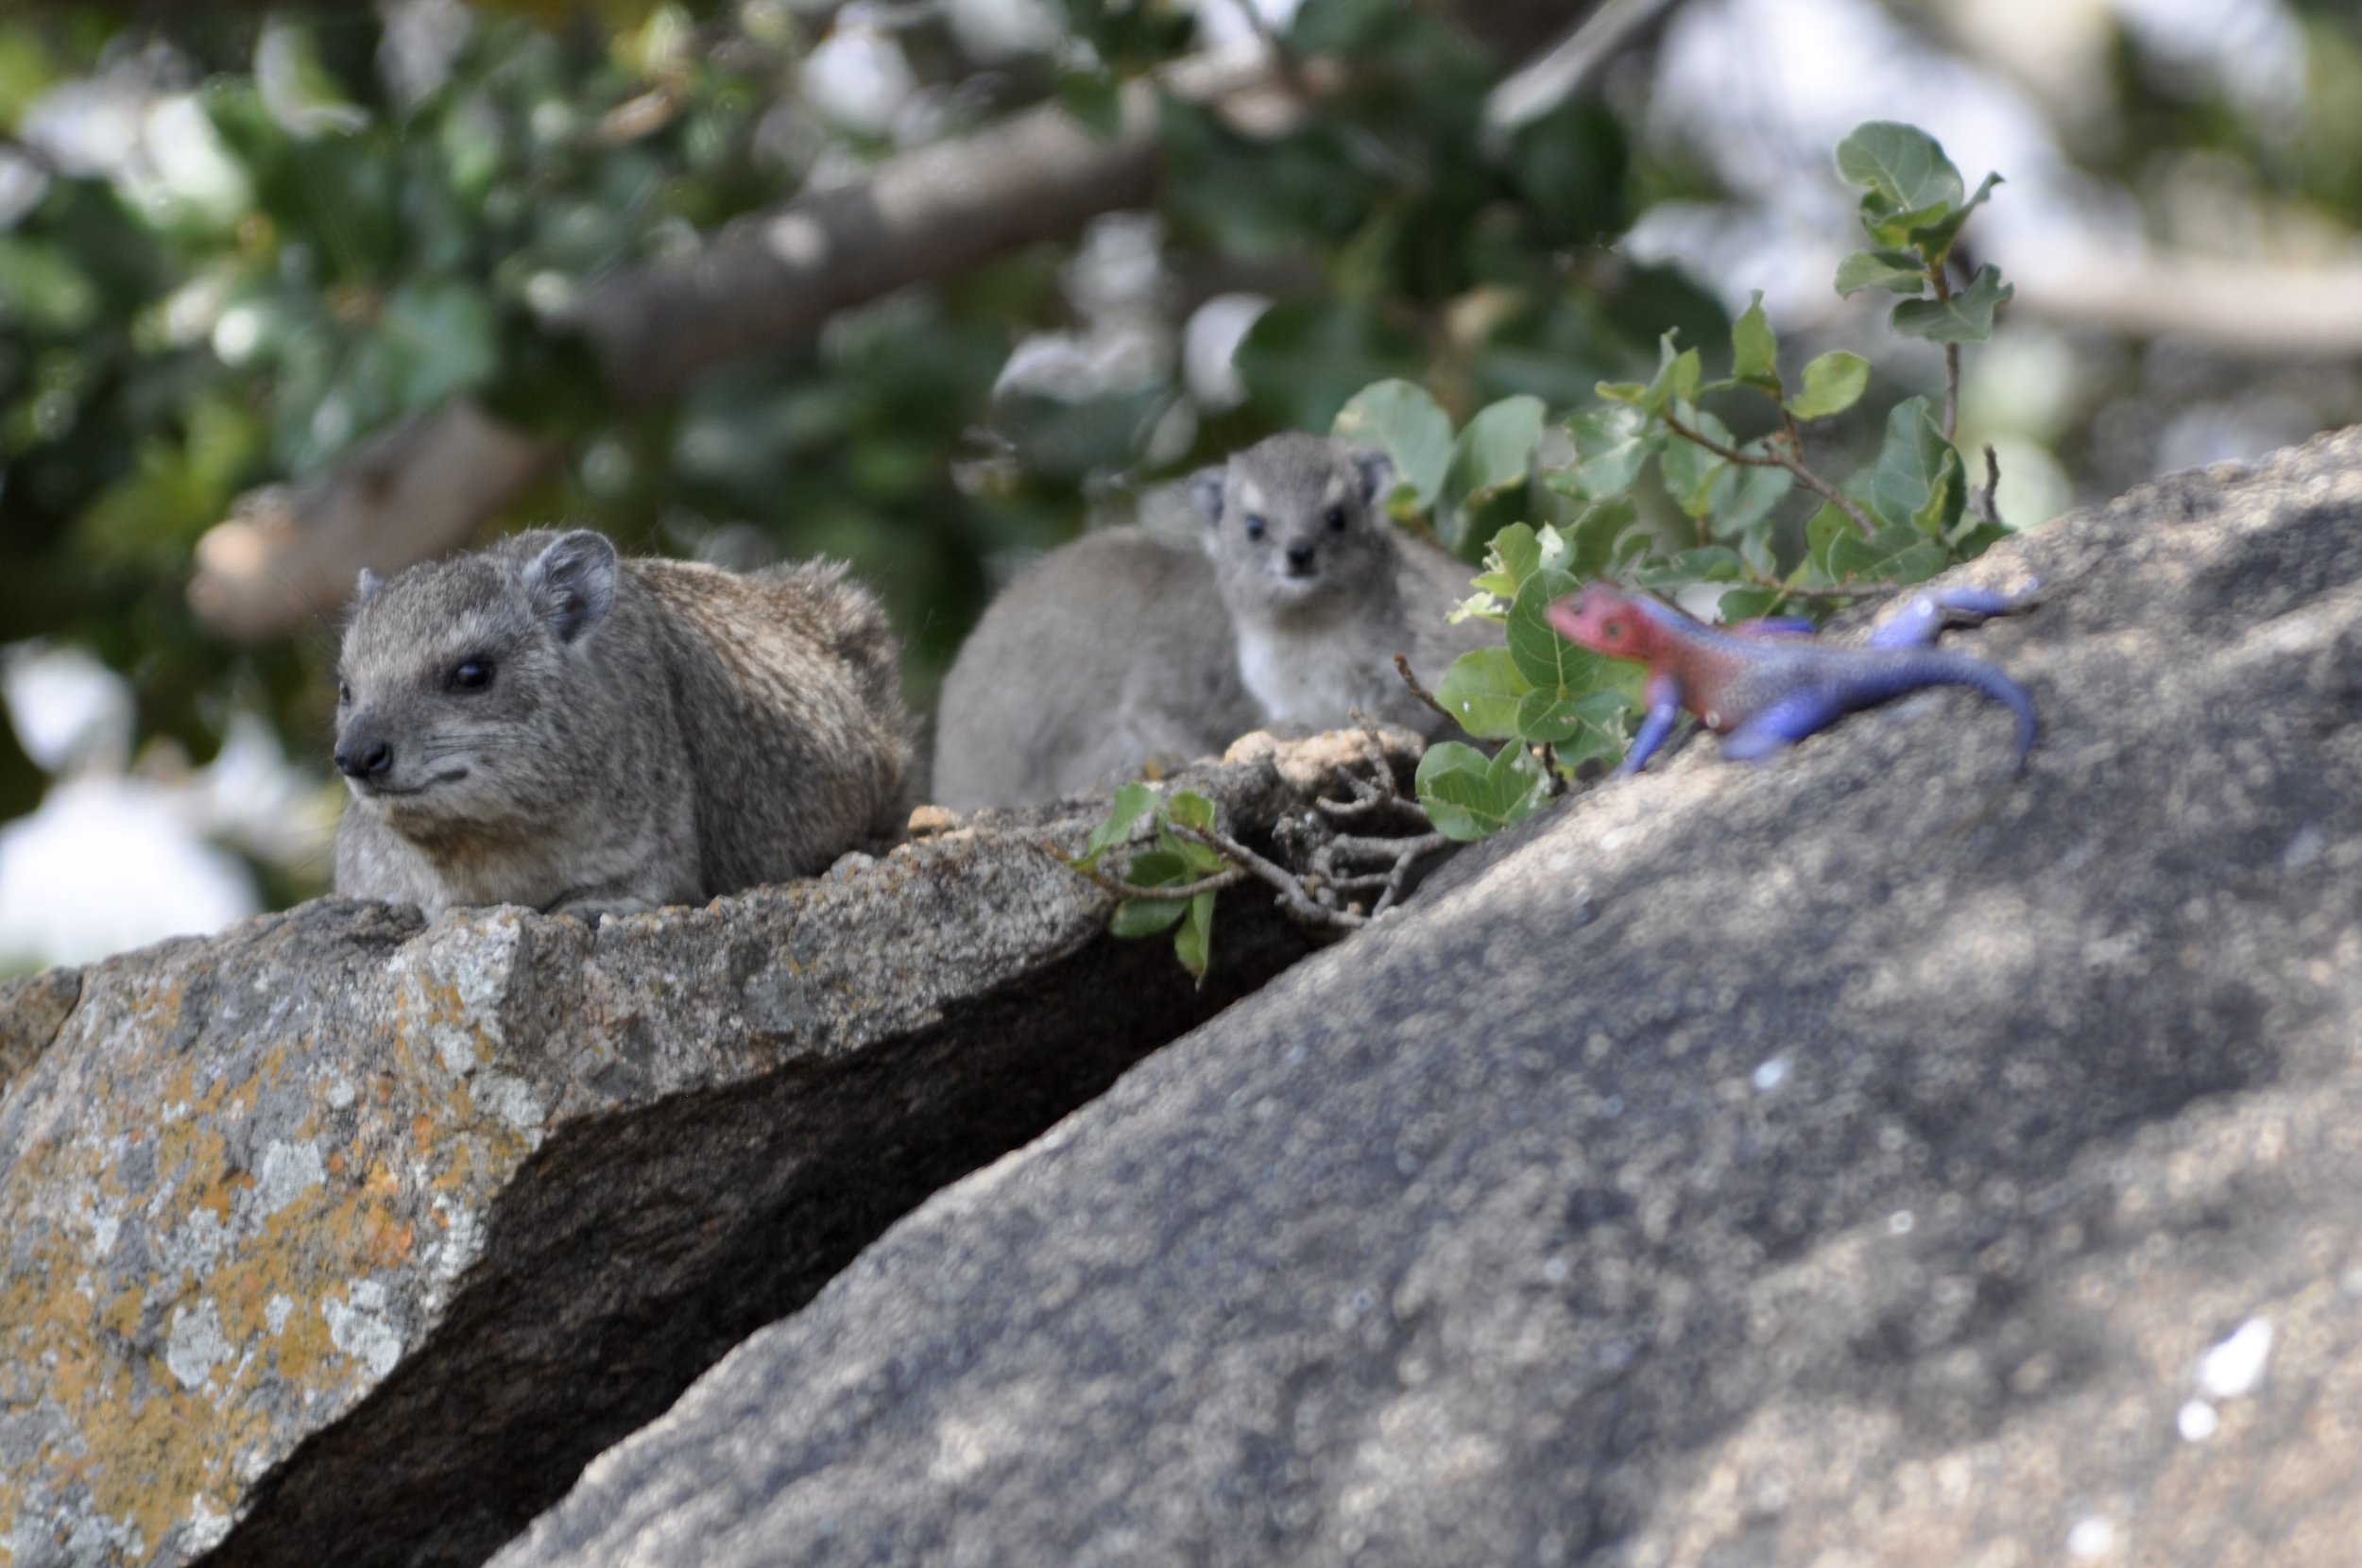
Dassies & Agama
Shallow depth of field can come in handy when using selective focus, which allows you to highlight a particular spot or individual. This family group of Rock Hyraxes or Dassies (Procavia capensis), except for junior, is hardly interested in the energetic displays of this male Red-headed Agama (Agama agama). By selecting a particular spot or plane you can tell a story in which subjects relate to each differently. Important elements highlighted in perfect focus command a certain power over the scene.

Green Honeycreeper
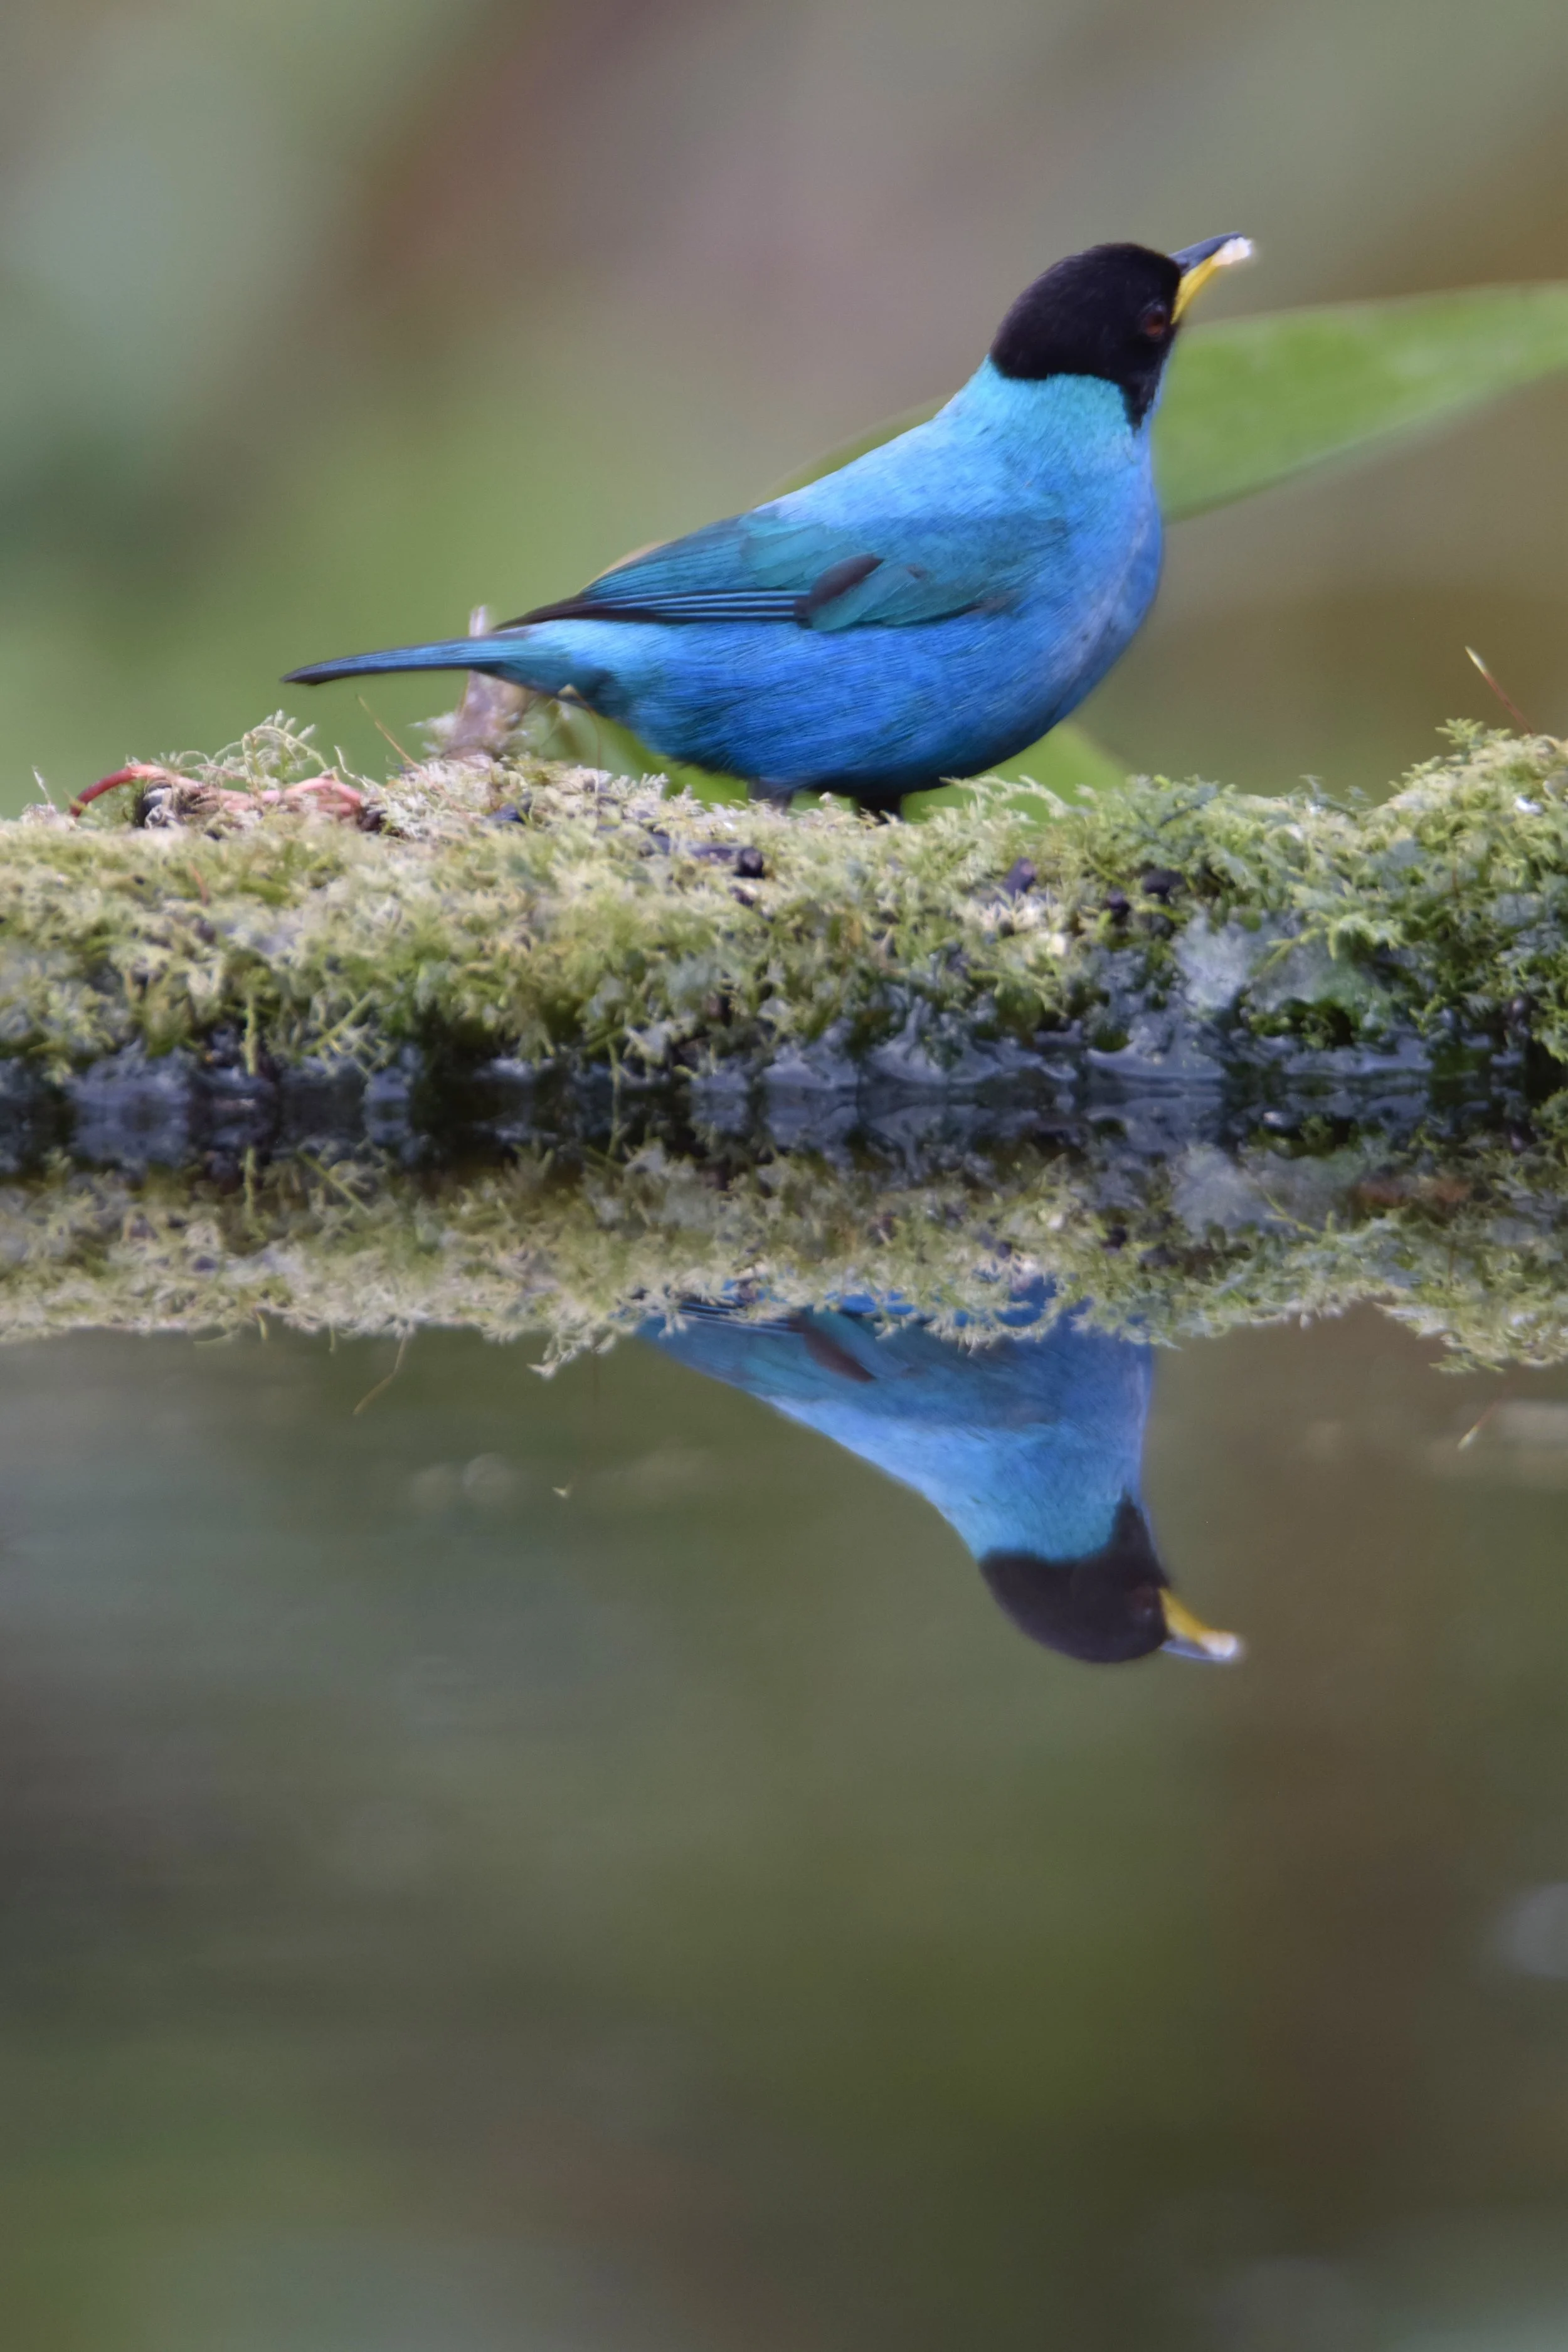
This male Green Honeycreeper (Chorophanes spiza) and its reflection are a typical mistake when occasionally using flash. Having set the camera in manual mode (M), the shutter speed was set at 1/200 sec. in order to synchronize with the flash. When this male honeycreeper came to drink, I set the camera on Shutter Priority (S) assuming it was still at ASA 1,000, but it wasn’t. With the lens wide open (f/7.1) @ 1/200 sec. it had neither enough speed to freeze movement, nor the Depth of Field to get the whole bird in focus.
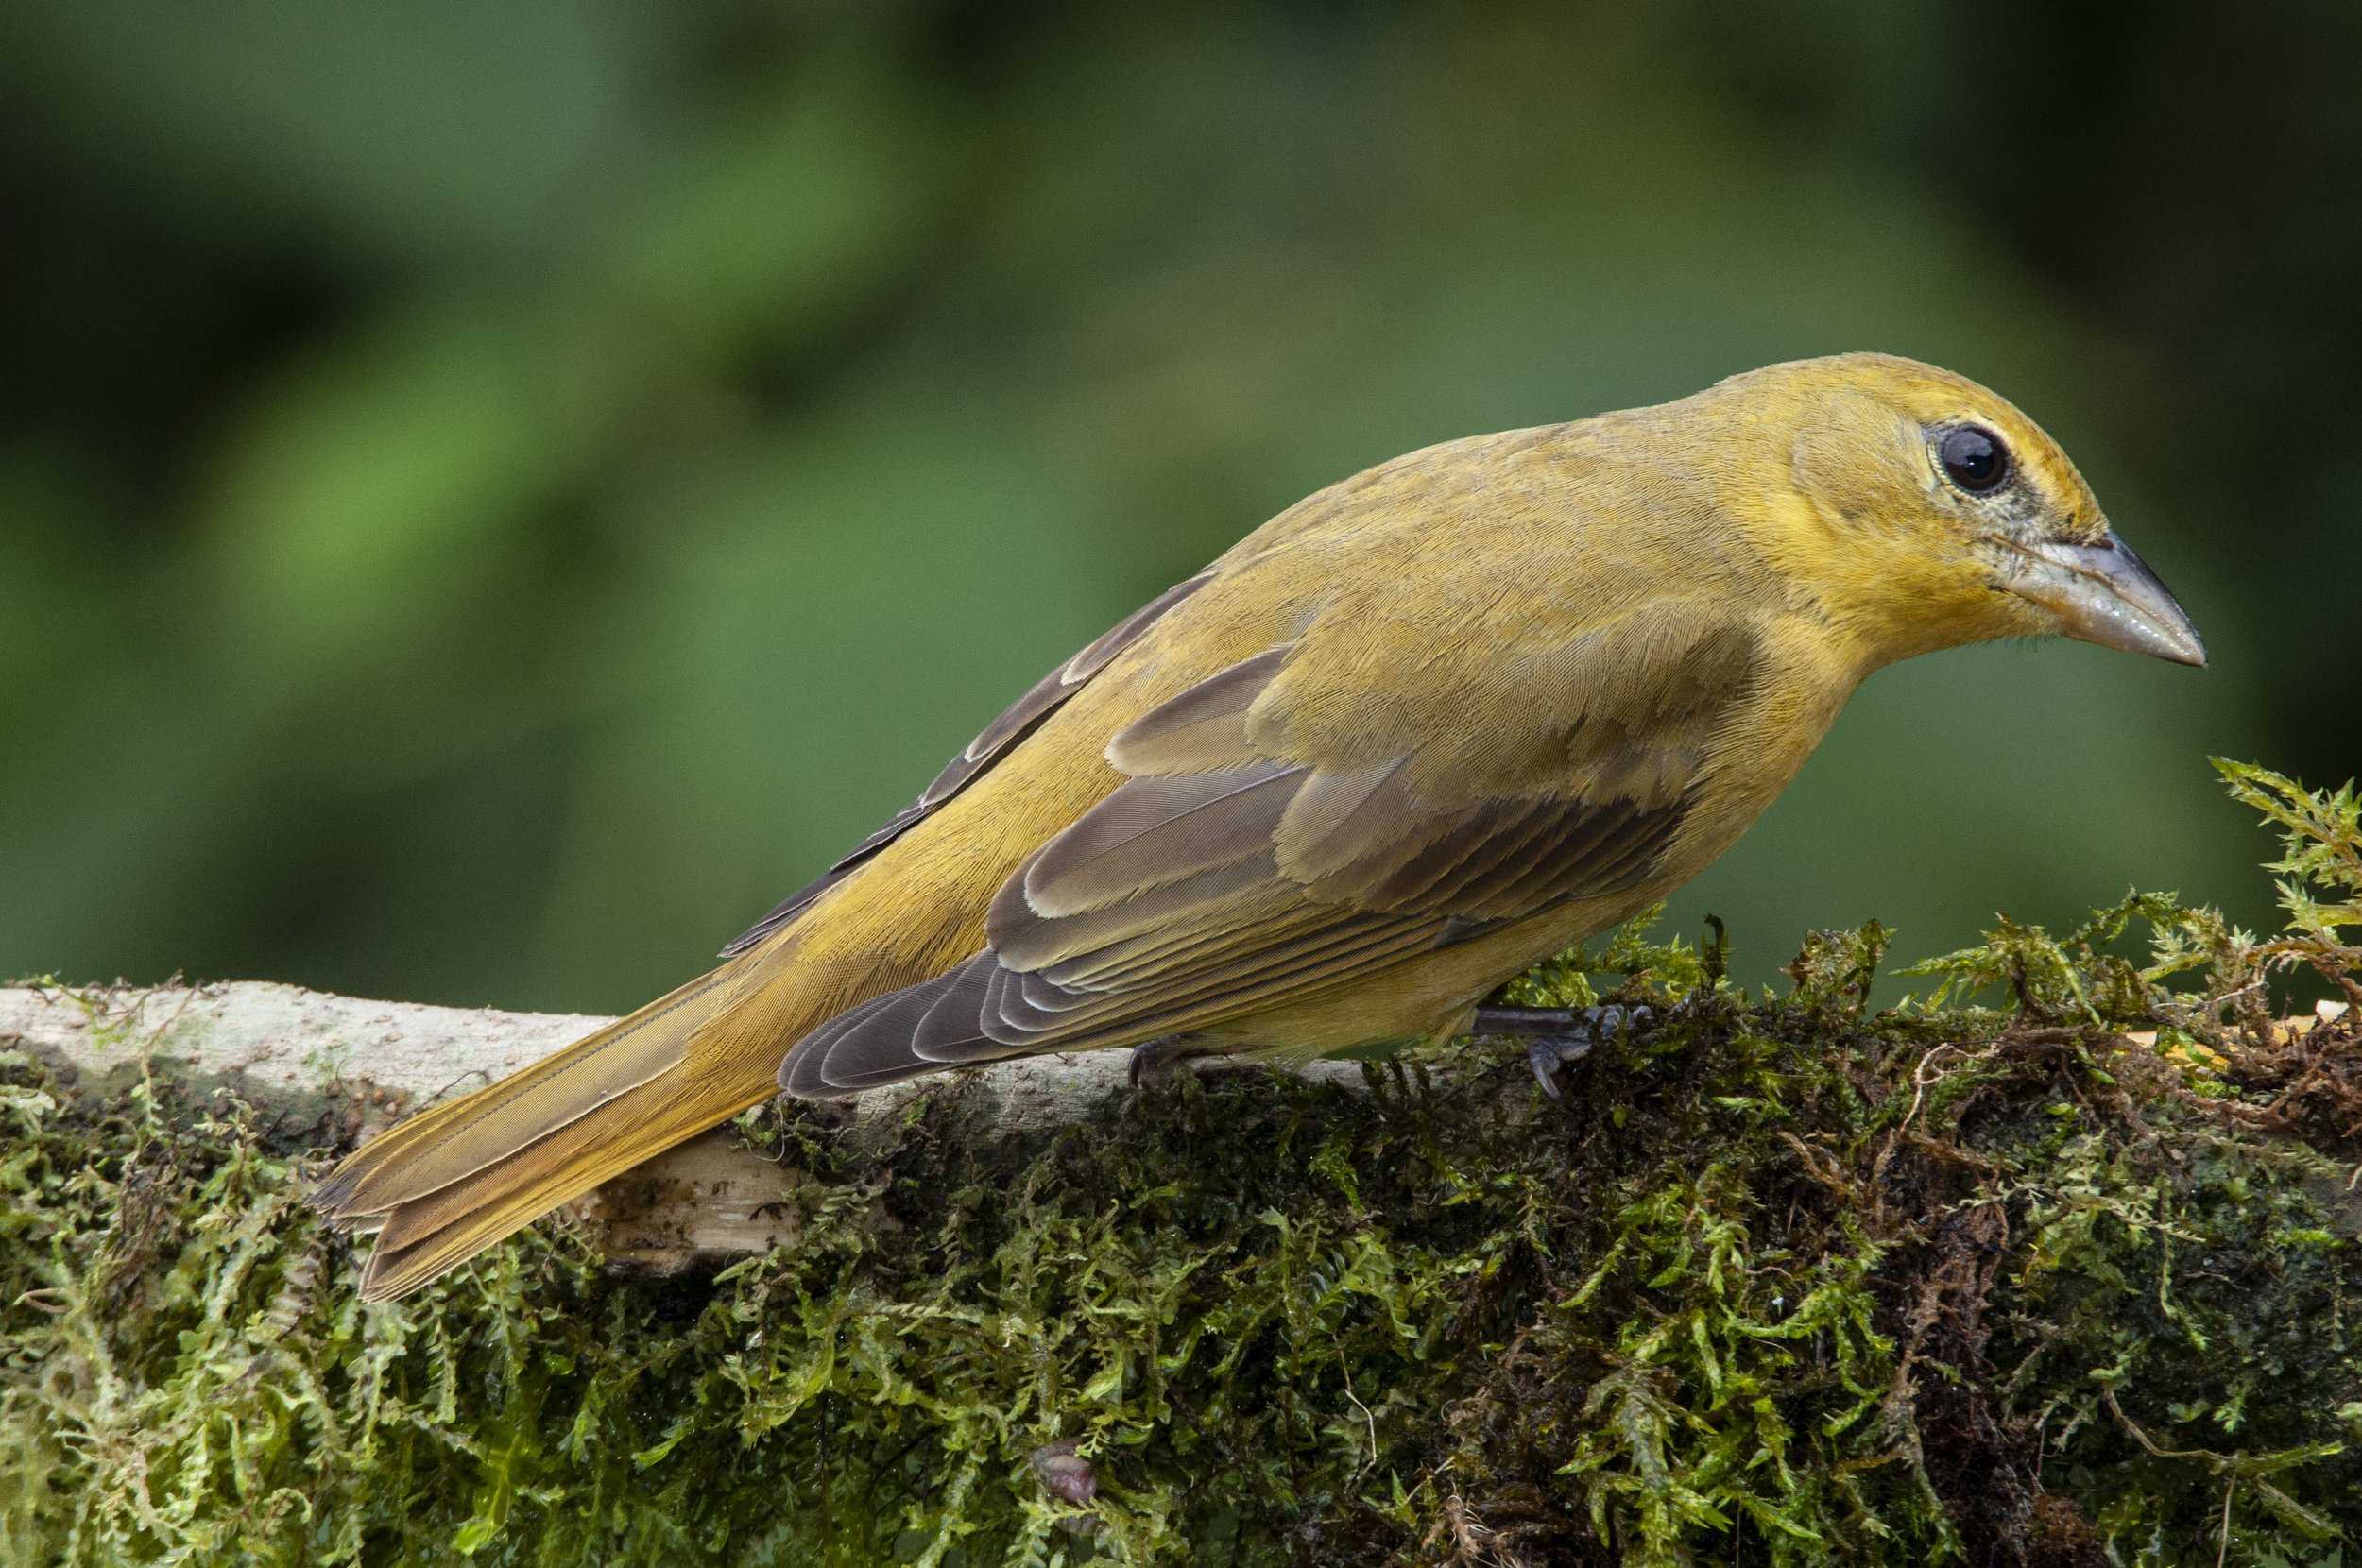
Summer Tanager
This female Summer Tanager (Piranga rubra) shows the importance of critical focus. Out of a series of six images, only two were perfectly in focus; one is shown below right. I was an ardent defender of manual focus lenses until my 50th birthday.
Not anymore.
¡Viva Autofocus!
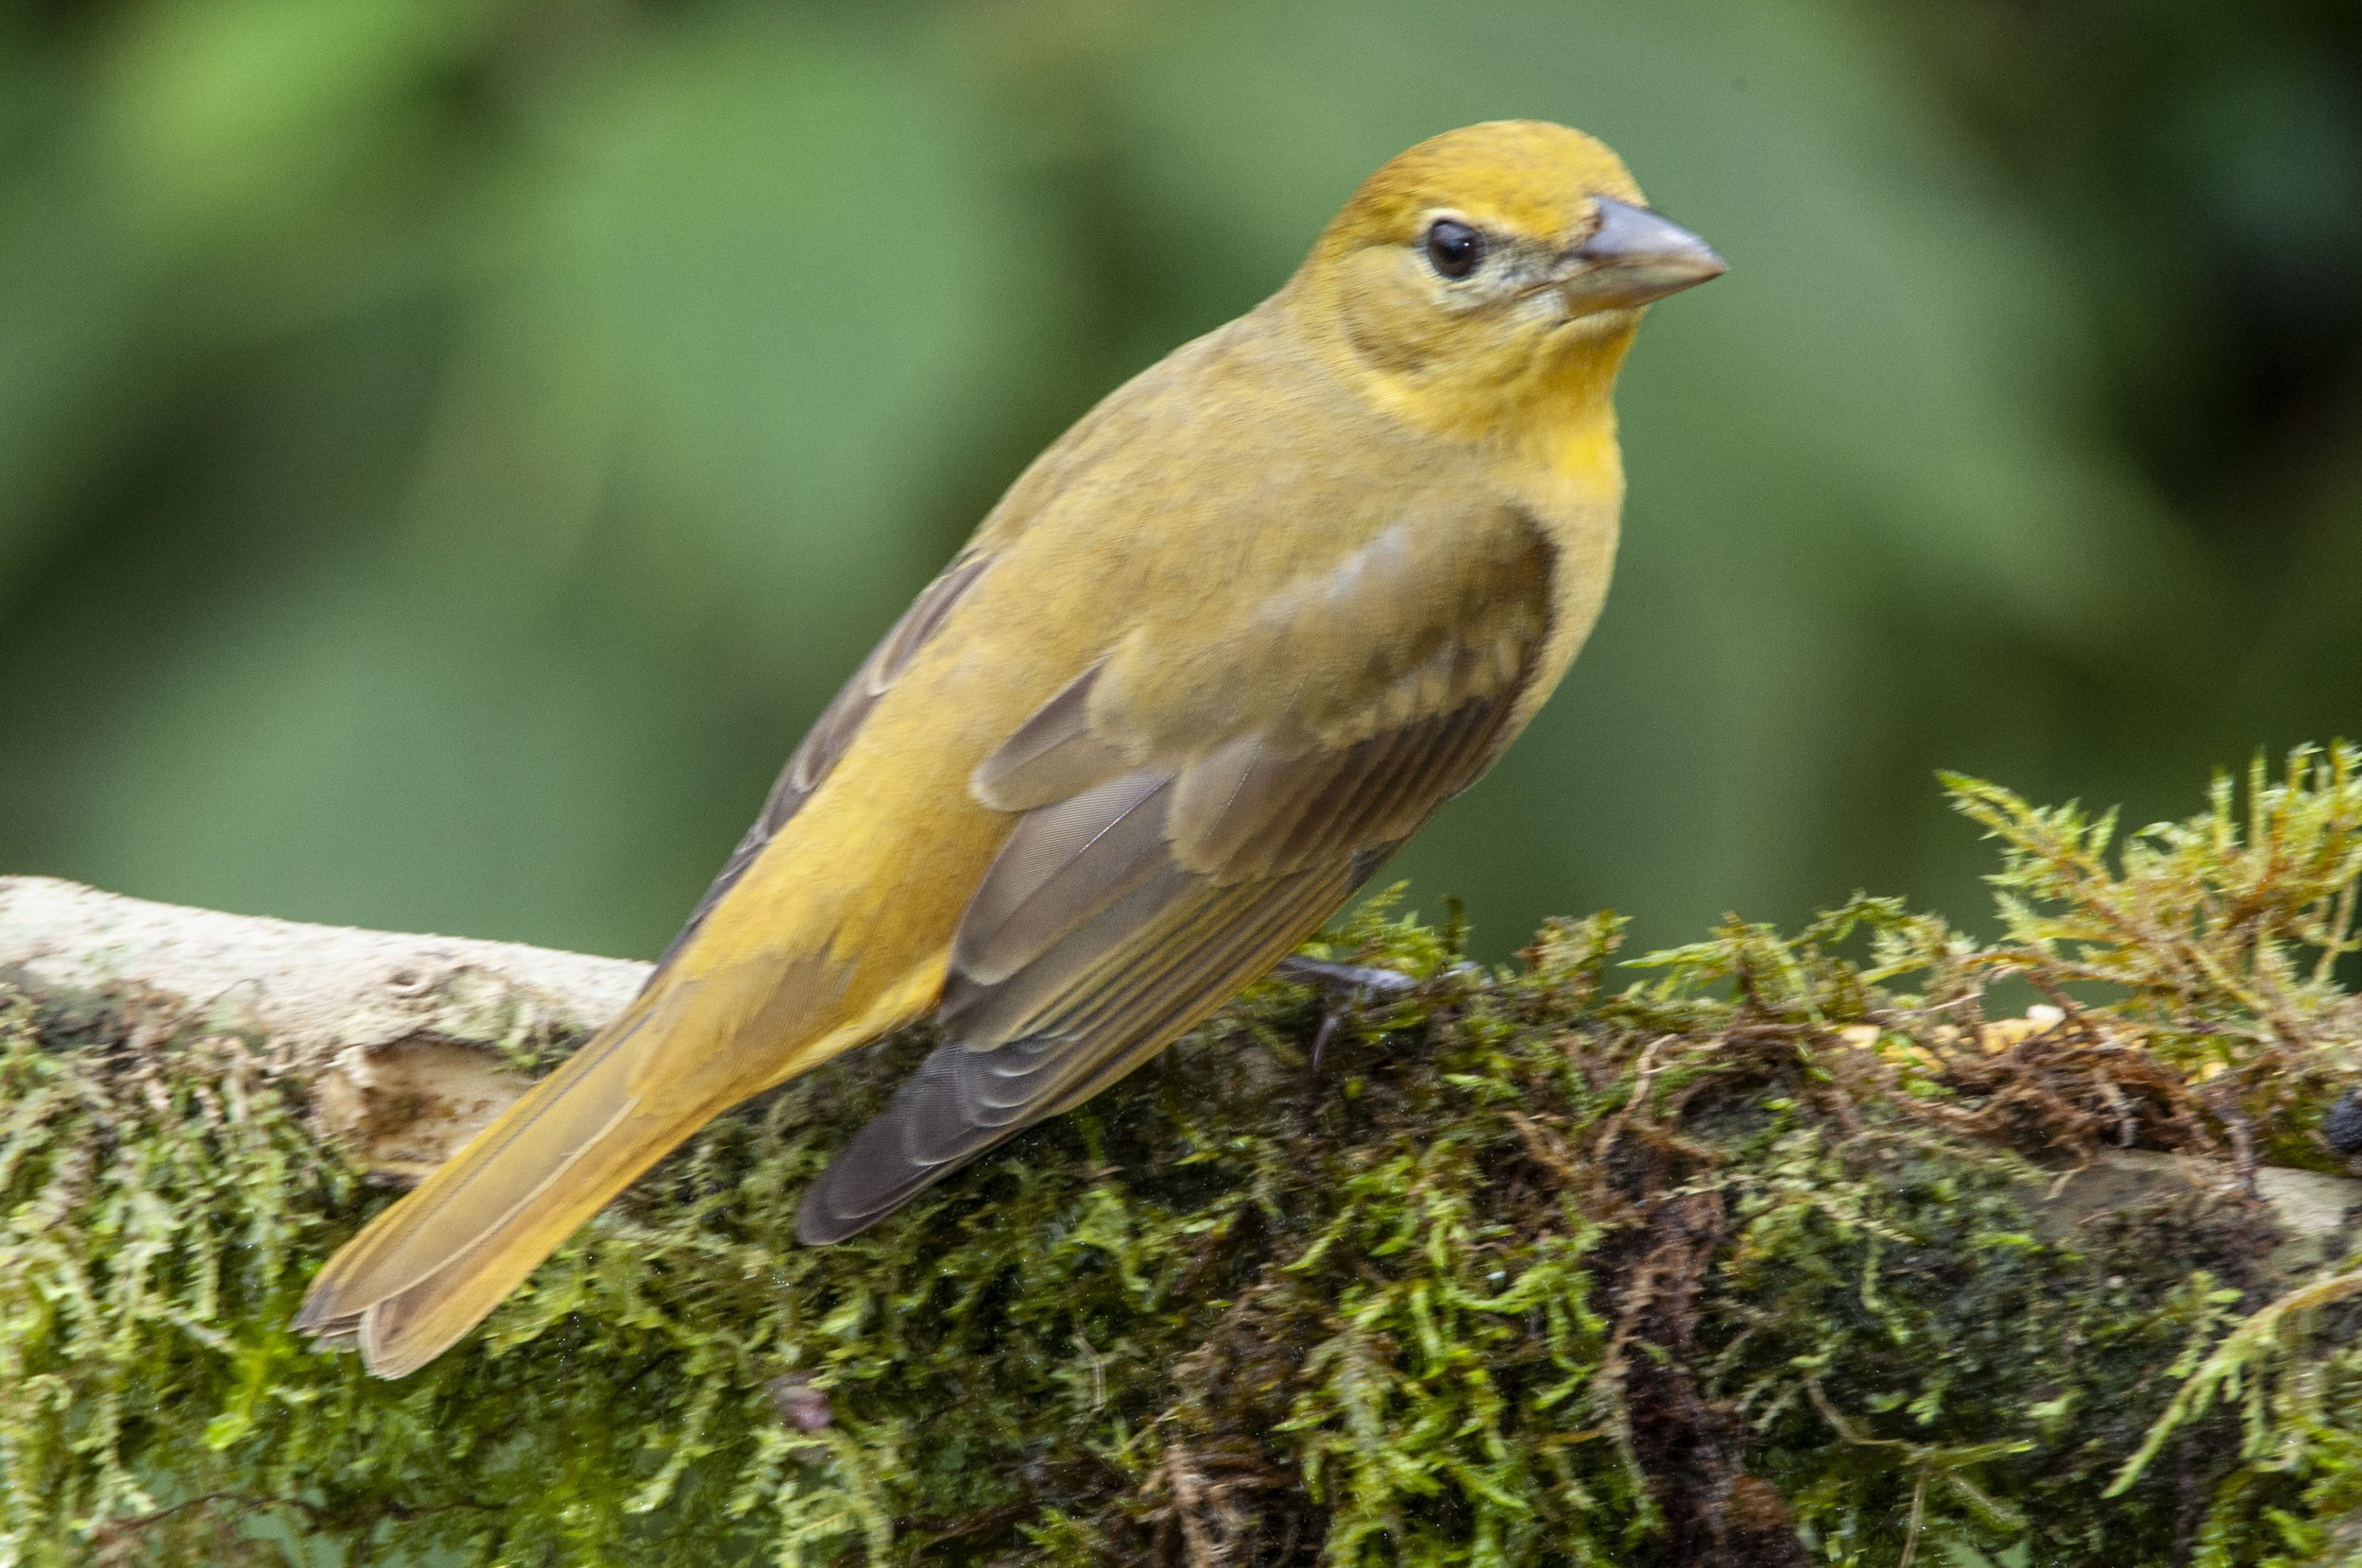
Today I have to take my time to focus and be sure, before I press the shutter. Although I trust the equipment, once you are pointing into low contrast vegetation, the autofocus mechanism either goes crazy or it gets stuck. Learn to lock focus and exposure, and, if you wear glasses, learn to focus with them which makes checking the image after exposure much easier.
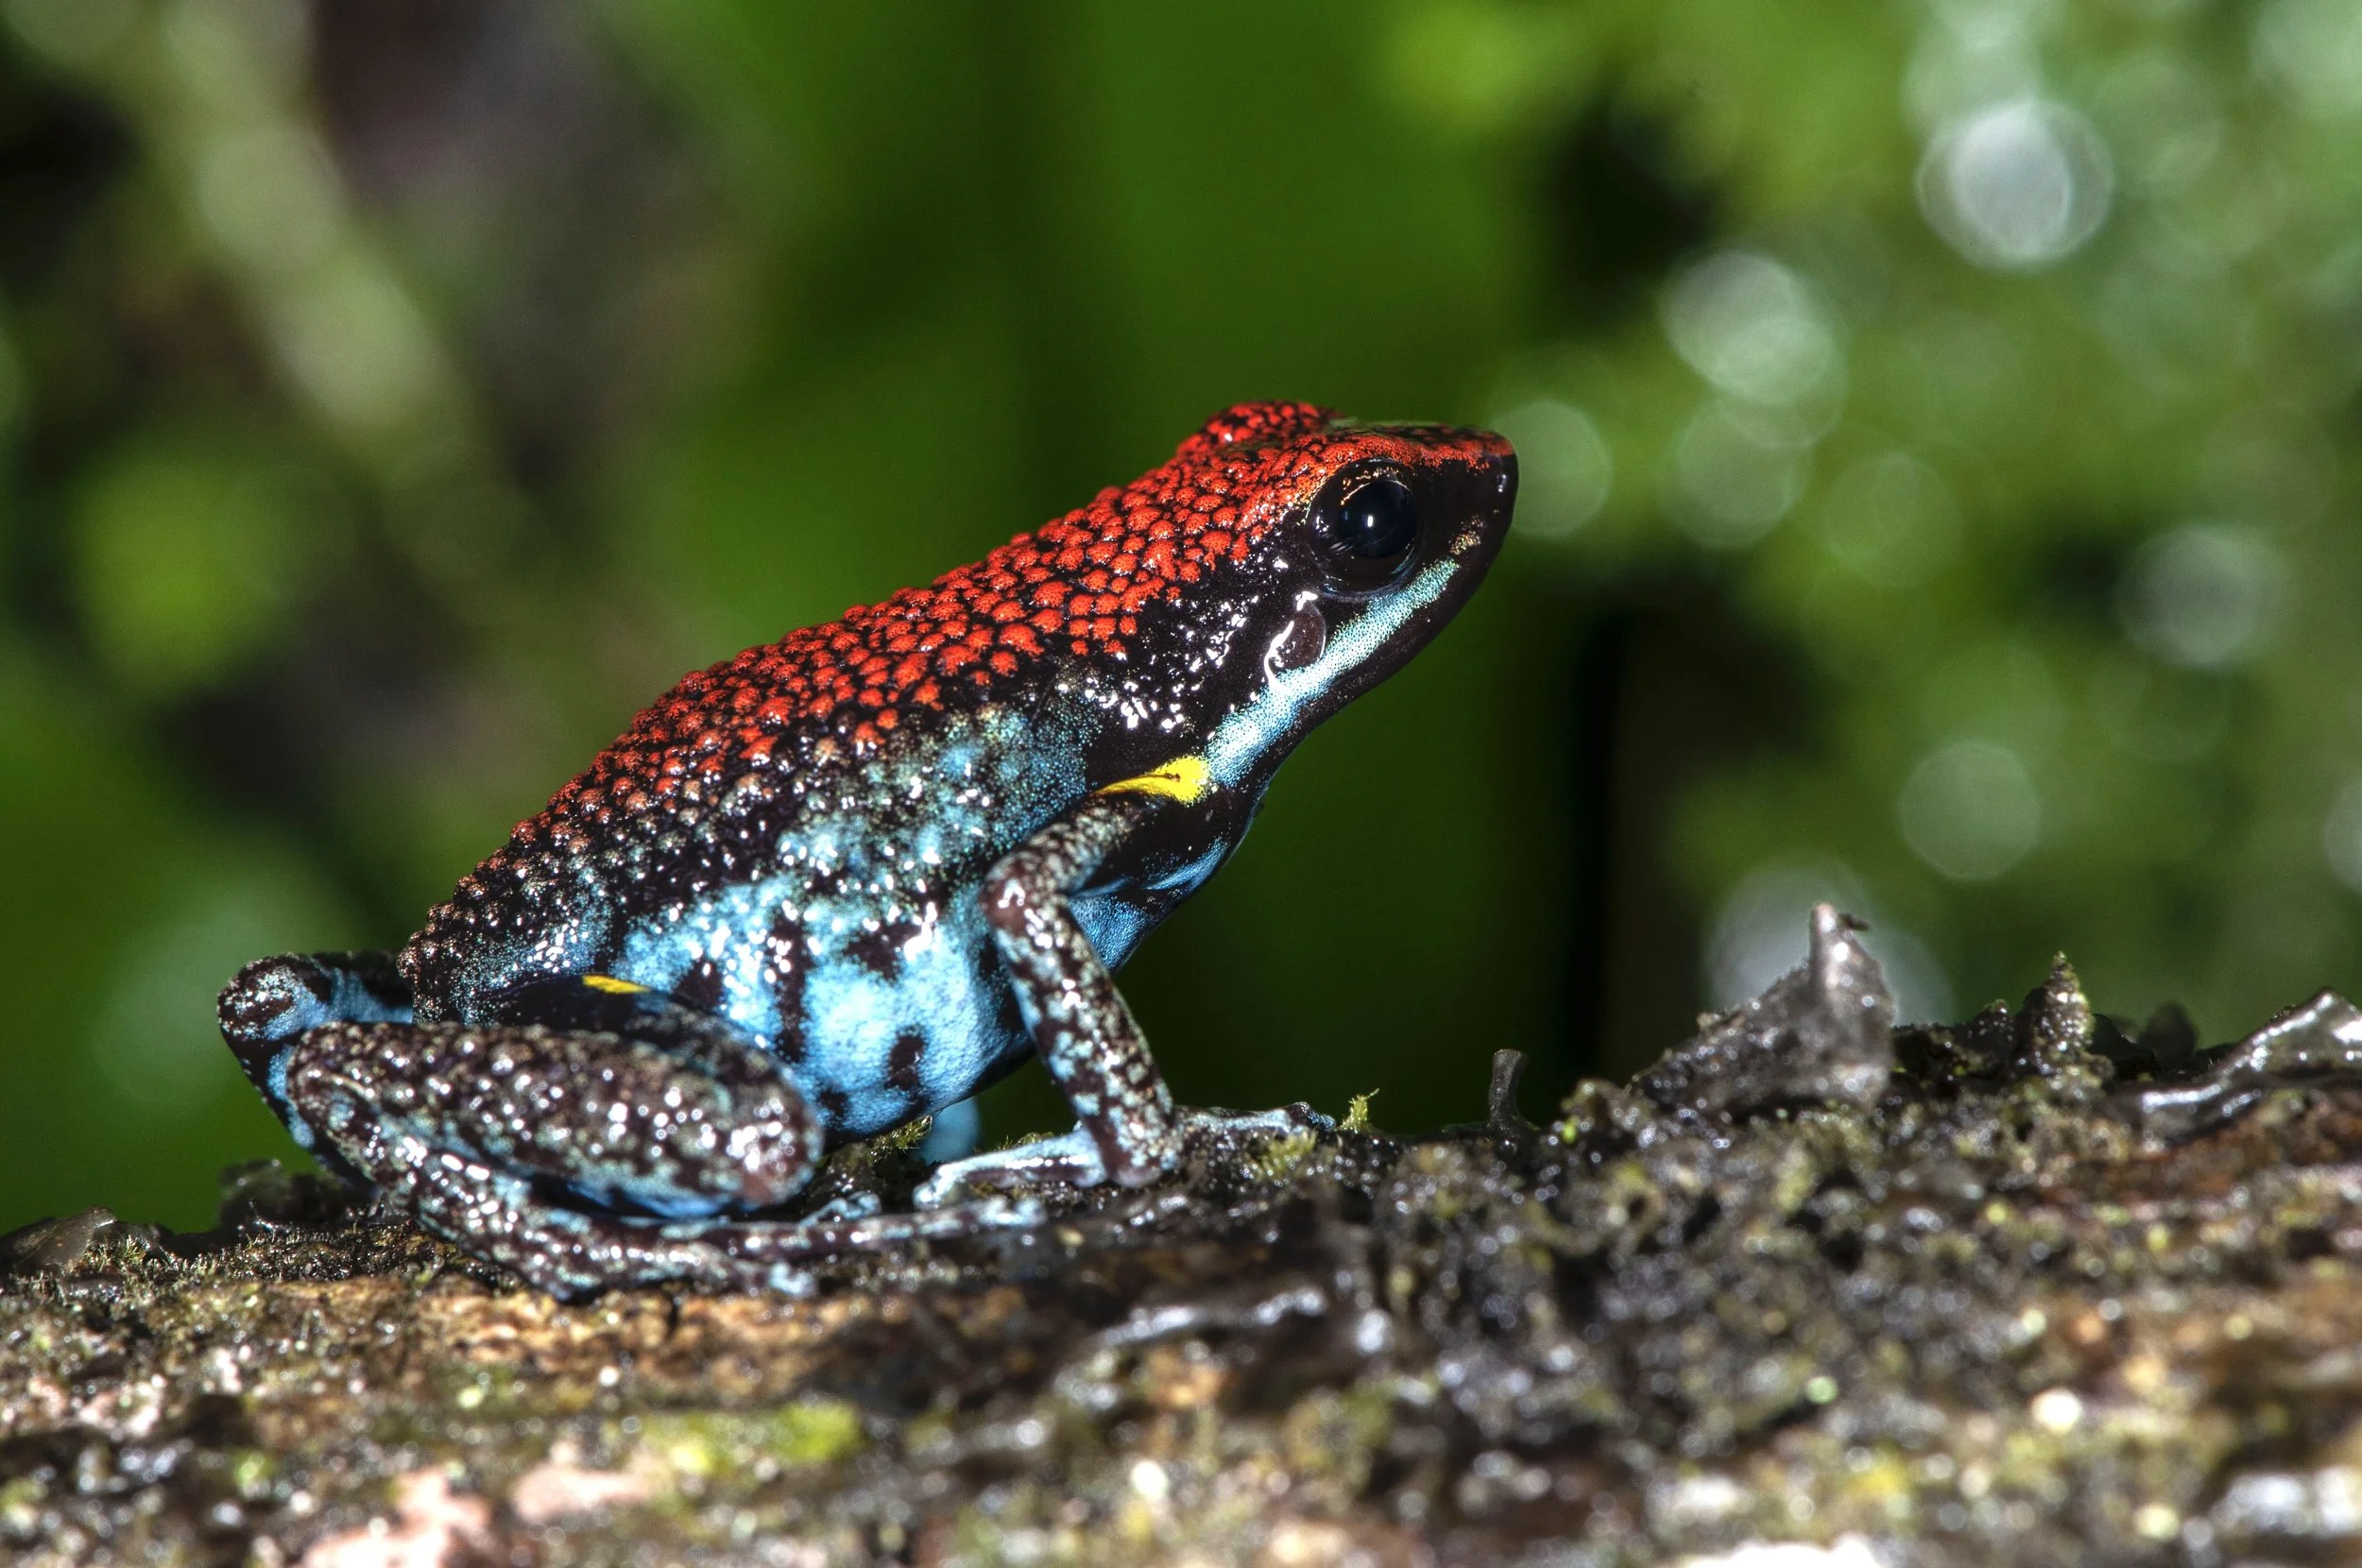
Bokeh remains regardless of scale, but achieving it becomes more difficult when you move into the macro range. The Depth of Field in extreme close-ups is so narrow that you can’t afford the luxury of using large apertures. This image was taken at f/32 and barely covers half the animals width. The Ameerega bilinguis shown is an adult and measures a little over 2/3”/1.5 cm. DOF is about 1/3”/8 mm. Image: ©Peter Rockstroh 2023.
*Focusing movement refers to how much you rotate the focusing ring between the closest and farthest points of the image.
All content ©Exotica Esoterica LLC® 2023 and ©Peter Rockstroh 2023.
Follow us on:


