Hacks for Hummers - Tips on Photographing Hummingbirds in Flight
Tips for HIFs (Hummingbirds in Flight)
by Peter Rockstroh
I really enjoy birds, especially duck confit, but that is a totally different tale except for the fact that getting it right in the kitchen has also became quite a small obsession. After a few cycles of trial, error and improvement, I now have a clear idea of time and temperature requirements to get both juicy meat and a crispy skin, so I now mostly understand what goes on during the process. This makes for predictable and gratifying results, which is what I was looking for when photographing native hummingbirds in flight.

Male green-tailed trainbearer (Lesbia nuna)
My first real attempts at photographing hummingbirds began when I moved to Colombia from Guatemala about six years ago. Locally, it is difficult going out to the field with a camera and not be tempted to photograph these bold, ubiquitous and lovely birds. Whether in a park or a backyard, from sea level to nearly 12,000' (4,000 m), where there is suitable vegetation, there are hummingbirds.
Lots of hummingbirds.
MAN are there ever lots and lots of hummingbirds in Colombia!
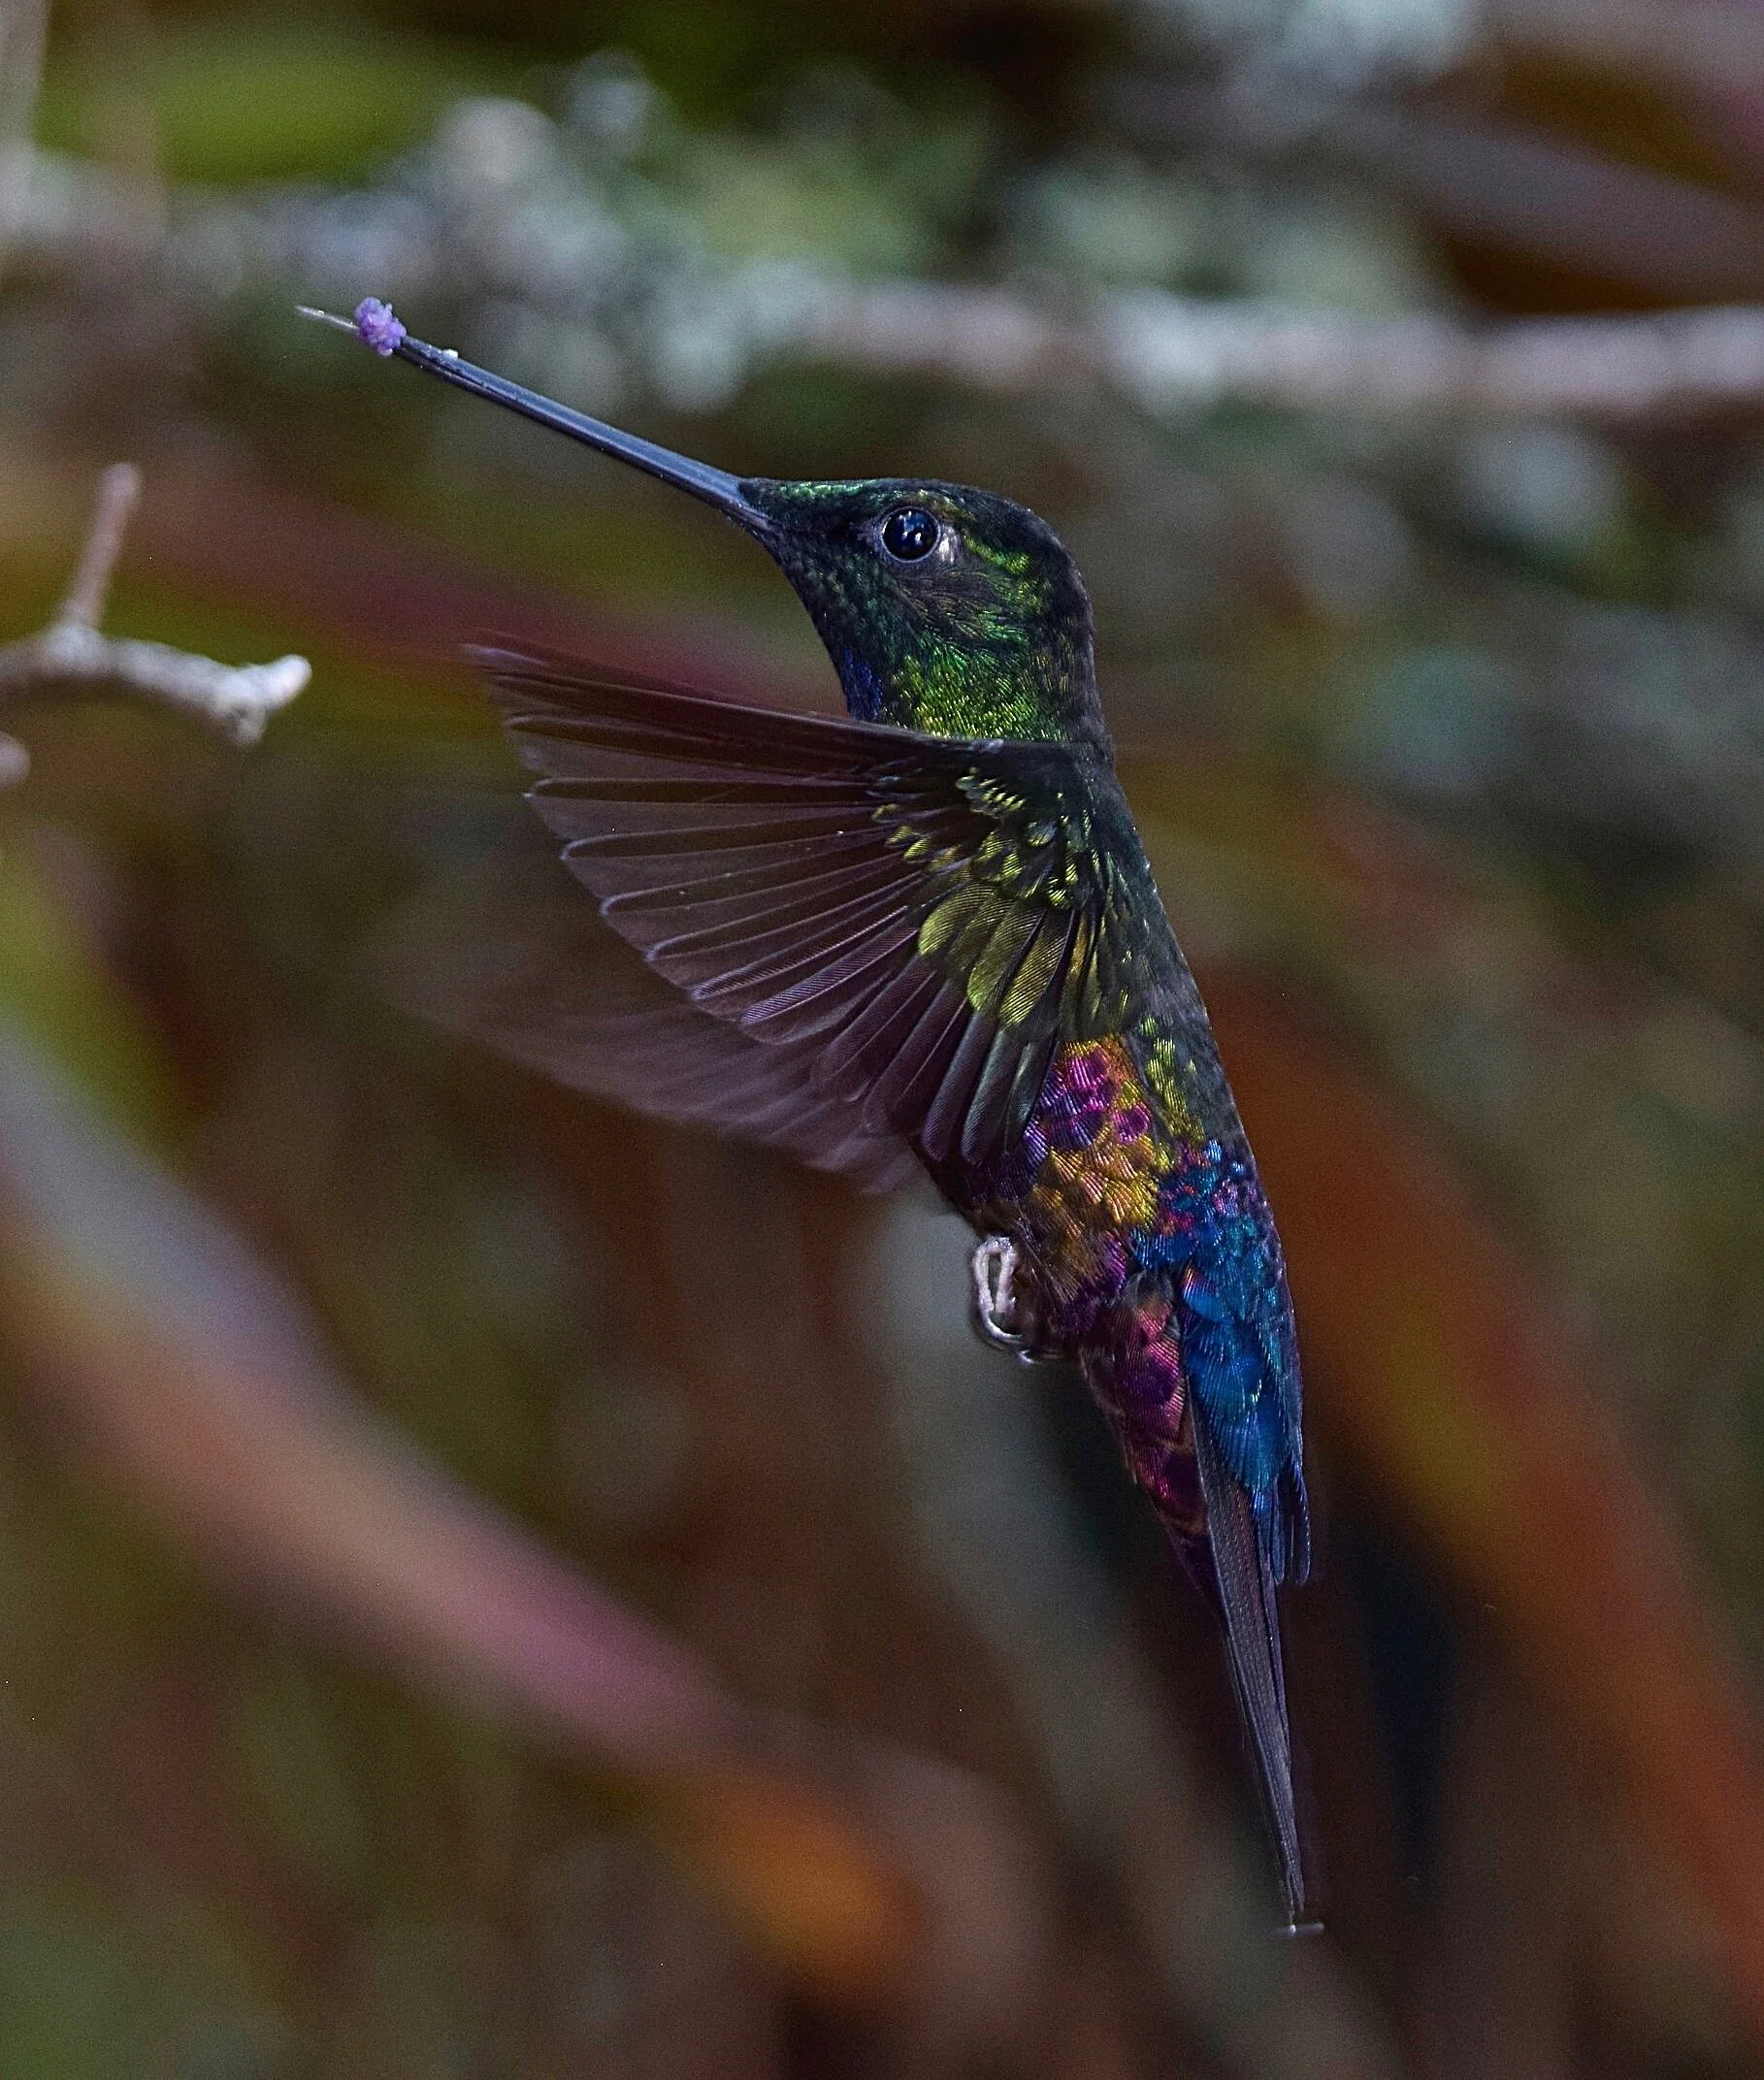
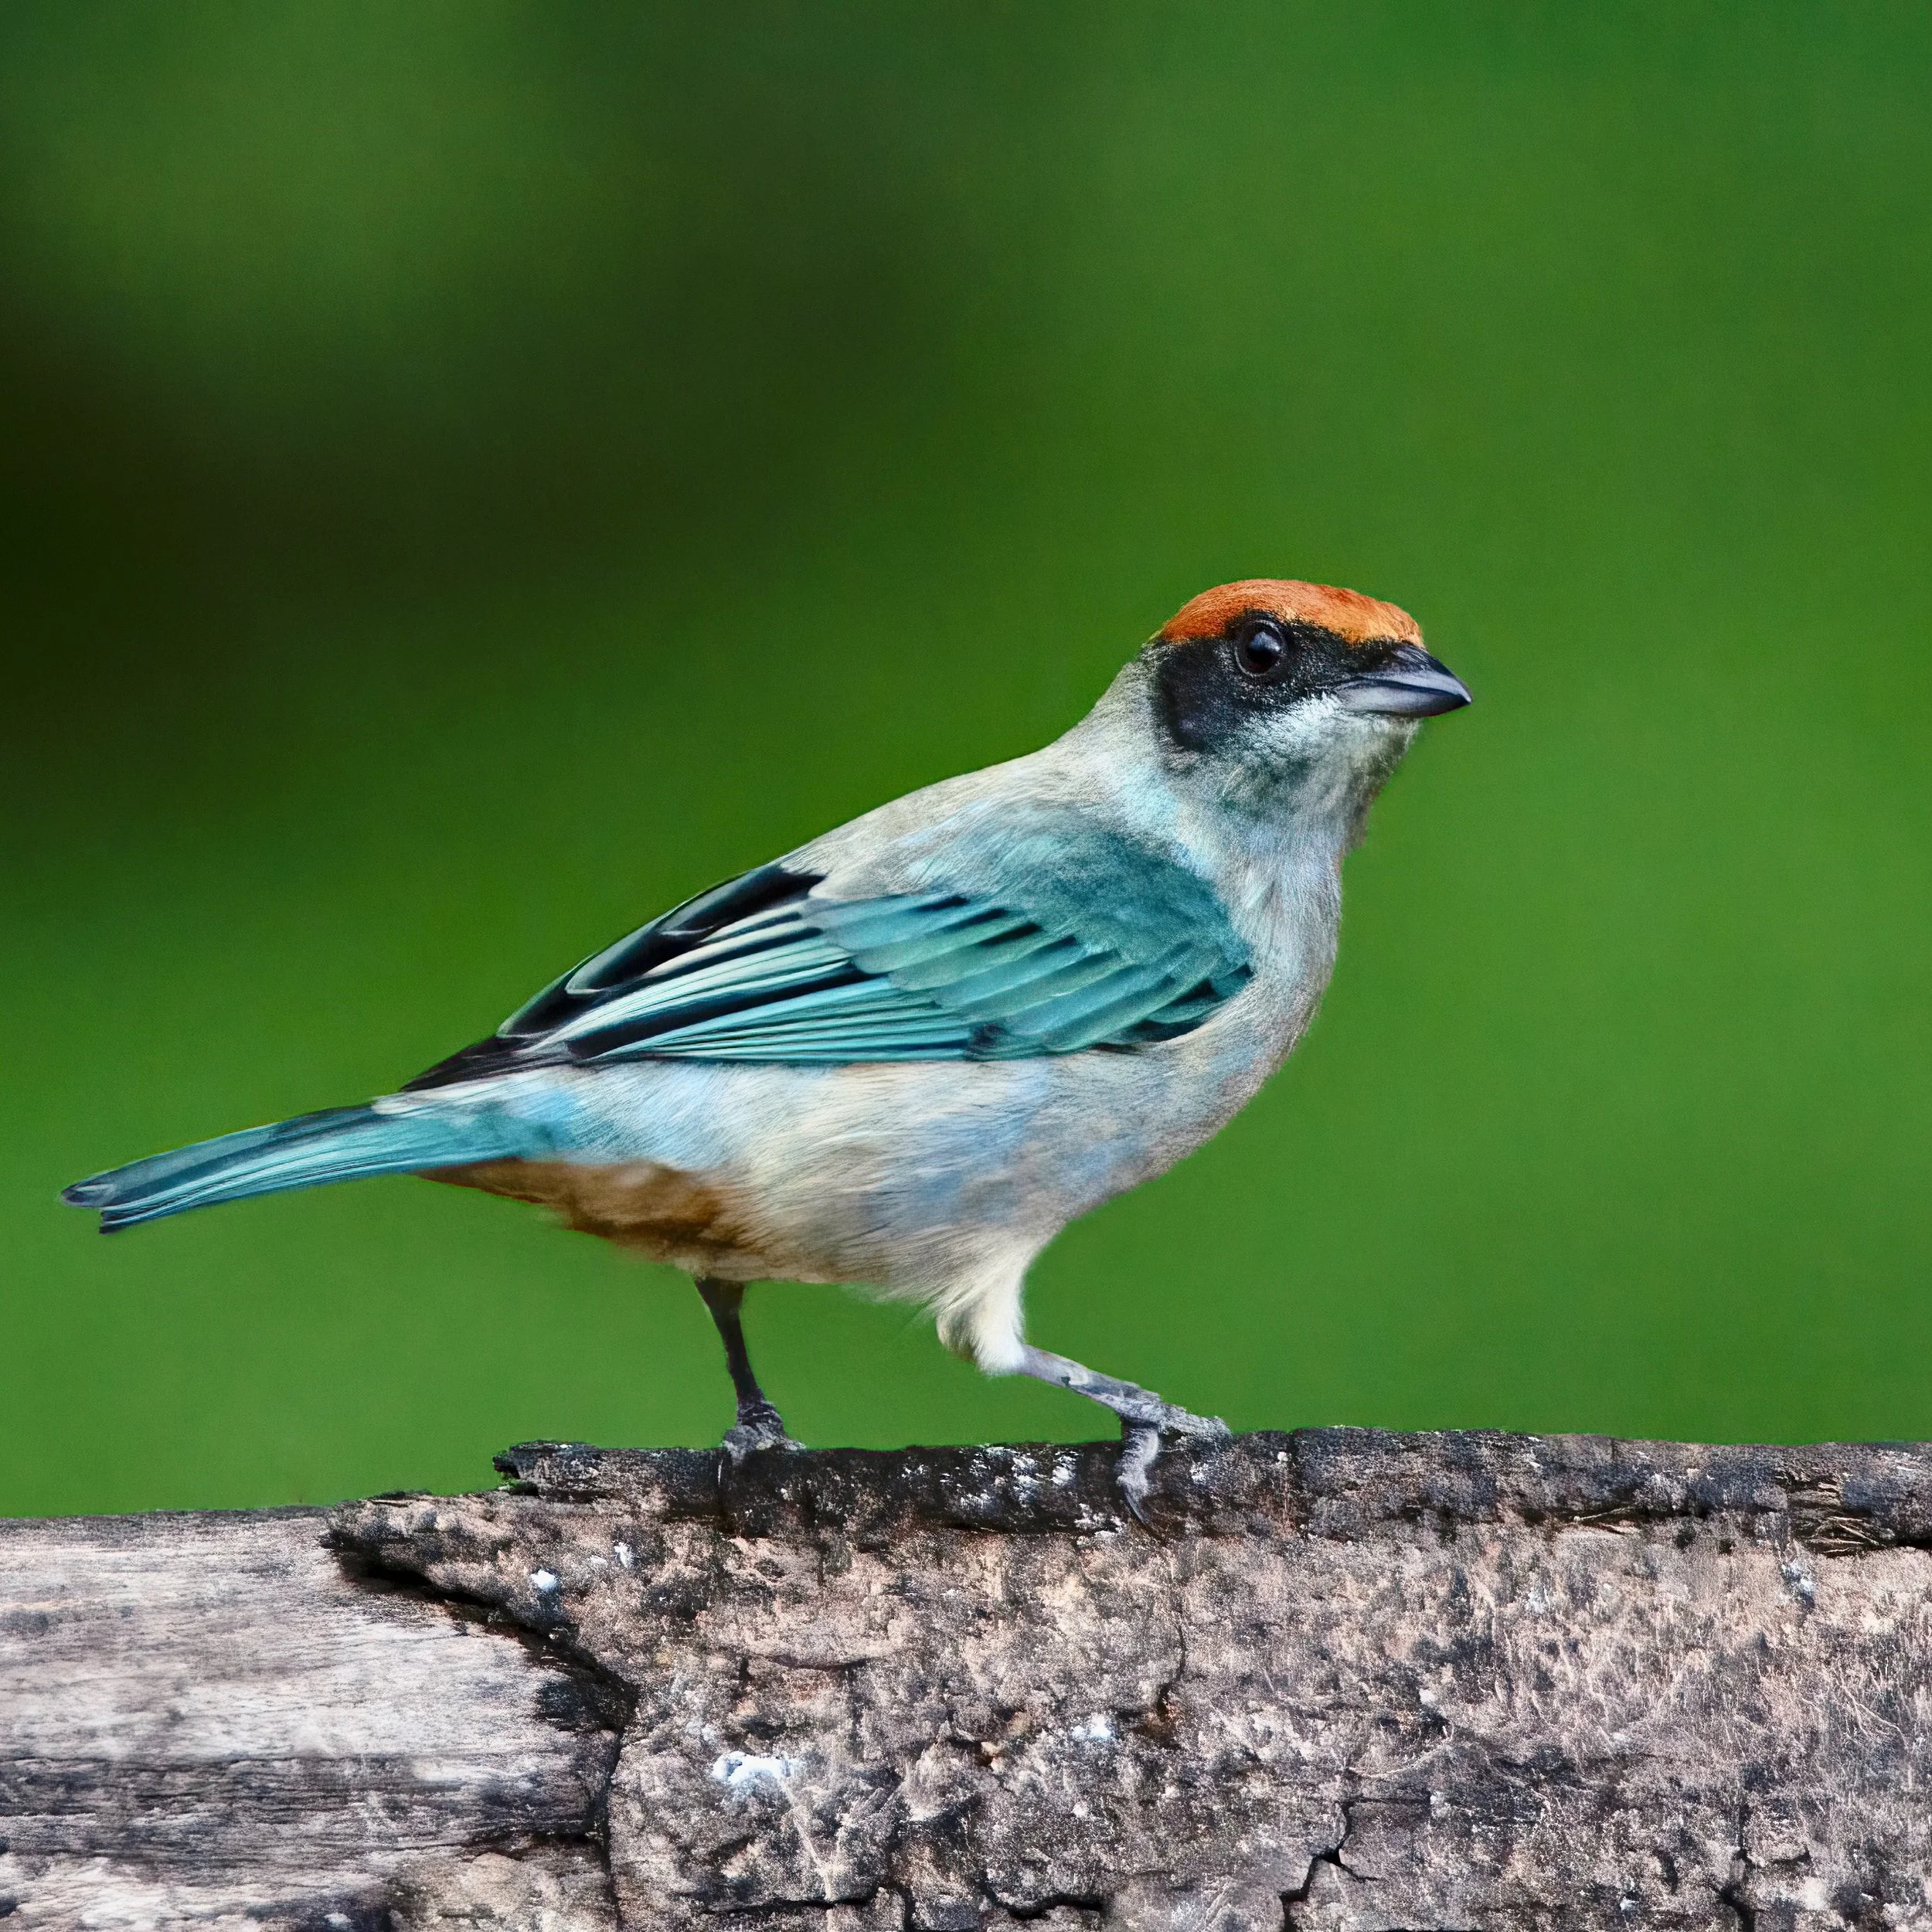
Blue-throated starfrontlet (Coeligena helianthea)
The image that started getting me interested in the potential of this specialty was the photo shown below of a rufous-tailed hummingbird (Amazilia tzacatl). In theory, it has everything I liked, yet also everything that can be improved in a photo of a wild bird. While it is a pretty nice scene of a bird visiting pretty nice flowers, it is blurred, way too bright, and too far away to be pleasing to the eye.
Notes on the photo below: Although the bird is properly exposed and pretty much in focus, there is a slight "ghosting" visible in the wings. Ghosting, or ghost images, is the result of the exposure created by aperture and shutter in combination with the superimposed image created during flash burst. It is minimized in this photo because of the light background.
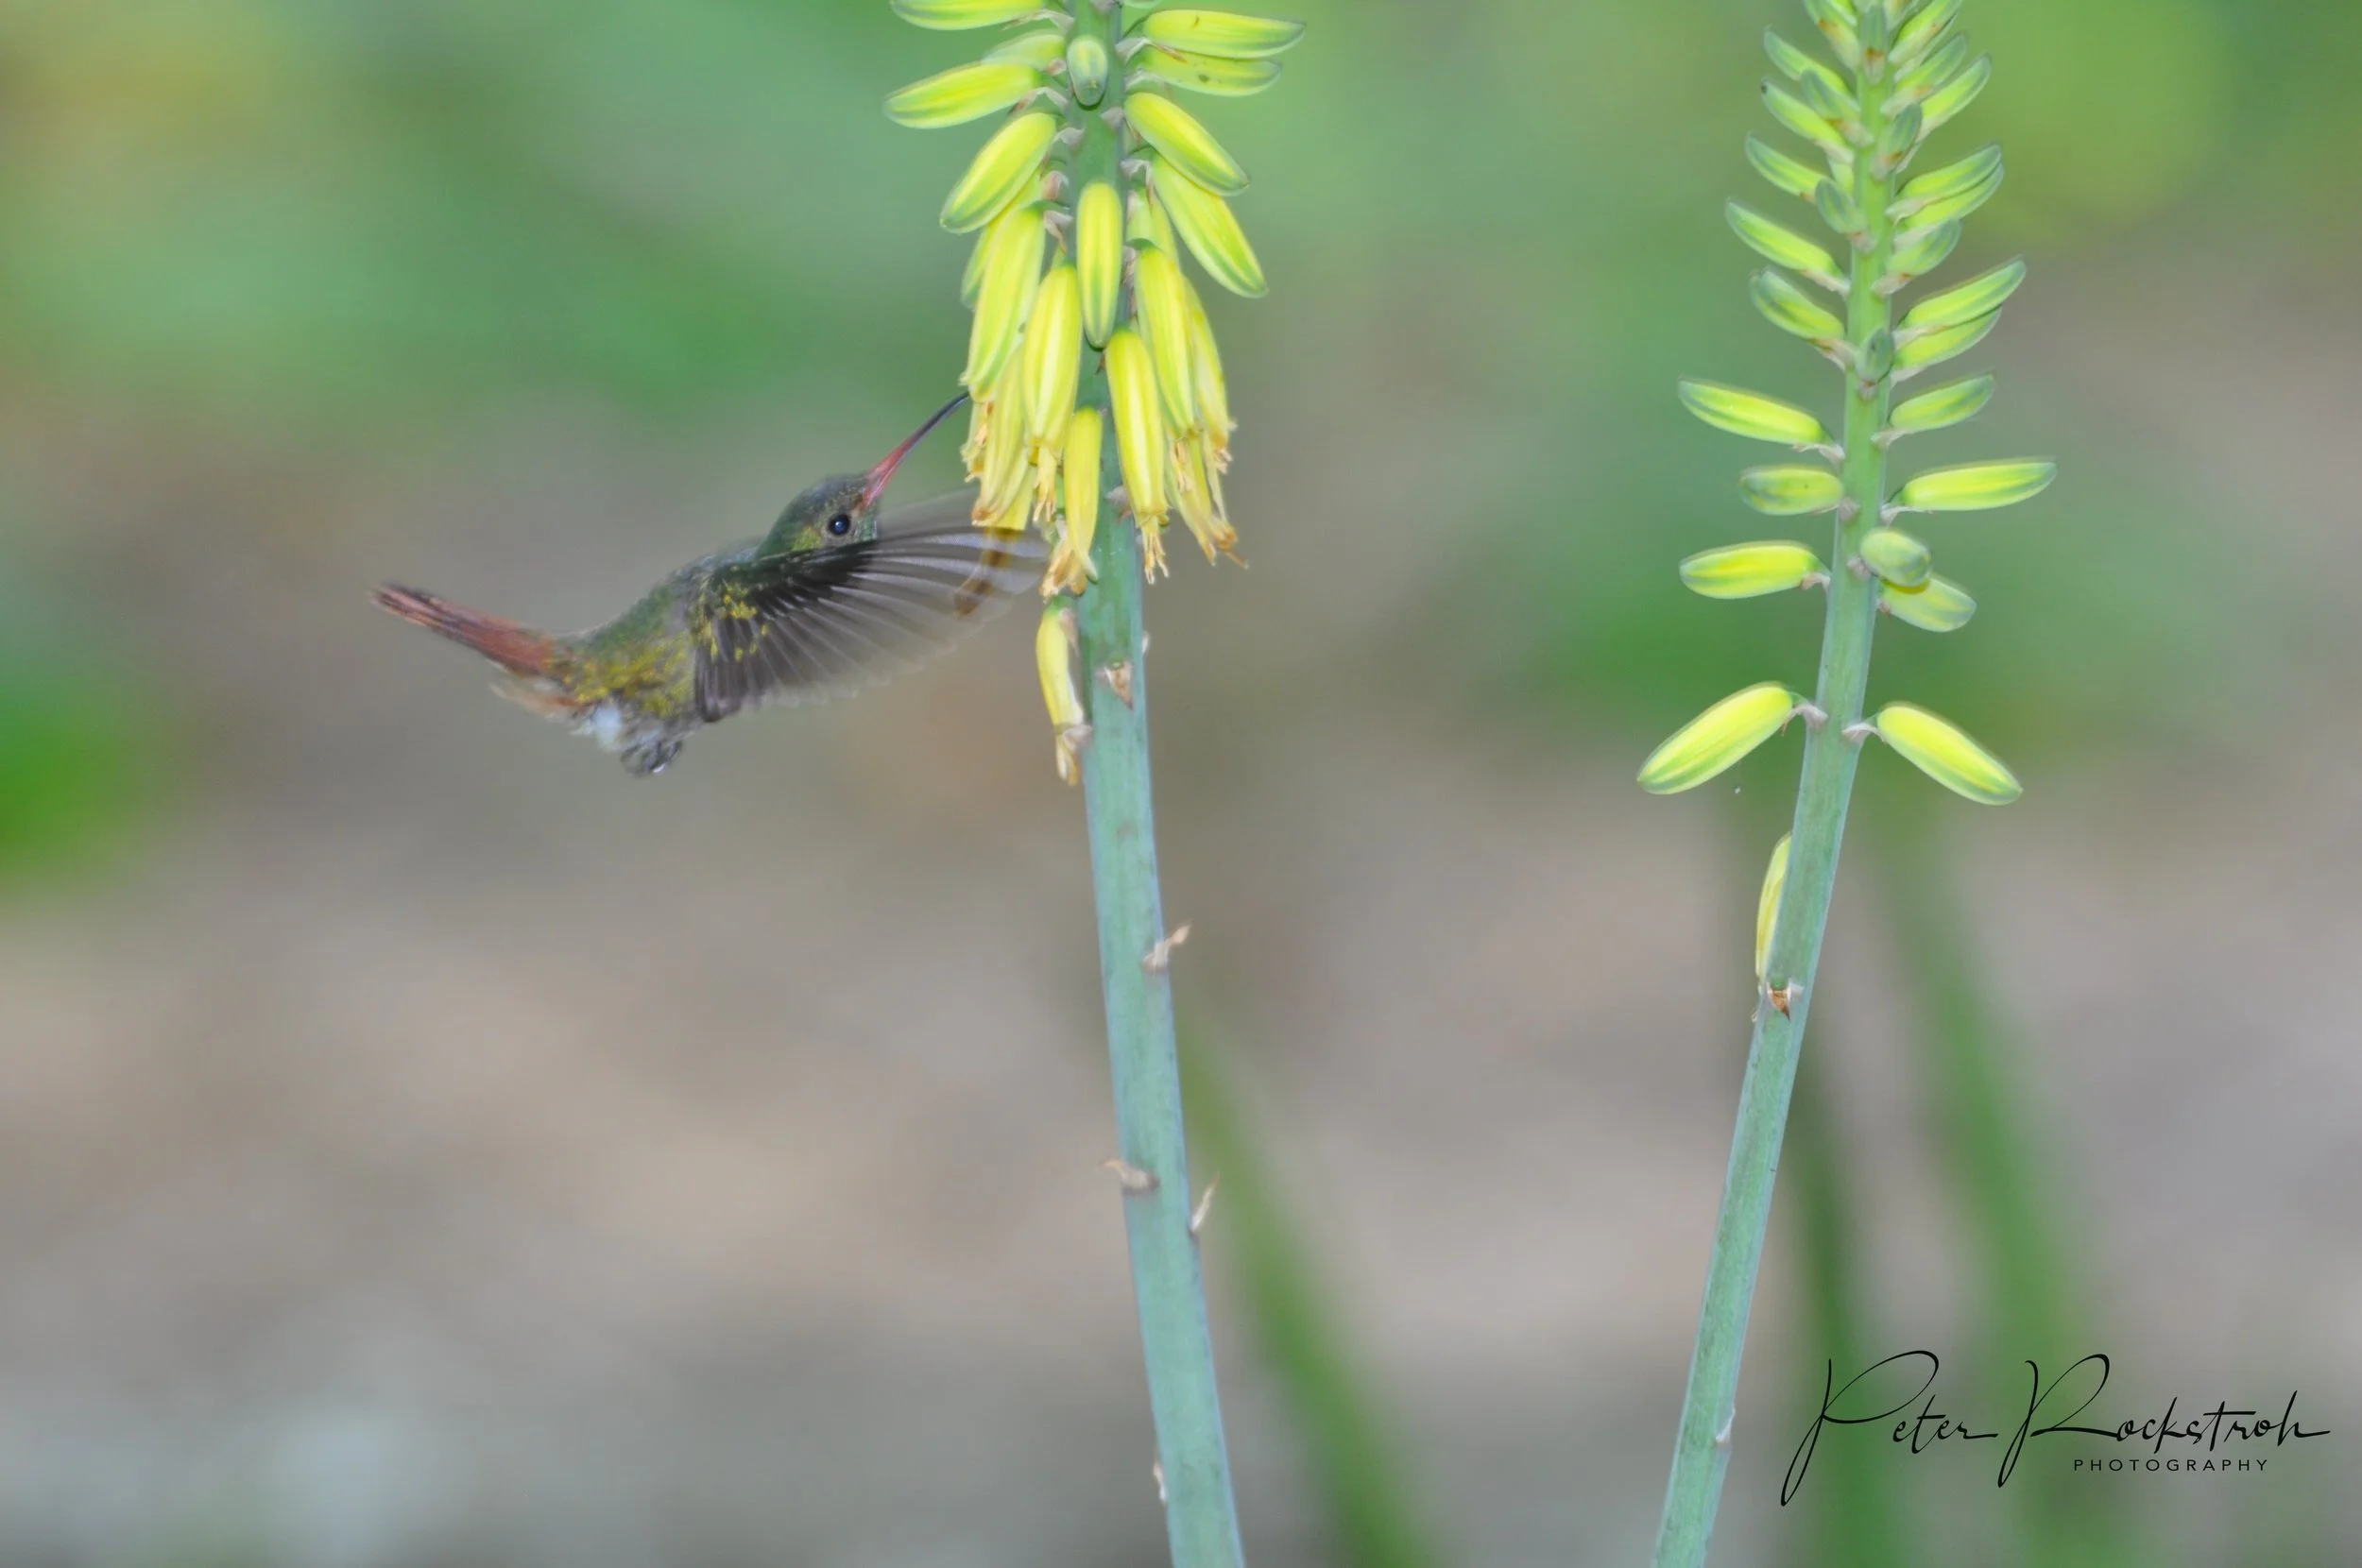
Rufous-tailed hummingbird, Amazilia tzacatl, on introduced Aloe sp., daylight + flash
The next step was getting closer to the birds, and the obvious solution was setting up a feeder and waiting. I tried photographing these birds at a feeder and visiting flowers and managed to get some reasonably good results. What I didn't like were the omnipresent blurred wings. While I admit that they transmit a sense of motion, of vibrant life and they display an ethereal quality that…
zzzZzzzzzzzzZZzzzzzZZZzzzzZZZZZZZZ…
You get the point.
All I really wanted was a crisp photo that showed all the glorious, glittery details.
I then increased the ASA to 6400 and managed to get some grainy images with blurred wings, even @ 1/4000 sec. Result; the worst of both worlds. Still dissatisfied, I continued to seek an image as crisp and tasty as the skin of a well-prepared duck.
It soon became obvious that I couldn't freeze the motion of the wings via shutter speed alone. The only thing faster than a shutter on a camera is a burst of its flashlight.
Notes on the photo below: This was my first reasonably satisfactory image of a hummingbird in flight. The images that I captured prior to this one all had a black background, making the bird look like disturbingly like an iridescent bat. This one was taken at 0535 hrs - crack of dawn. The previous test photos recorded no background light.
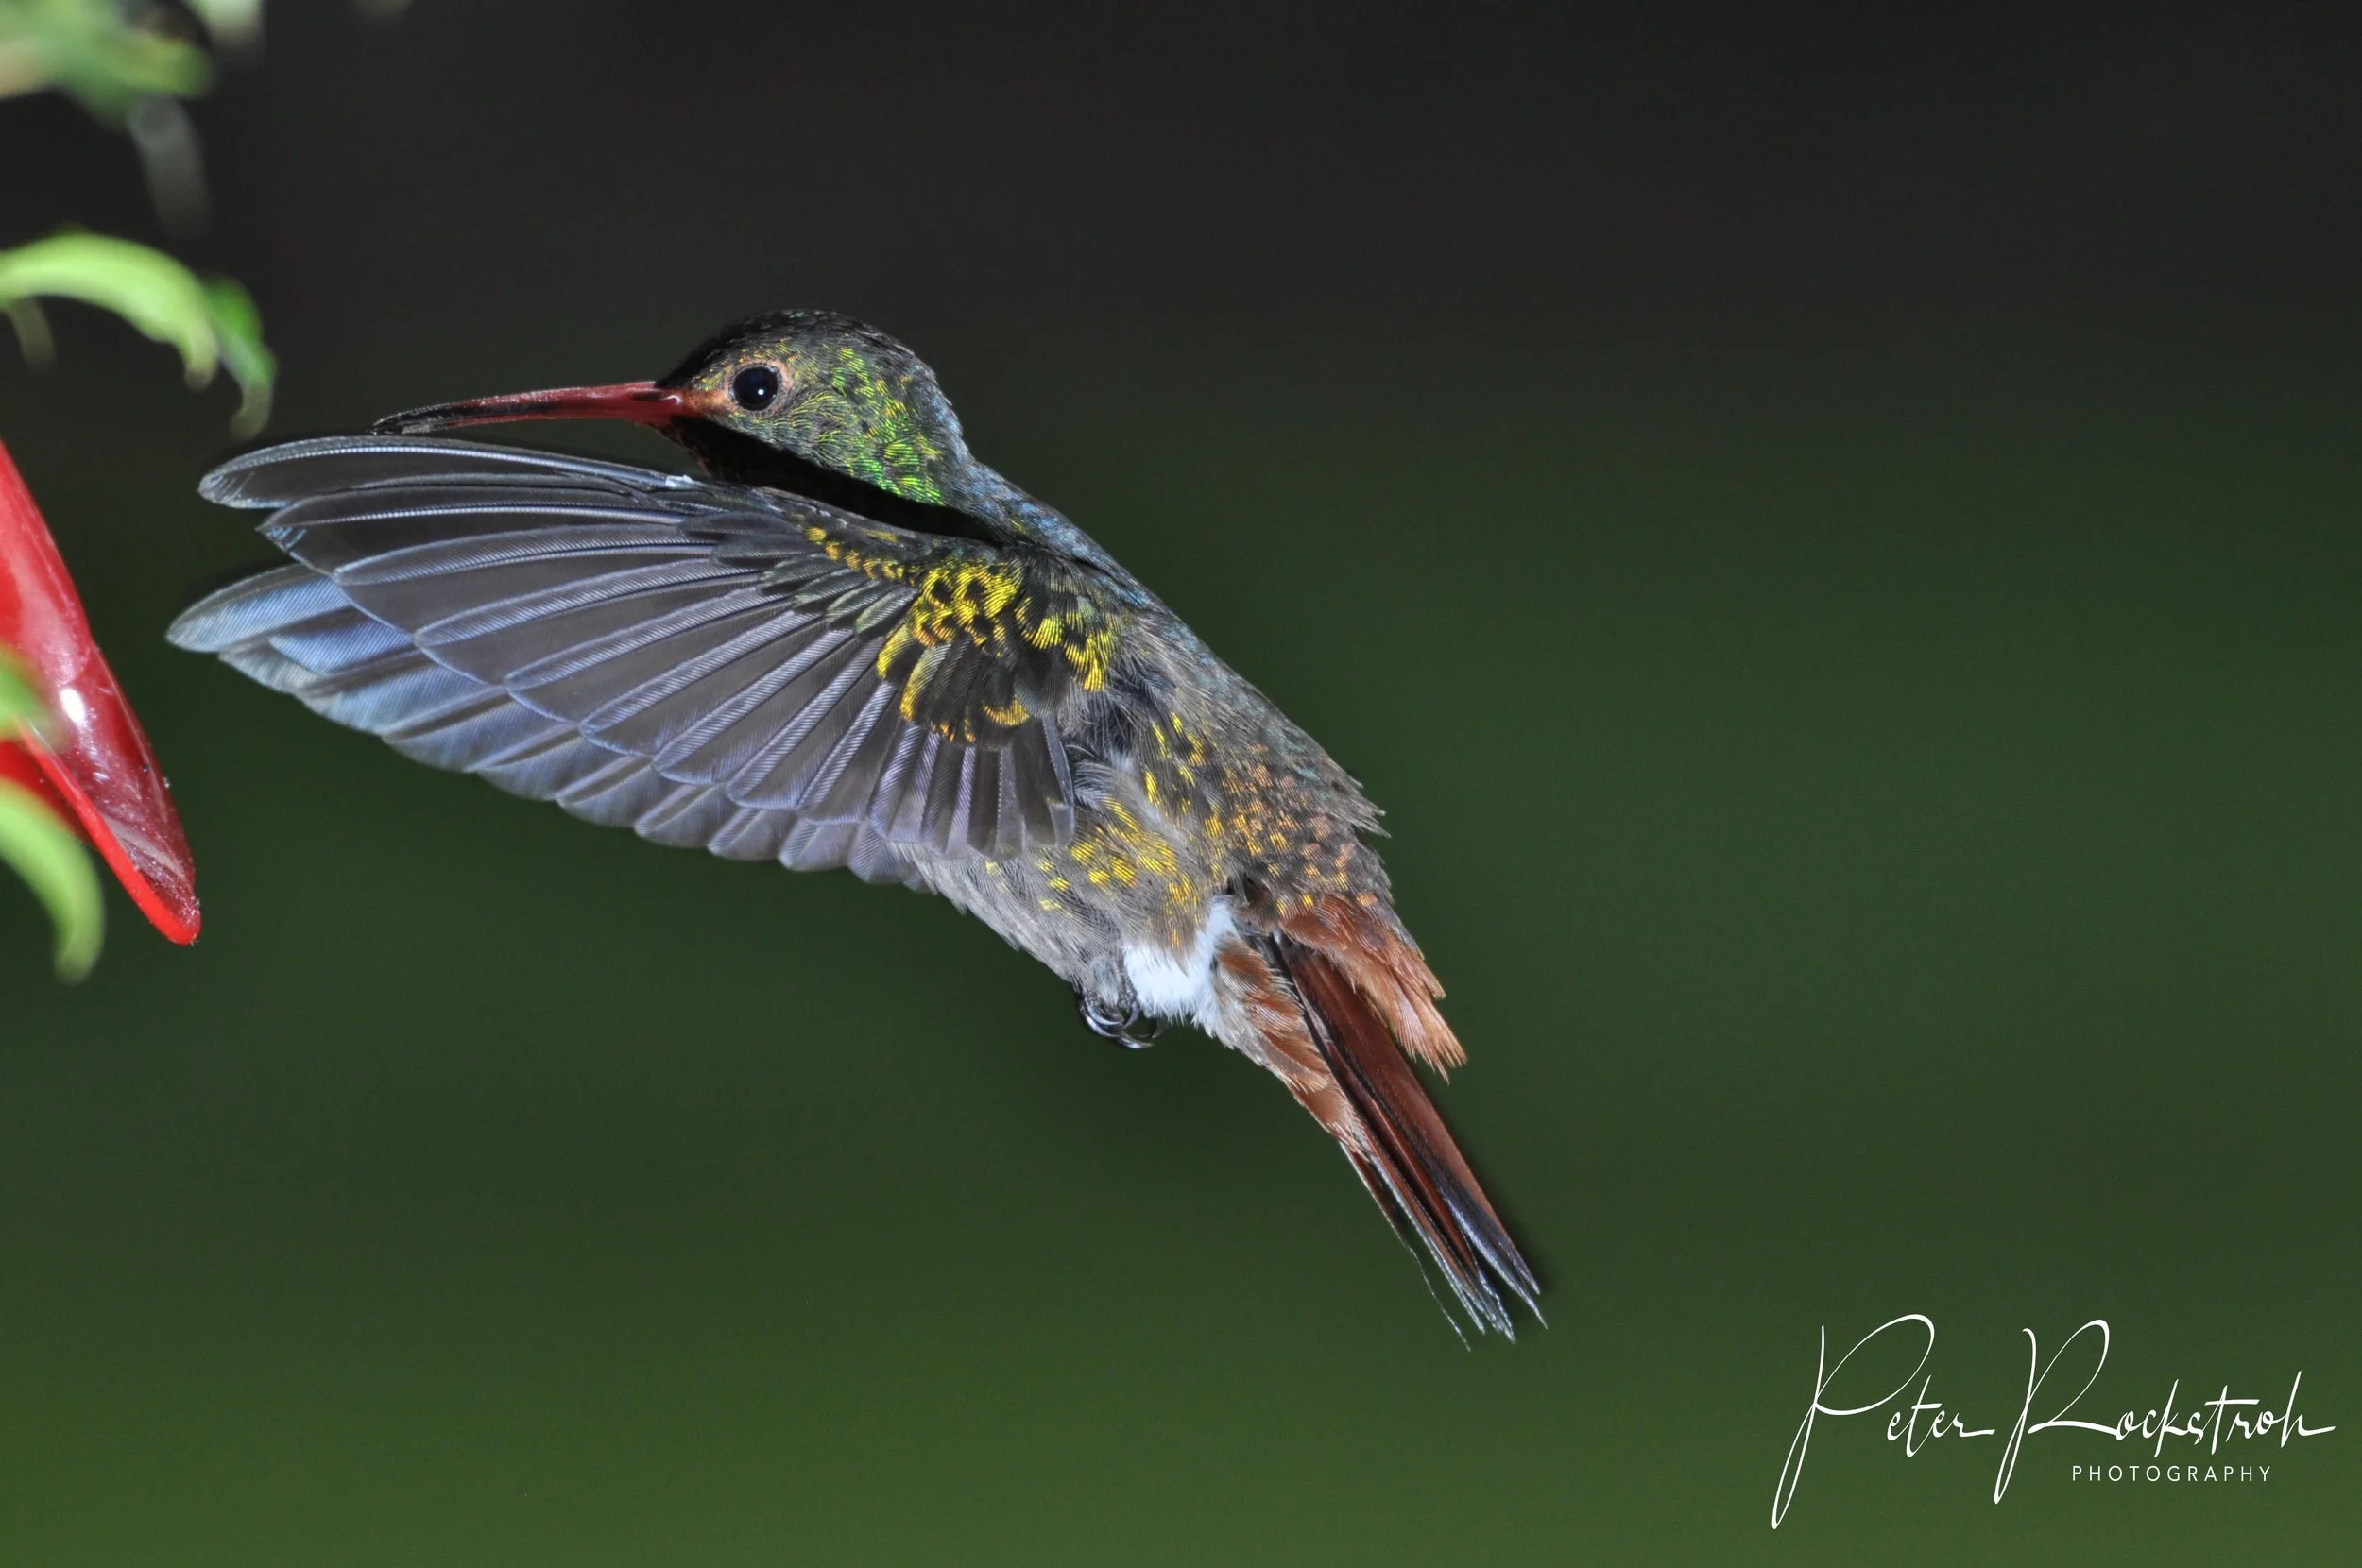
Rufous-tailed hummingbird, Amazilia tzacatl. In my view, the first acceptable image that I took of a hummingbird in flight
Many nature photographers don't particularly like or understand flash photography. Some argue that the results look artificial, others say that its use is just plain bad for birds. I have even heard local park guides complaining to people who were using flash to photograph plants, claiming that this artificial bright burst of light is bad for them. Just like that evil sunlight and photosynthesis, I suppose...
If you photograph in the deep tropics on a sunny day, you have between 30 minutes to an hour of interesting light per day. That is to say, you have ~30 minutes in the morning and ~30 minutes immediately before sundown. In between, you face sharp, contrast-y, glaring light that is often complicated to deal with.
When you are photographing tropical birds, you are quite often shooting a target into a dark canopy and your subject is backlit. The best time to photograph is very early in the morning, or, what birds might call, "post-night". Meaning, there is very little available light. And the list goes on.
Now that I have (hopefully!) convinced you to take a flash with you into the field, I'll explain a little about how your flash works. For the flash to fire, it needs an energy reserve that it can drain rapidly and transfer that energy on to the bulb. This energy reservoir is called a capacitor. The whistling sound you hear is the capacitor loading between shots. The higher the amount of light you want your flash to emit, the more energy you need to store in the capacitor.
Most modern dedicated flash units can be operated both on and off camera. Mounted on the camera's hot shoe, the flash is aligned with your lens. It can receive all your camera's commands and will synchronize with all its functions.
Held separately as a remote unit, it will also operate in synchrony with all functions, but only if it is programmed as a remote flash, triggered by infrared signal (i.e. a remote control), or as a slave flash that fires when it detects the on-camera flash burst.
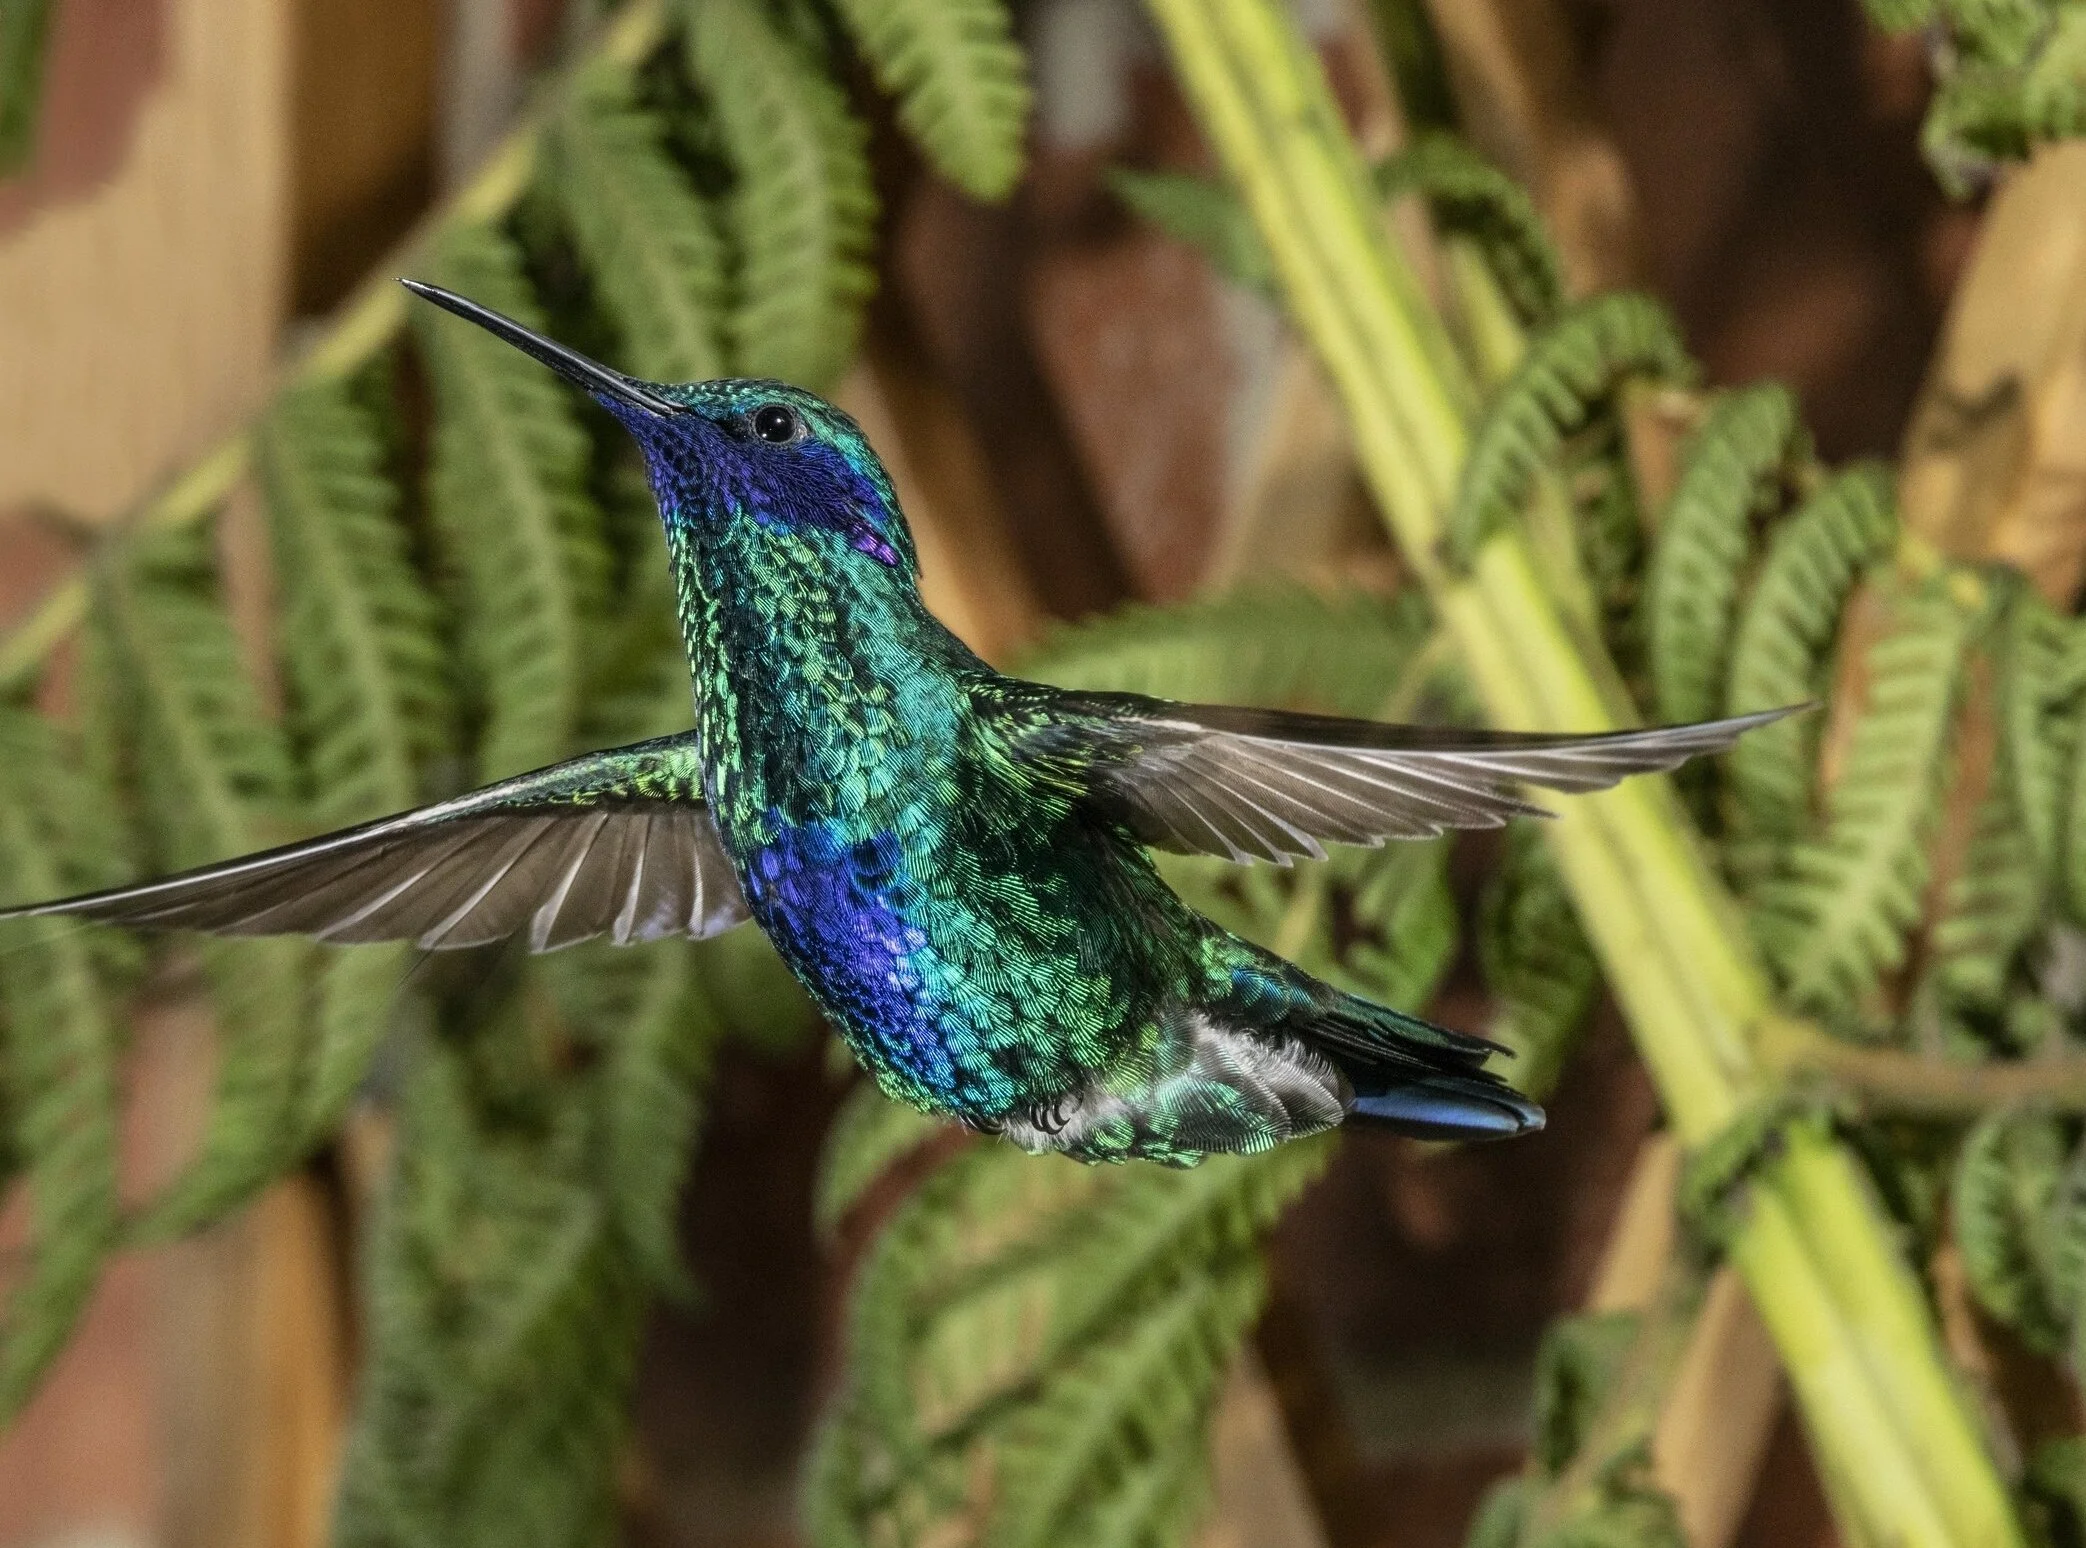
Notes on the photo below: After a few practice sessions I had reached a success rate of about 2.50%, that is to say about eight good photos from a session of 300 exposures. This is the classic desired "calendar" image captured when a hummingbird has backed off the feeder and before he/she goes in for another sip.
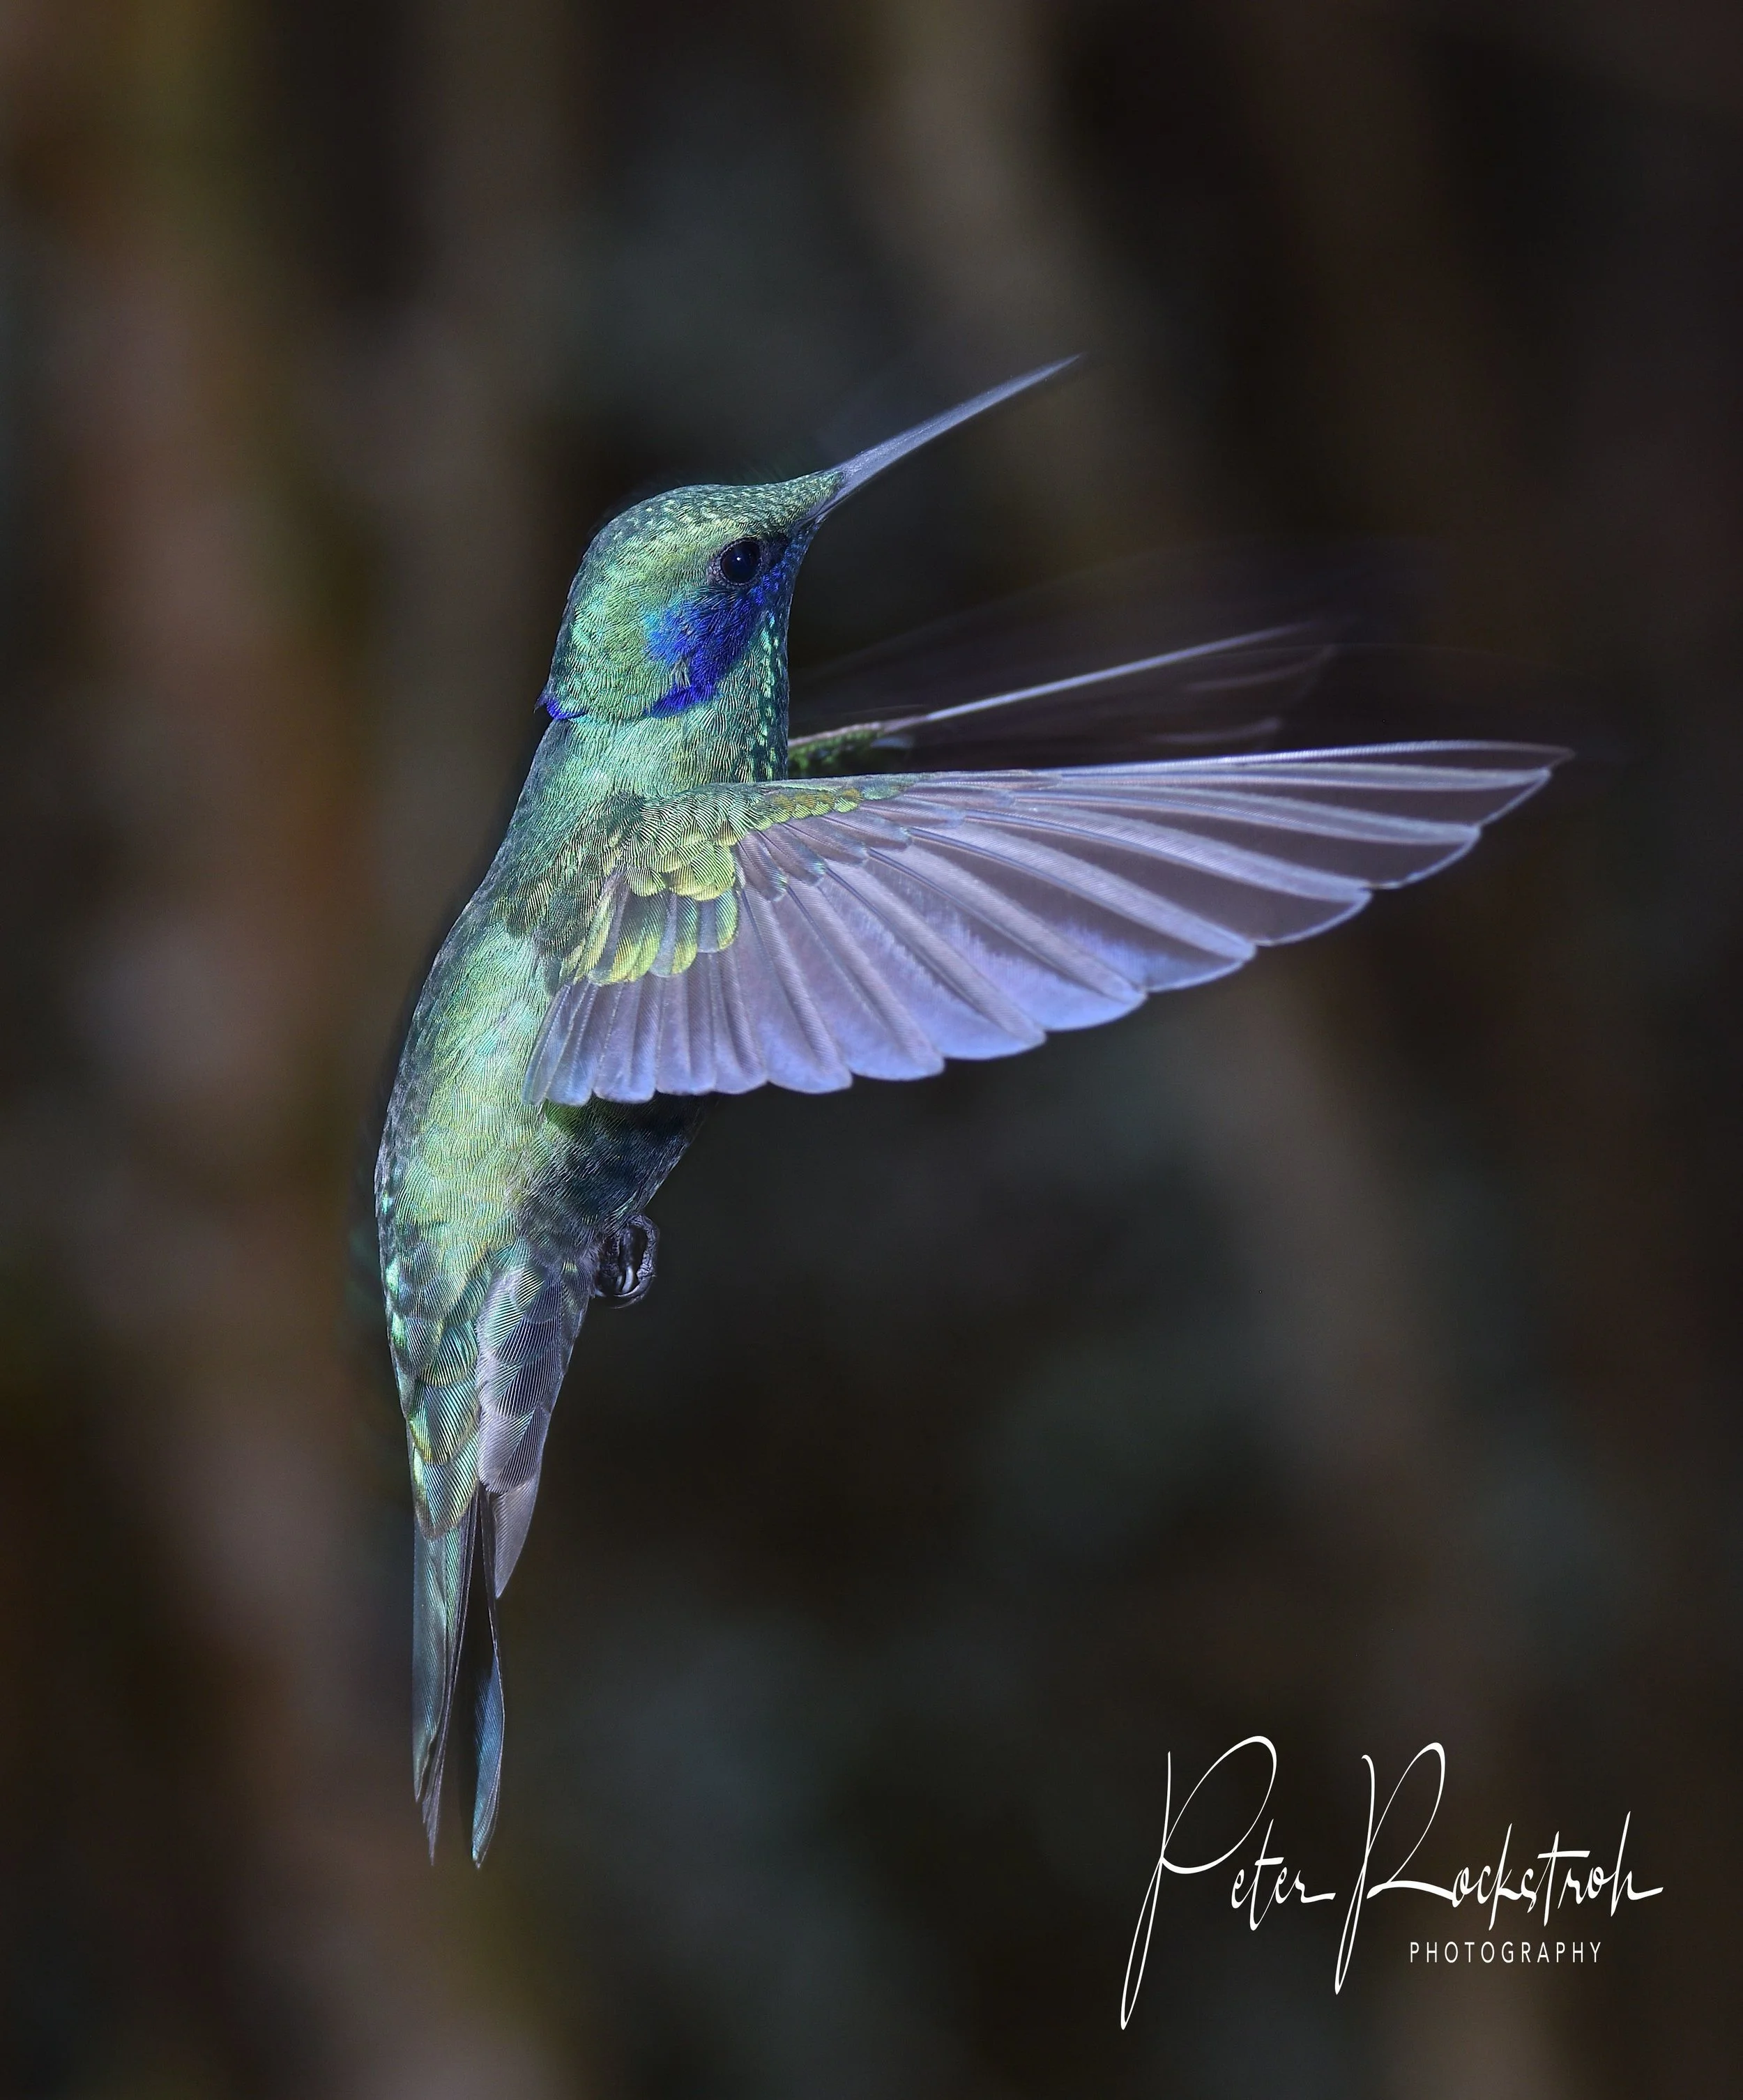
Male sparkling violet ear, Colibri coruscans, showing lots of nice details and color
And here comes the most interesting and useful part: most dedicated flashes also operate in manual mode. What does that mean? When you are using an automatic mode ("Program", "Portrait" or whatever they are called on your camera) and your light meter detects that it is too dark to photograph, your on-camera flash pops up automatically. When you are going to take a photo, you point the lens at your subject and, before your camera fires, it emits an infrared burst that bounces off your subject and returns to the camera "through the lens" (TTL). This is the reading your camera needs to determine how much light is needed to illuminate the image. While you might not particularly care for the results due to their mugshot-reminiscent look, the camera sent the right amount of light needed for that moment.
When you use your flash in manual mode, you can select how powerful you want your flash burst to be. It usually goes from Full Power (1/1) to its weakest setting (1/128). You pick a setting with too much power for the scene and you overexpose it. You pick a setting with too little power and the image is underexposed.
Now that you know what you did wrong when you first tried it. But there are additional valuable aspects of using a manual flash. The power of your flash is not only the amount of light it emits during the burst, but also the length of the burst. A full power burst (1/1) lasts about 1/1,000 second. At ½ the power setting, the burst lasts about 1/2,000 second. At the weakest setting (1/128) the flash emits a burst of less than 1/20,000 second.
On the other hand, the higher the flash output, the more time the thyristor takes to reload. That also implies that the rapid flash bursts allow for very short cycling times, meaning you can take almost stroboscopic sequences of images at a relatively low power setting.
I will now attempt to integrate your newfound knowledge of flash photography with how the camera works. When you take a photo, your camera, with all its buttons and levers and functions can only do two things: it can decide how big the opening will be that lets light through the lens onto your film (if you're old school) or digital sensor, and it can decide how long that opening will stay open. That's it. All the money that you paid is for these two simple functions.
To make sure that you get exactly the amount of light out of these two functions, the camera has a system of curtains that work in synchrony with your shutter, to ensure the dosage of light to the sensor chip (or film) is accurate.
The usual sequence goes like this: You press the shutter button > the shutter starts opening > the first curtain opens > the second curtain opens > the first curtain closes > the second curtain closes > the shutter closes.
When you use a flash, the sequence is the following: You press the shutter button > the shutter starts opening > the first curtain opens > the second curtain opens > the flash fires > the first curtain closes > the second curtain closes > the shutter closes.
BUT: Most cameras (or lenses) have a range of shutter speeds at which they synchronize this sequence with the flash. If you pick a shutter speed faster than the maximum SYNCH speed, the flash burst will be emitted while one of the curtains is moving and will crop part of the image.
SO: Now we can put everything together and get back to cooking our perfectly prepared, crispy-skinned, yet still juicy duck.
To photograph hummingbirds in flight, fully-lit, in all their colorful glory and displaying every little detail on their feathers, we MUST use flash(es).
Notes on the photo below: For me, the final position of a hummingbird within a frame is quite unpredictable when taking these types of photos. Since I don't take auto-driven image bursts, getting this quality of photo is pure luck. If you normally take rapid-fire, automated sequences of images, your harvest of photos that look like this will be higher than mine.
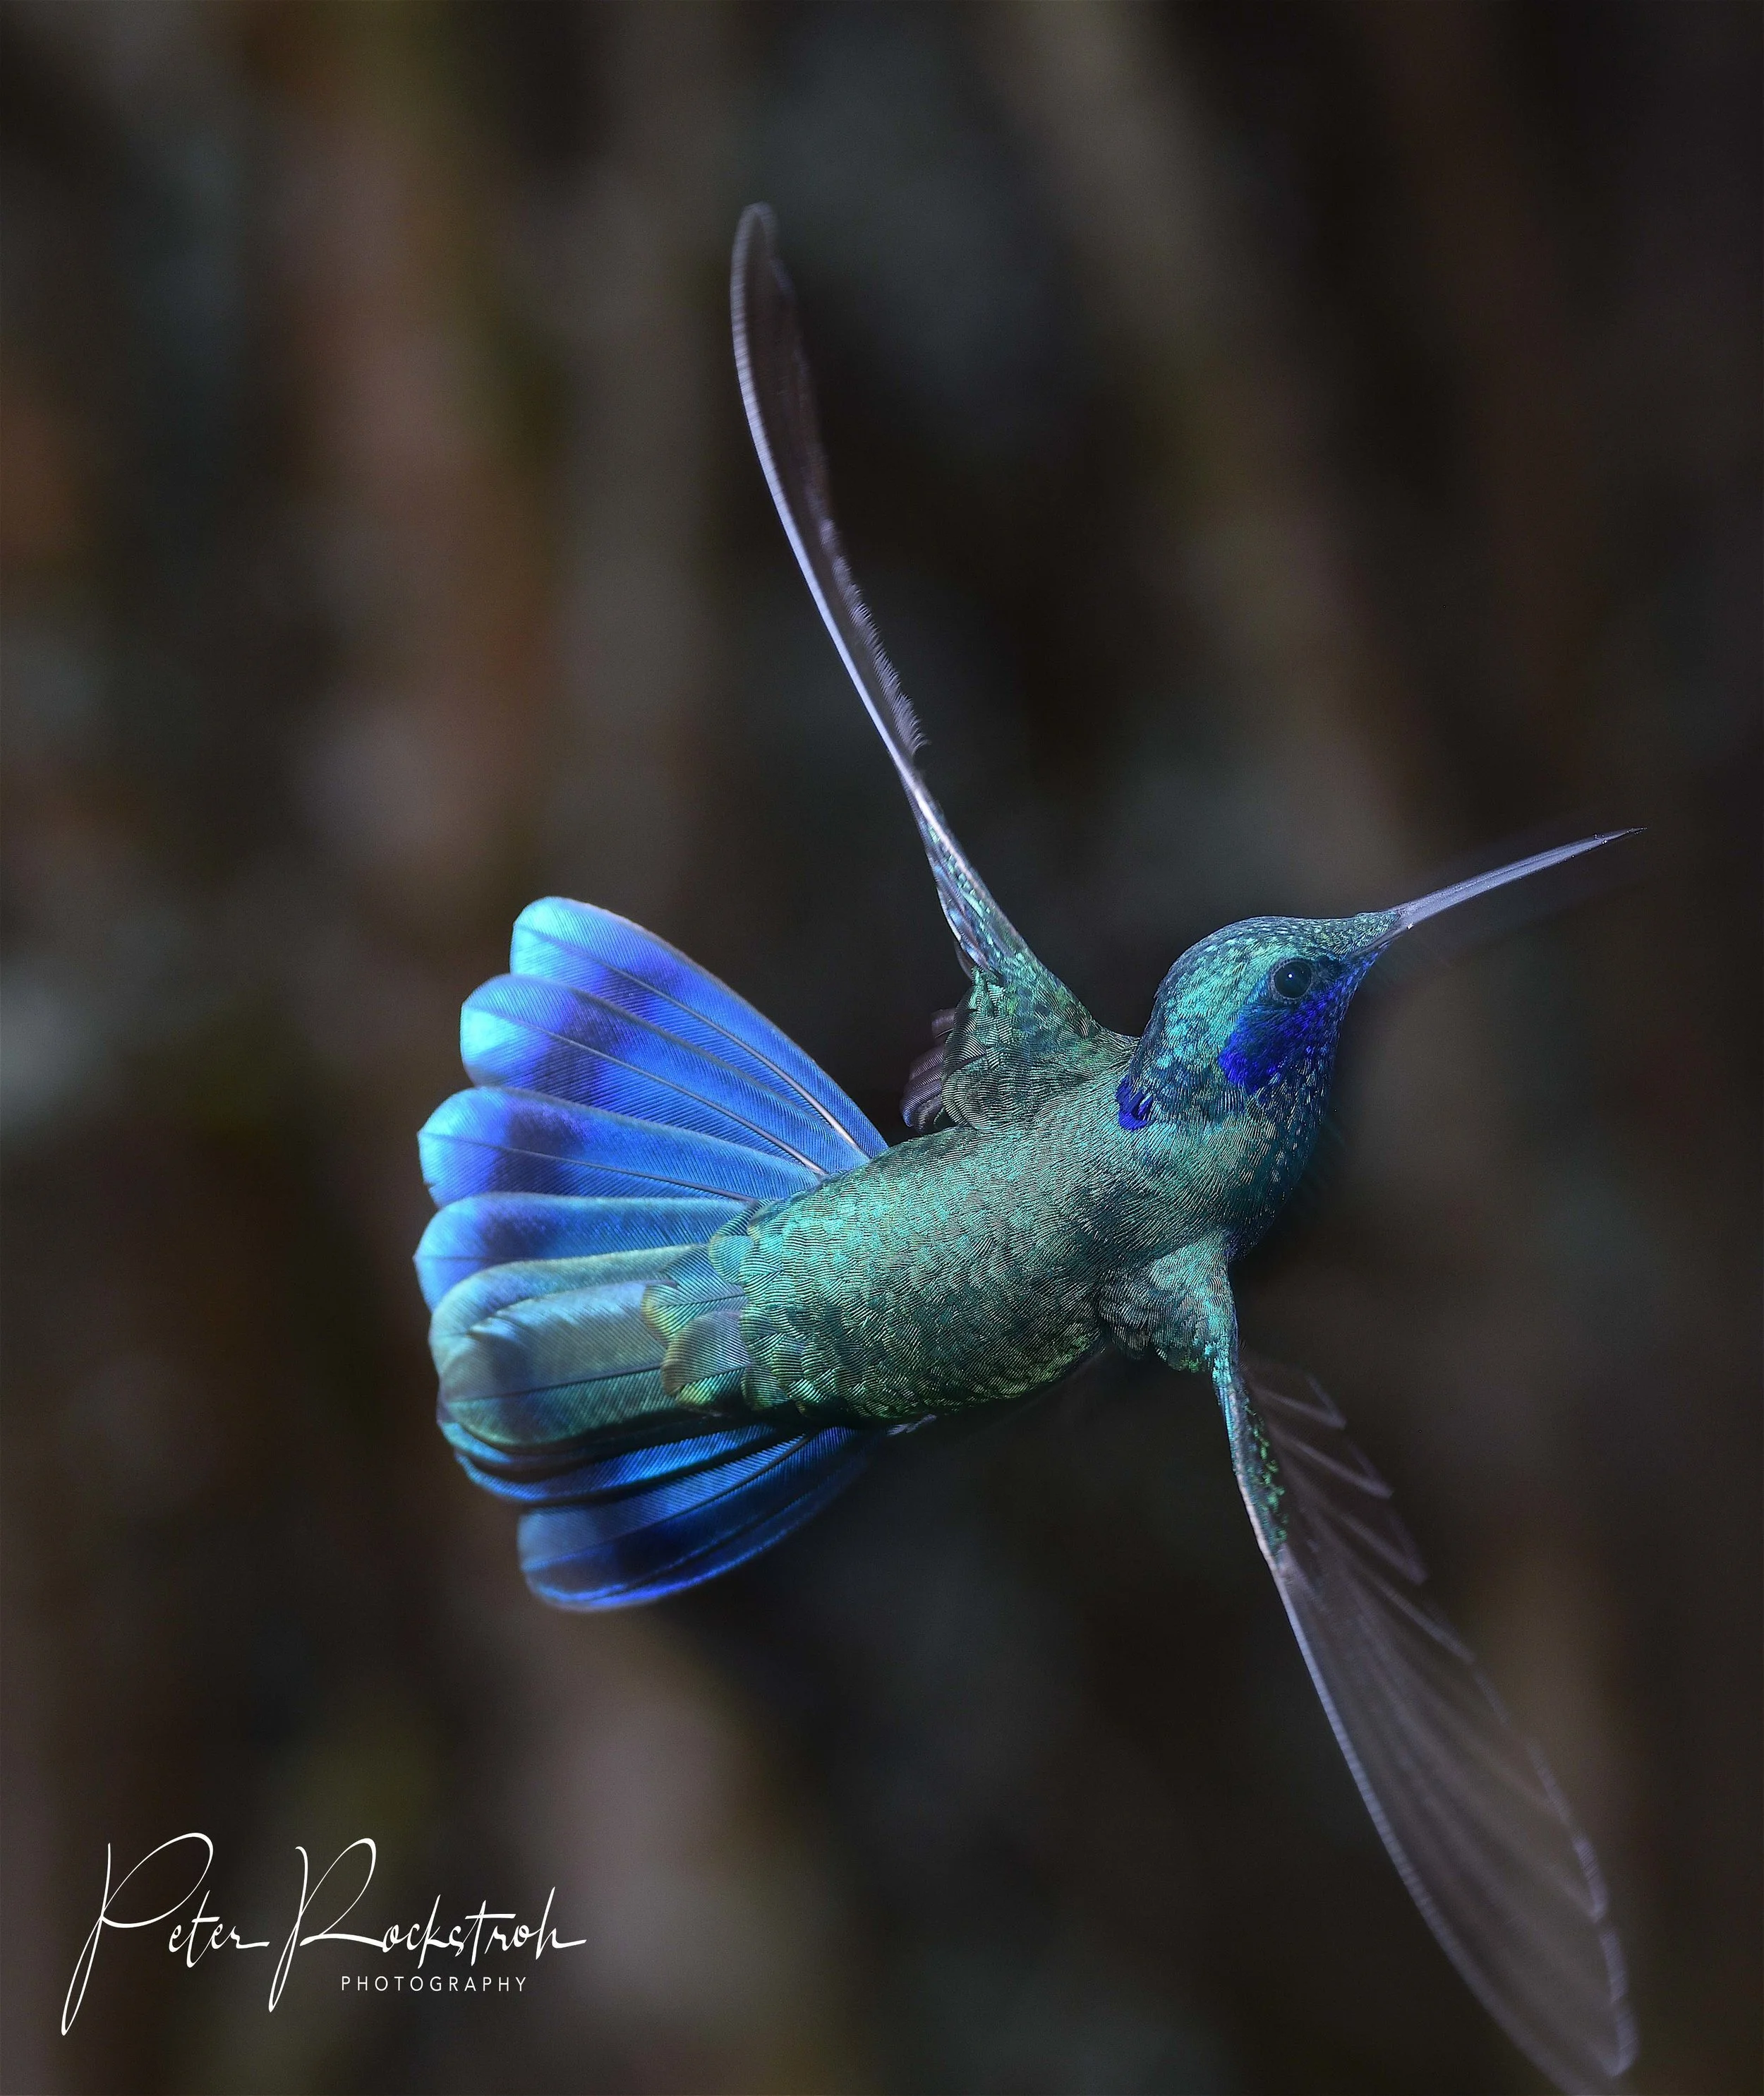
Male sparkling violet ear, Colibri coruscans, a hyperactive little blue fellow just cruisin' through the wide world
To ensure that all this knowledge will not be wasted, try this at a well-established hummingbird feeder, during a season when hummingbirds visit the feeder. Try to place yourself in such manner that you will be photographing the birds against a dark background. Ideally you should work in open shade. It is always very pleasant when you have the feeder hanging underneath a tree.
Depending on the lens you are using, place yourself at a distance that allows for a nearly frame-filling image of the bird when it finally visits the feeder. With a 300 mm lens you should set your tripod about 10' (3 m) from the feeder.
Notes on the photo below: The interaction between bird and bee adds movement to the image and a provides a story to tell. As in the previous image, it is hard to predict when these interactions will occur in a single well-composed frame.
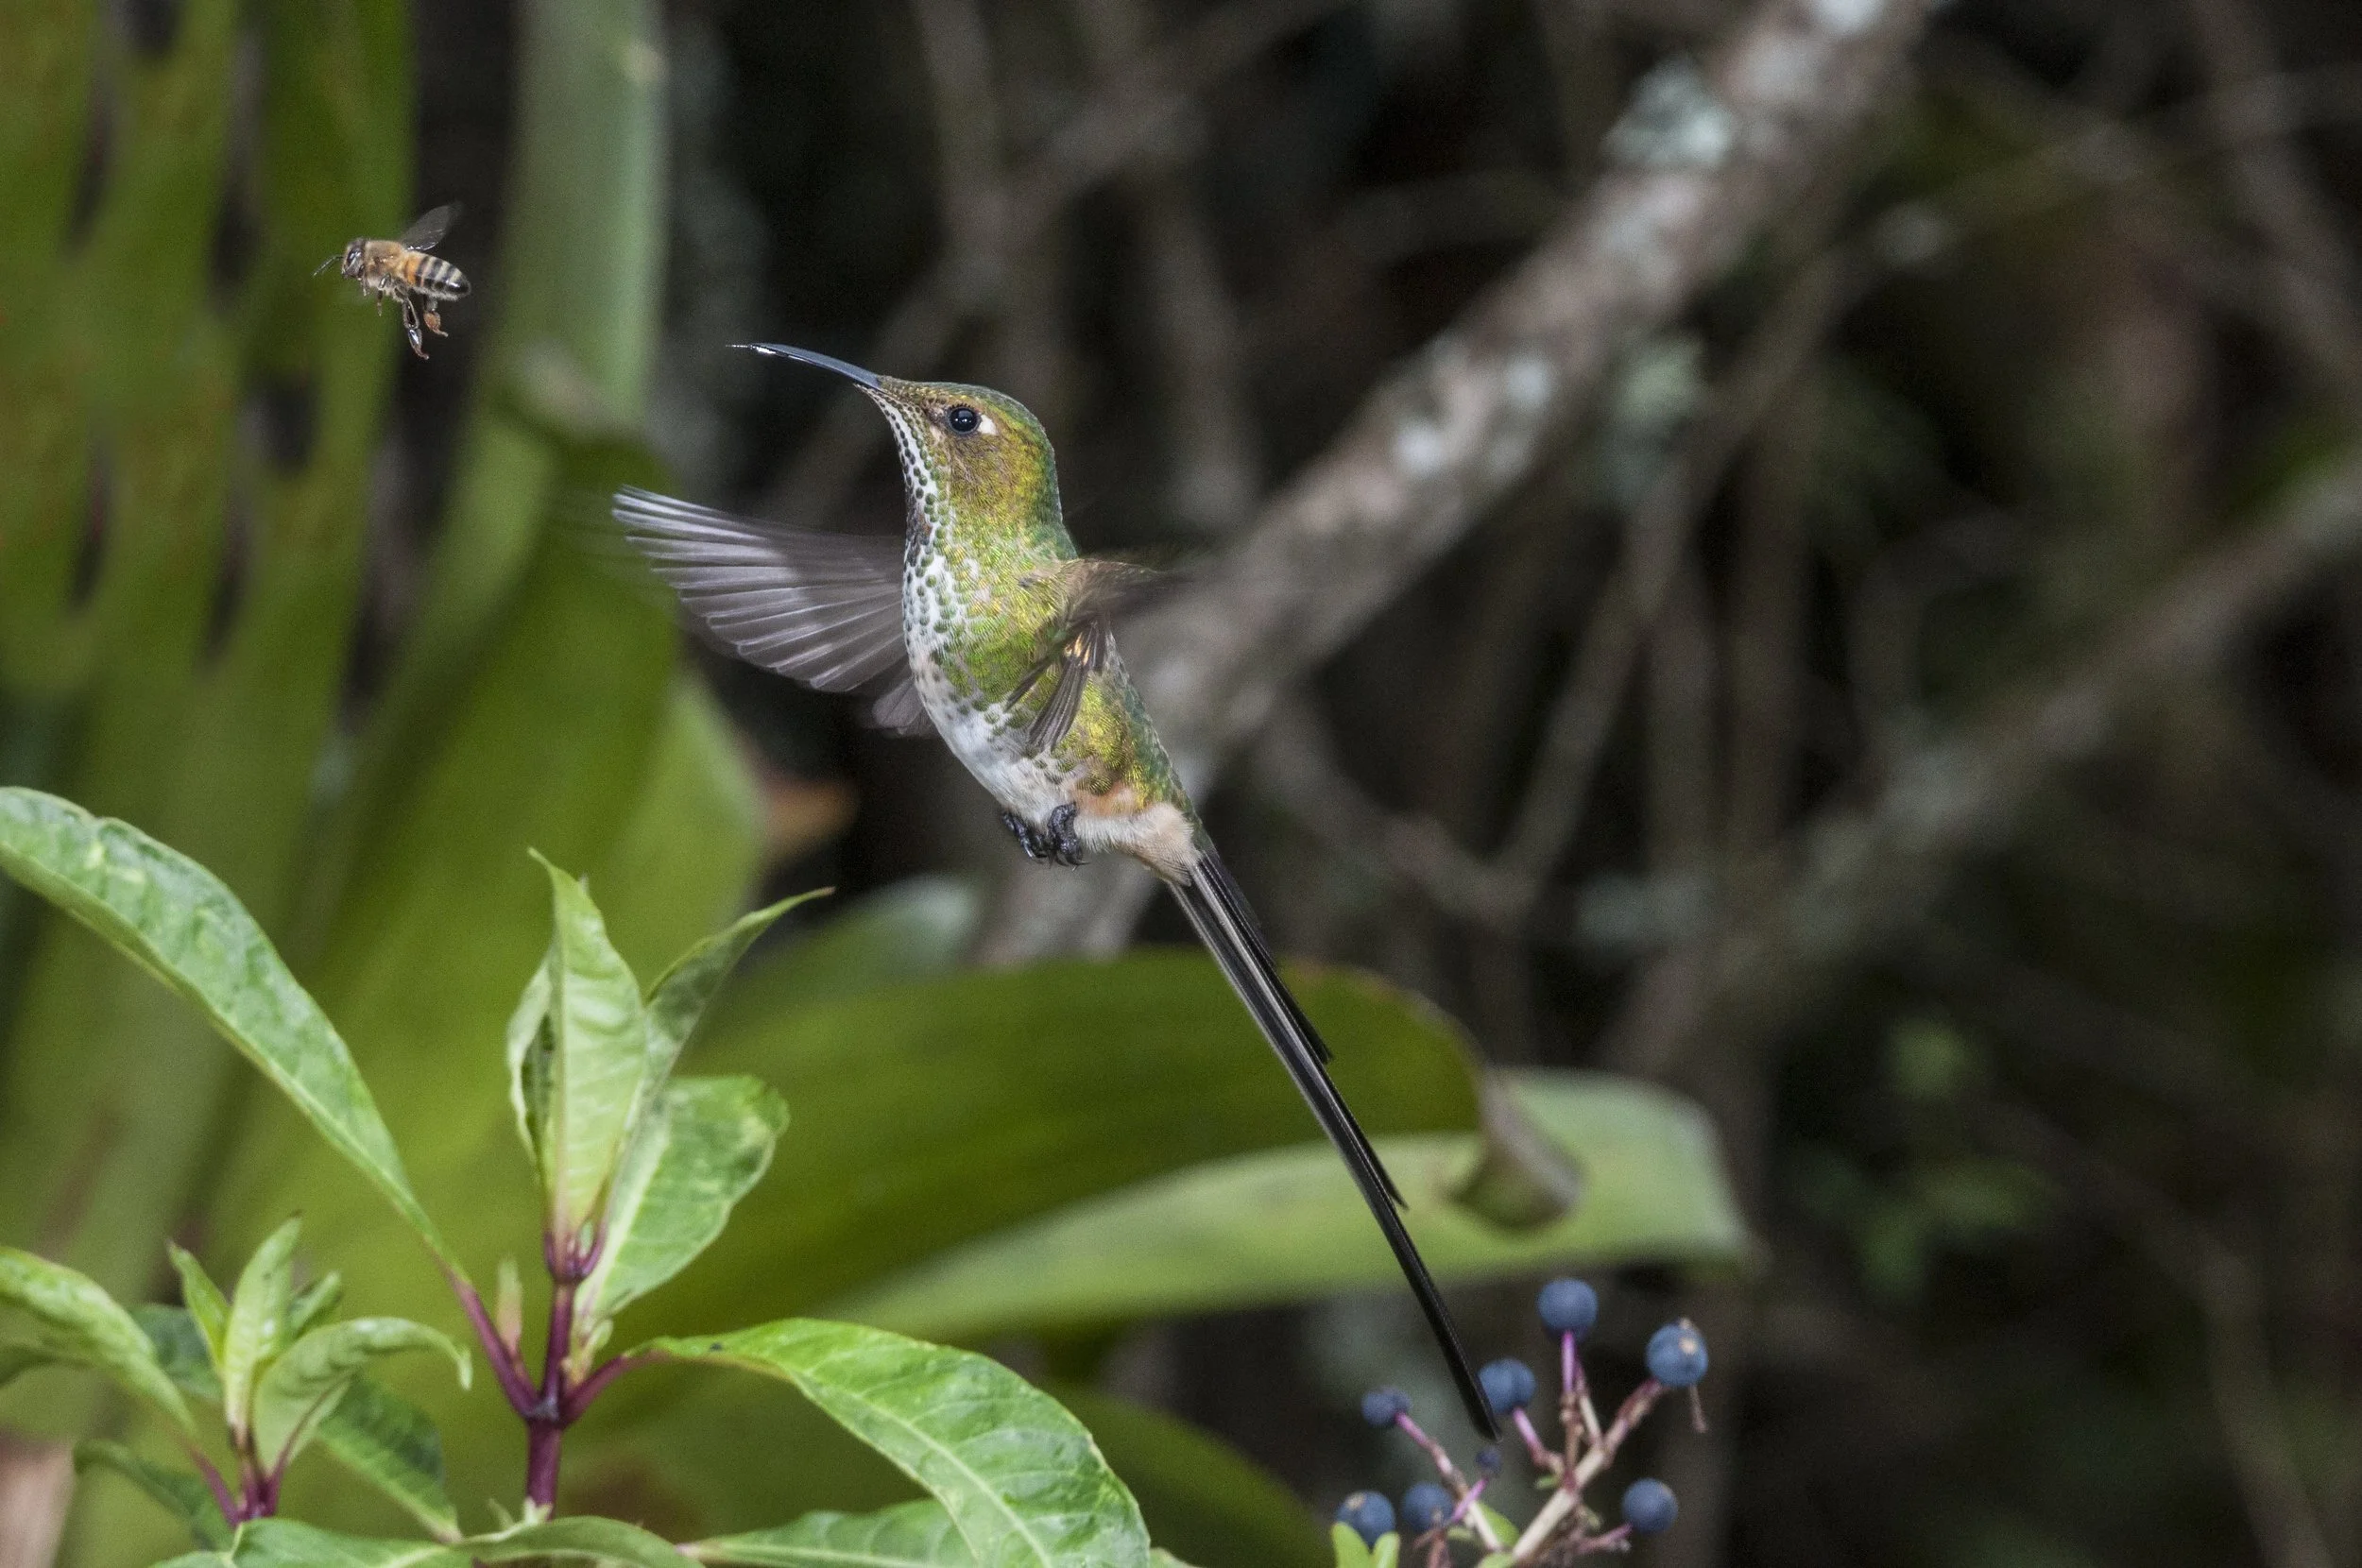
Female green-tailed trainbearer, Lesbia nuna, chasing a honeybee
I like to use feeding bottles with a single hole and without a perch. That allows me to prefocus exactly where the bird will be, and doesn't allow the bird to sit and feed. I stick a large toothpick into the feeding hole and, putting my camera in manual focus mode, I leave it focused on the toothpick. Place the bottle in such manner that you are parallel to the bird.
Since there is a maximum shutter speed at which the camera can synchronize the flash, we will default to that. Verify what aperture is needed that, combined with that shutter speed, will give you a background that ideally should be blurred and just a tad too dark. This combination of aperture and shutter speed takes care of ambient light.
If you take your photo of hummingbirds at the feeder with these settings, you will capture the blurred silhouette of dark bird. That is exactly what you test shots should look like.
Now it's time to set up your lights. I use two dedicated flashes placed at 45º angles to illuminate the target area. One is placed slightly below the feeder's height, in order to illuminate the birds ventral area, and the other is placed slightly above. Both are pointing at where the bird should be when it comes to feed. I start placing the flashes at about 20"(50 cm) from the feeder.
Turn on the flash units, put them on manual setting @ 1/64 and choose the "Remote" setting.
Test them by photographing the feeder. Your feeder should look well lit and the background a bit too dark. If the feeder looks far too dark, either move your flashes a little closer or set the power at 1/32. Repeat these steps until you have a balanced image.
I usually work at ASA 100 – ASA 400 in order to get full detail, saturated colors with no visual "noise". Once you have found a suitable combination, just get behind you camera and wait:
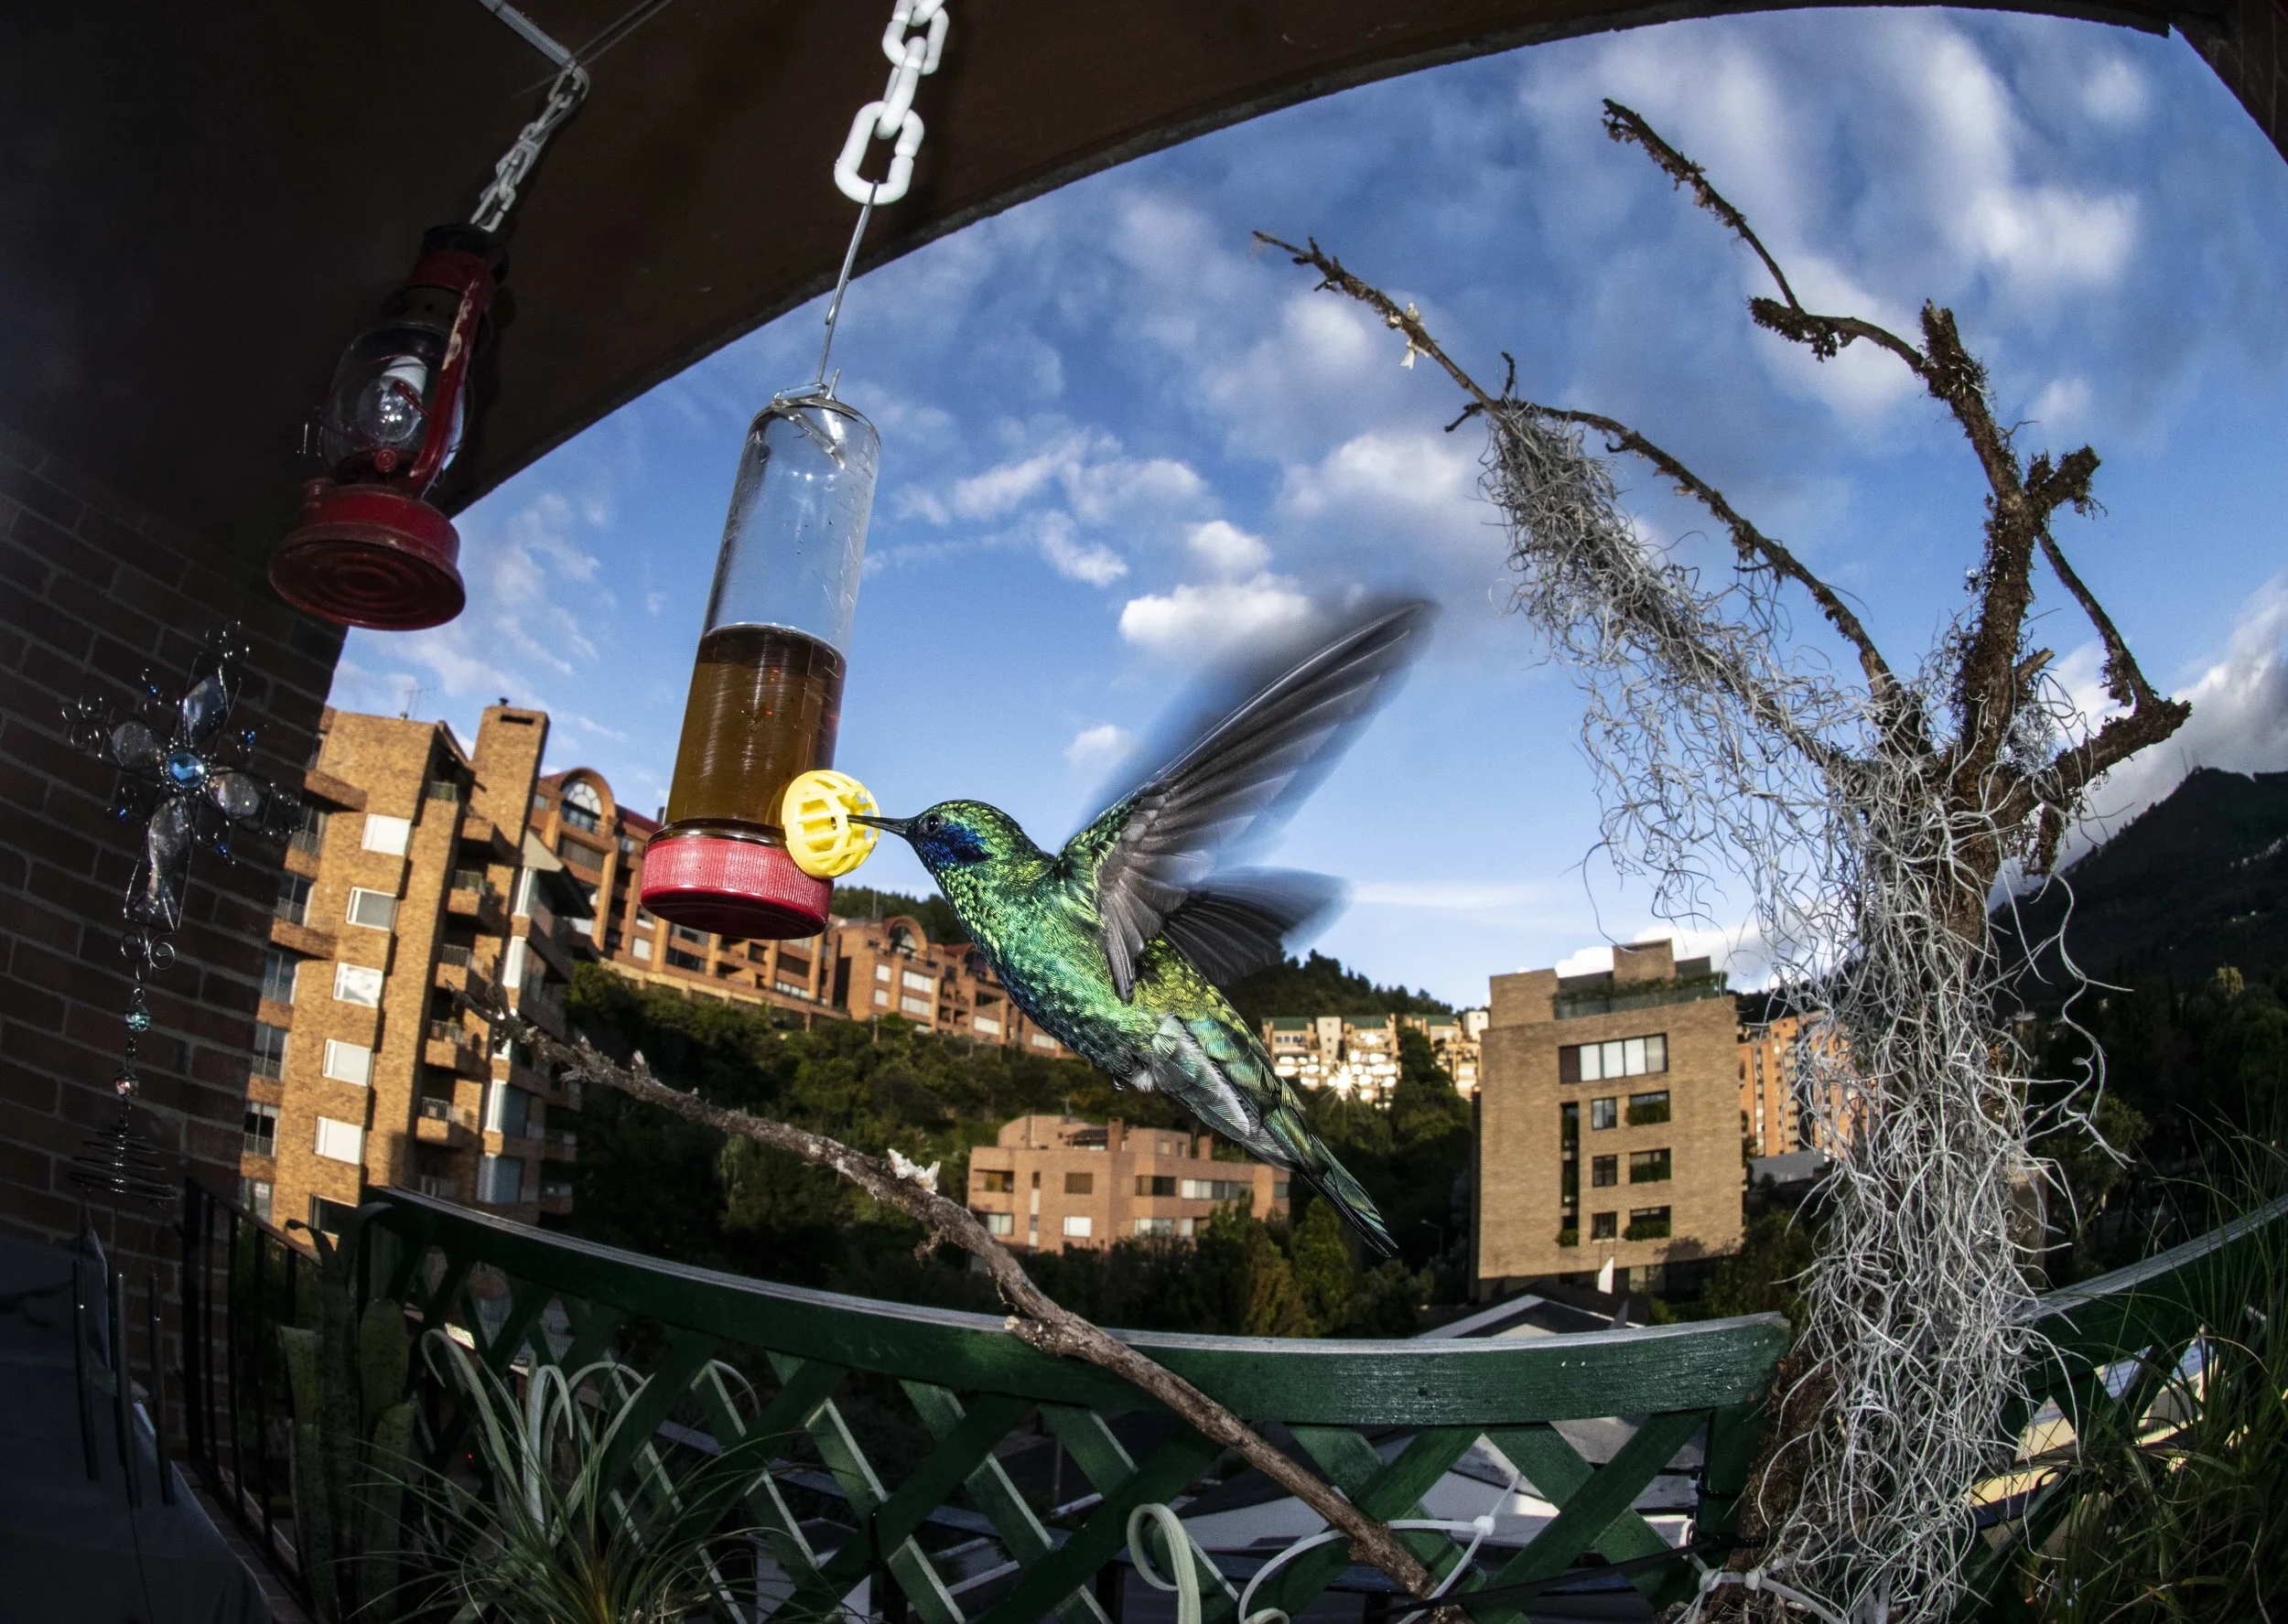
Male sparkling violetear, Colibri coruscans, experimental high-resolution fish-eye view at a feeder on my balcony in Bogotá, Colombia
Different hummingbirds have different feeding strategies. My favorites are those that come to feed, and every 15 seconds move back a little and then return to feed. I almost always photograph them when they back up, in order to avoid having the feeder in the frame.
After several hundred images (which will occupy a full morning's session) you'll probably get the knack of it. This is one of the areas where digital photography really allows you to learn, correct and improve in a very short time in order to achieve very satisfying results on the fly.
Twin flash experiment, random test shot for practice that is not at all bad
One example of a final product resulting from the cooking class described above is shown below (at reduced resolution) with image notes on the lower edge.
The best of luck with your efforts!
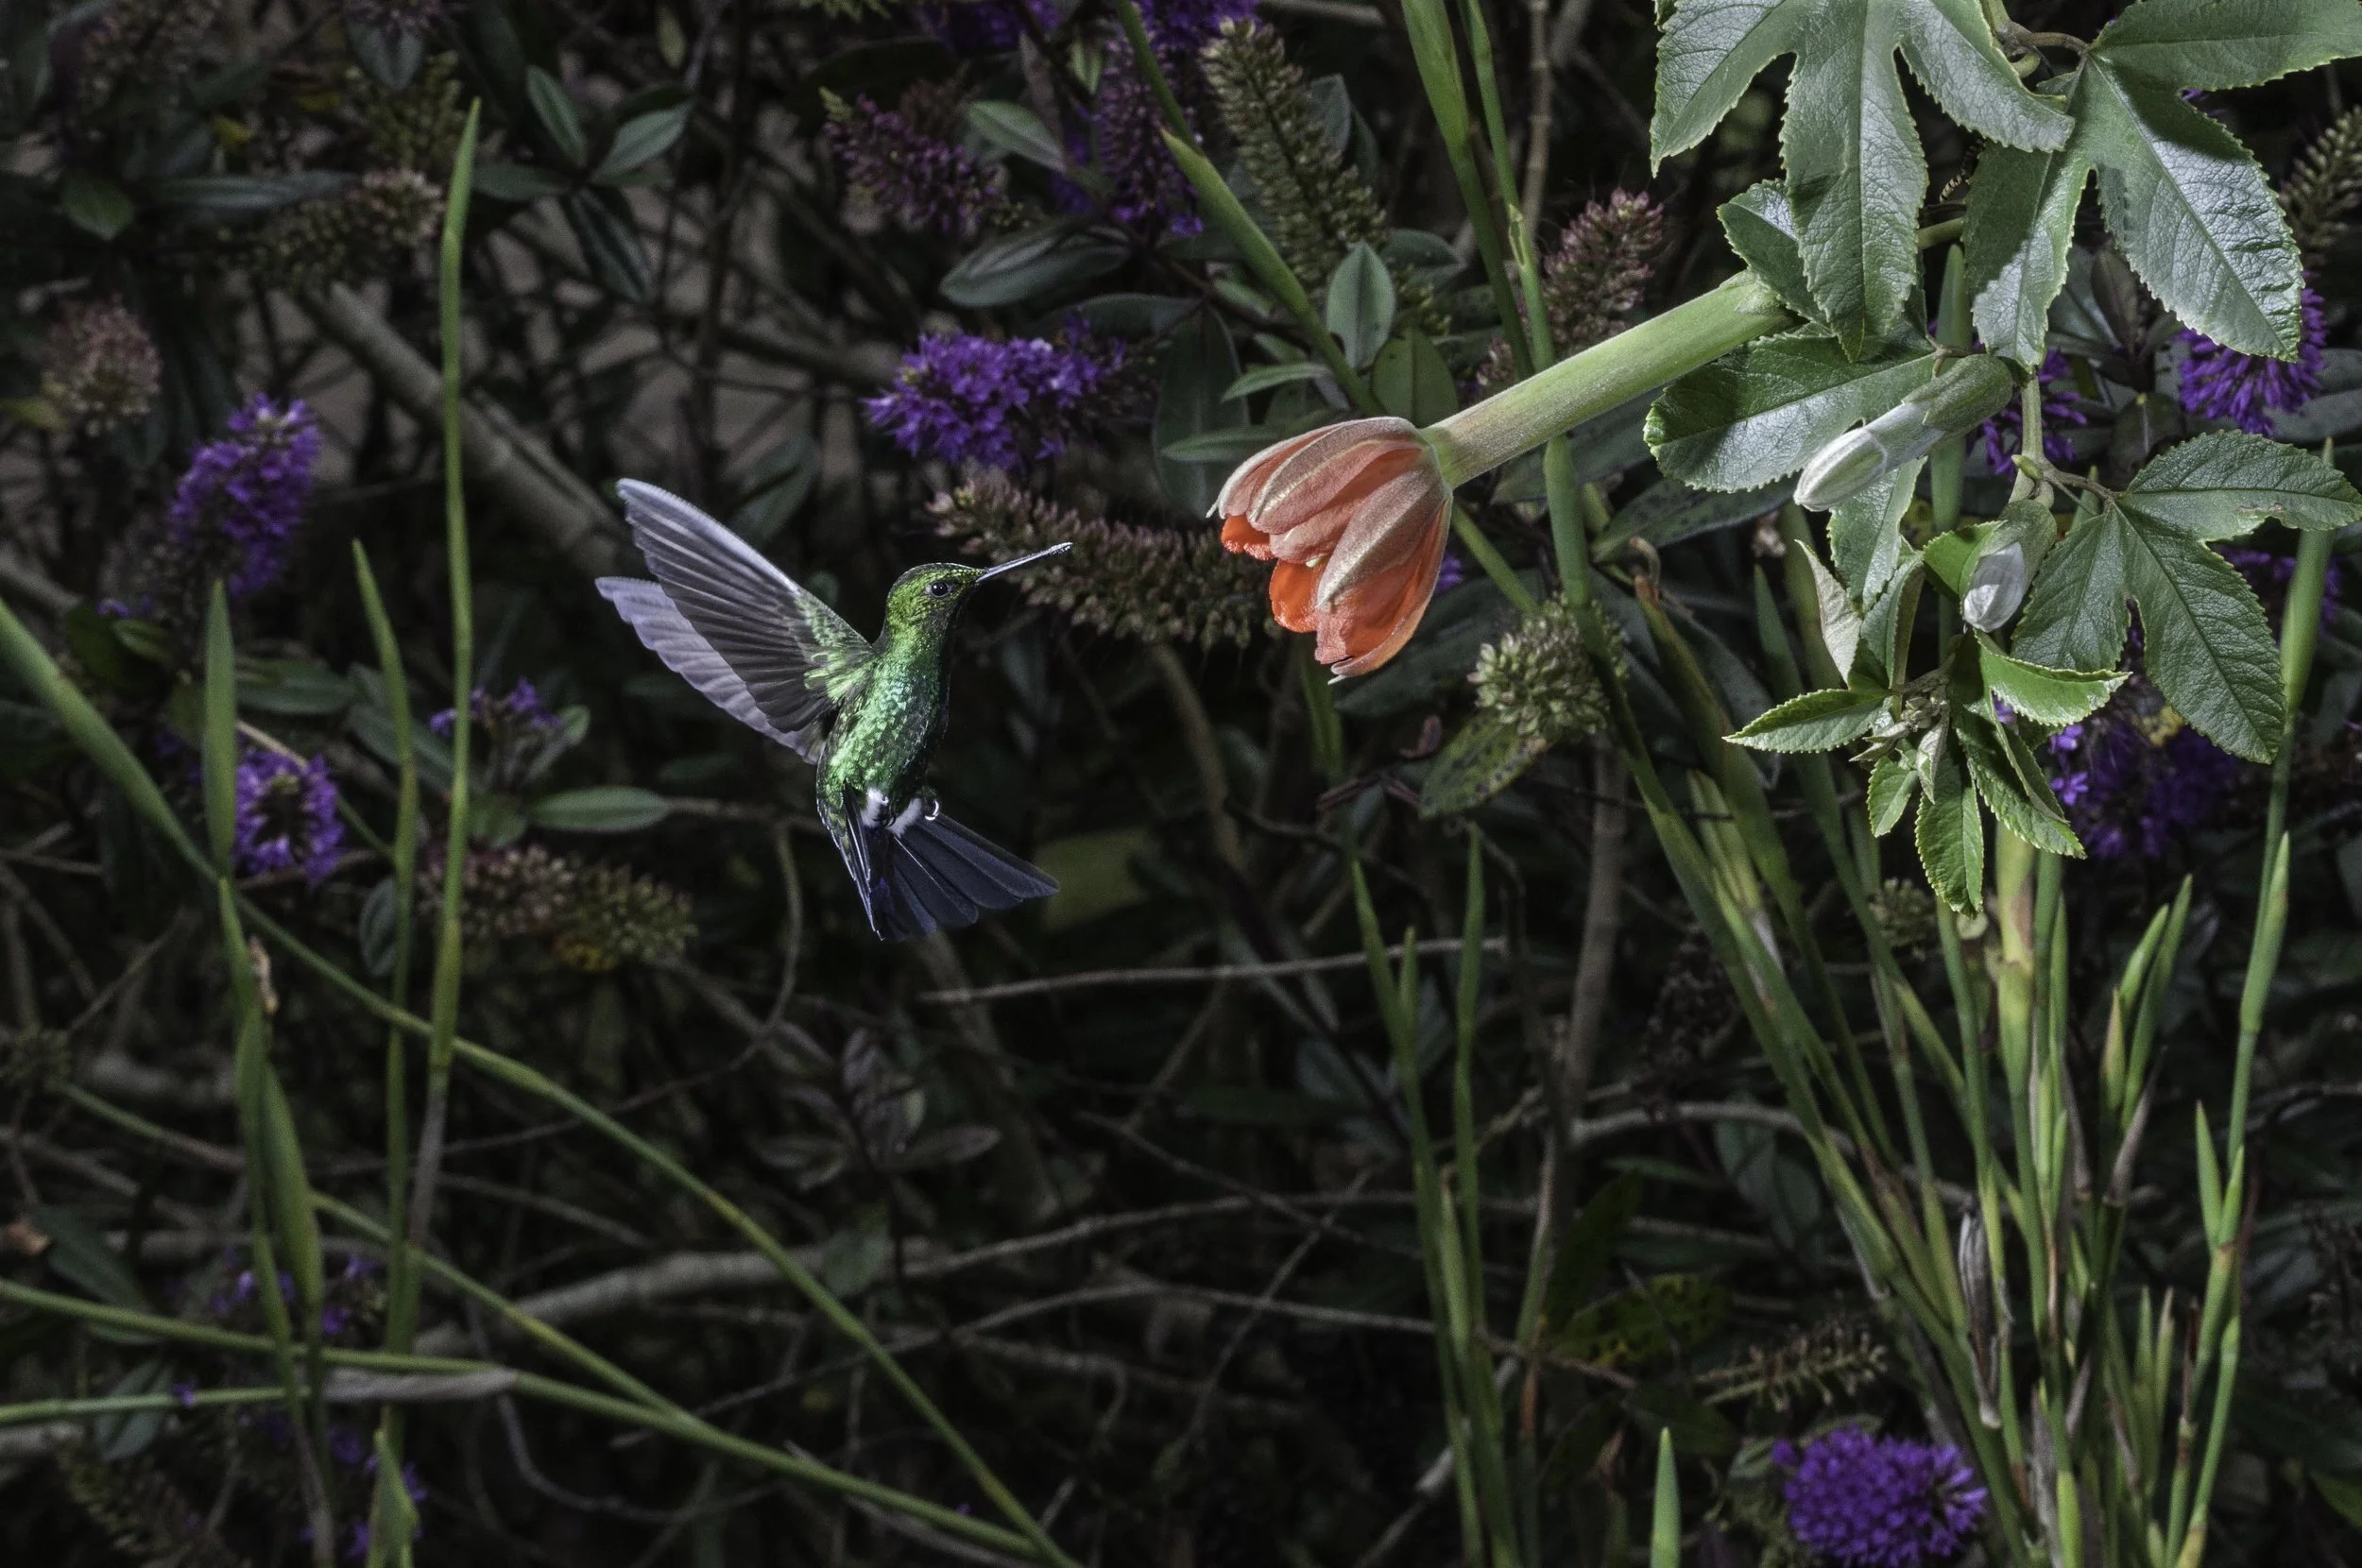
Male glowing puffleg, Eriocnemis vestita, inspecting an opening flower on Passiflora mixta. The original objective of this scene was to photograph a resident sword-billed hummingbird, Ensifera ensifera, feeding at this particular passion flower. I used three flashes to light the flower and hummingbird, plus another two flashes to light the background. The stage was set, but the sword-bill was a no-show diva. As a consolation prize, this compliant, "can-do" puffleg arrived to scope out the flower and now (hopefully) is a global media star!
All content ©Exotica Esoterica® 2018 and ©Peter Rockstroh 2018