Micro Budget Macro
by Peter Rockstroh
Few photographic subgroups are as rewarding and offer as much fun as macrophotography. Even a small backyard or tiny green space can transform into a rich hunting ground when you point your camera at small details and enlarge them to supernatural size. This is an especially valuable format under the current circumstances; with shelter in place orders in effect across many parts of the world, extreme close-up work can provide a great opportunity for creating fantastic images as well as for the photographer’s general entertainment.
To me the most entertaining aspect of macrophotography is the hunt for the image. It is quite literally Little Game Hunting when you can go out with handheld equipment and capture critters and their interactions. Extreme close-up gear can get clumsy and difficult to focus and compose, although with practice and artificial light to freeze the moment you will ultimately get the hang of it.
Depending on the author, “macrophotography” (alternately, “macro photography”) is a flexible term that encompasses any image taken closer than the minimum focusing distance of your normal lens.
Technically, a standard or “normal” lens is a lens whose focusing distance is equal to the diagonal of the film or digital sensor format of your camera. Why is that such an important reference?
Since a lens projects a circular image on the film or digital sensor, the normal lens is the shortest lens that covers the film area. From a practical point of view, the normal lens is also the lens that has approximately your average field of view.
Other authors consider that macrophotography are images that are at least 1:1 in scale on sensor or film, meaning that if you photograph a 10 mm (13/32”) long bug, it should be recorded on film or sensor at least 10 mm long to be considered macro
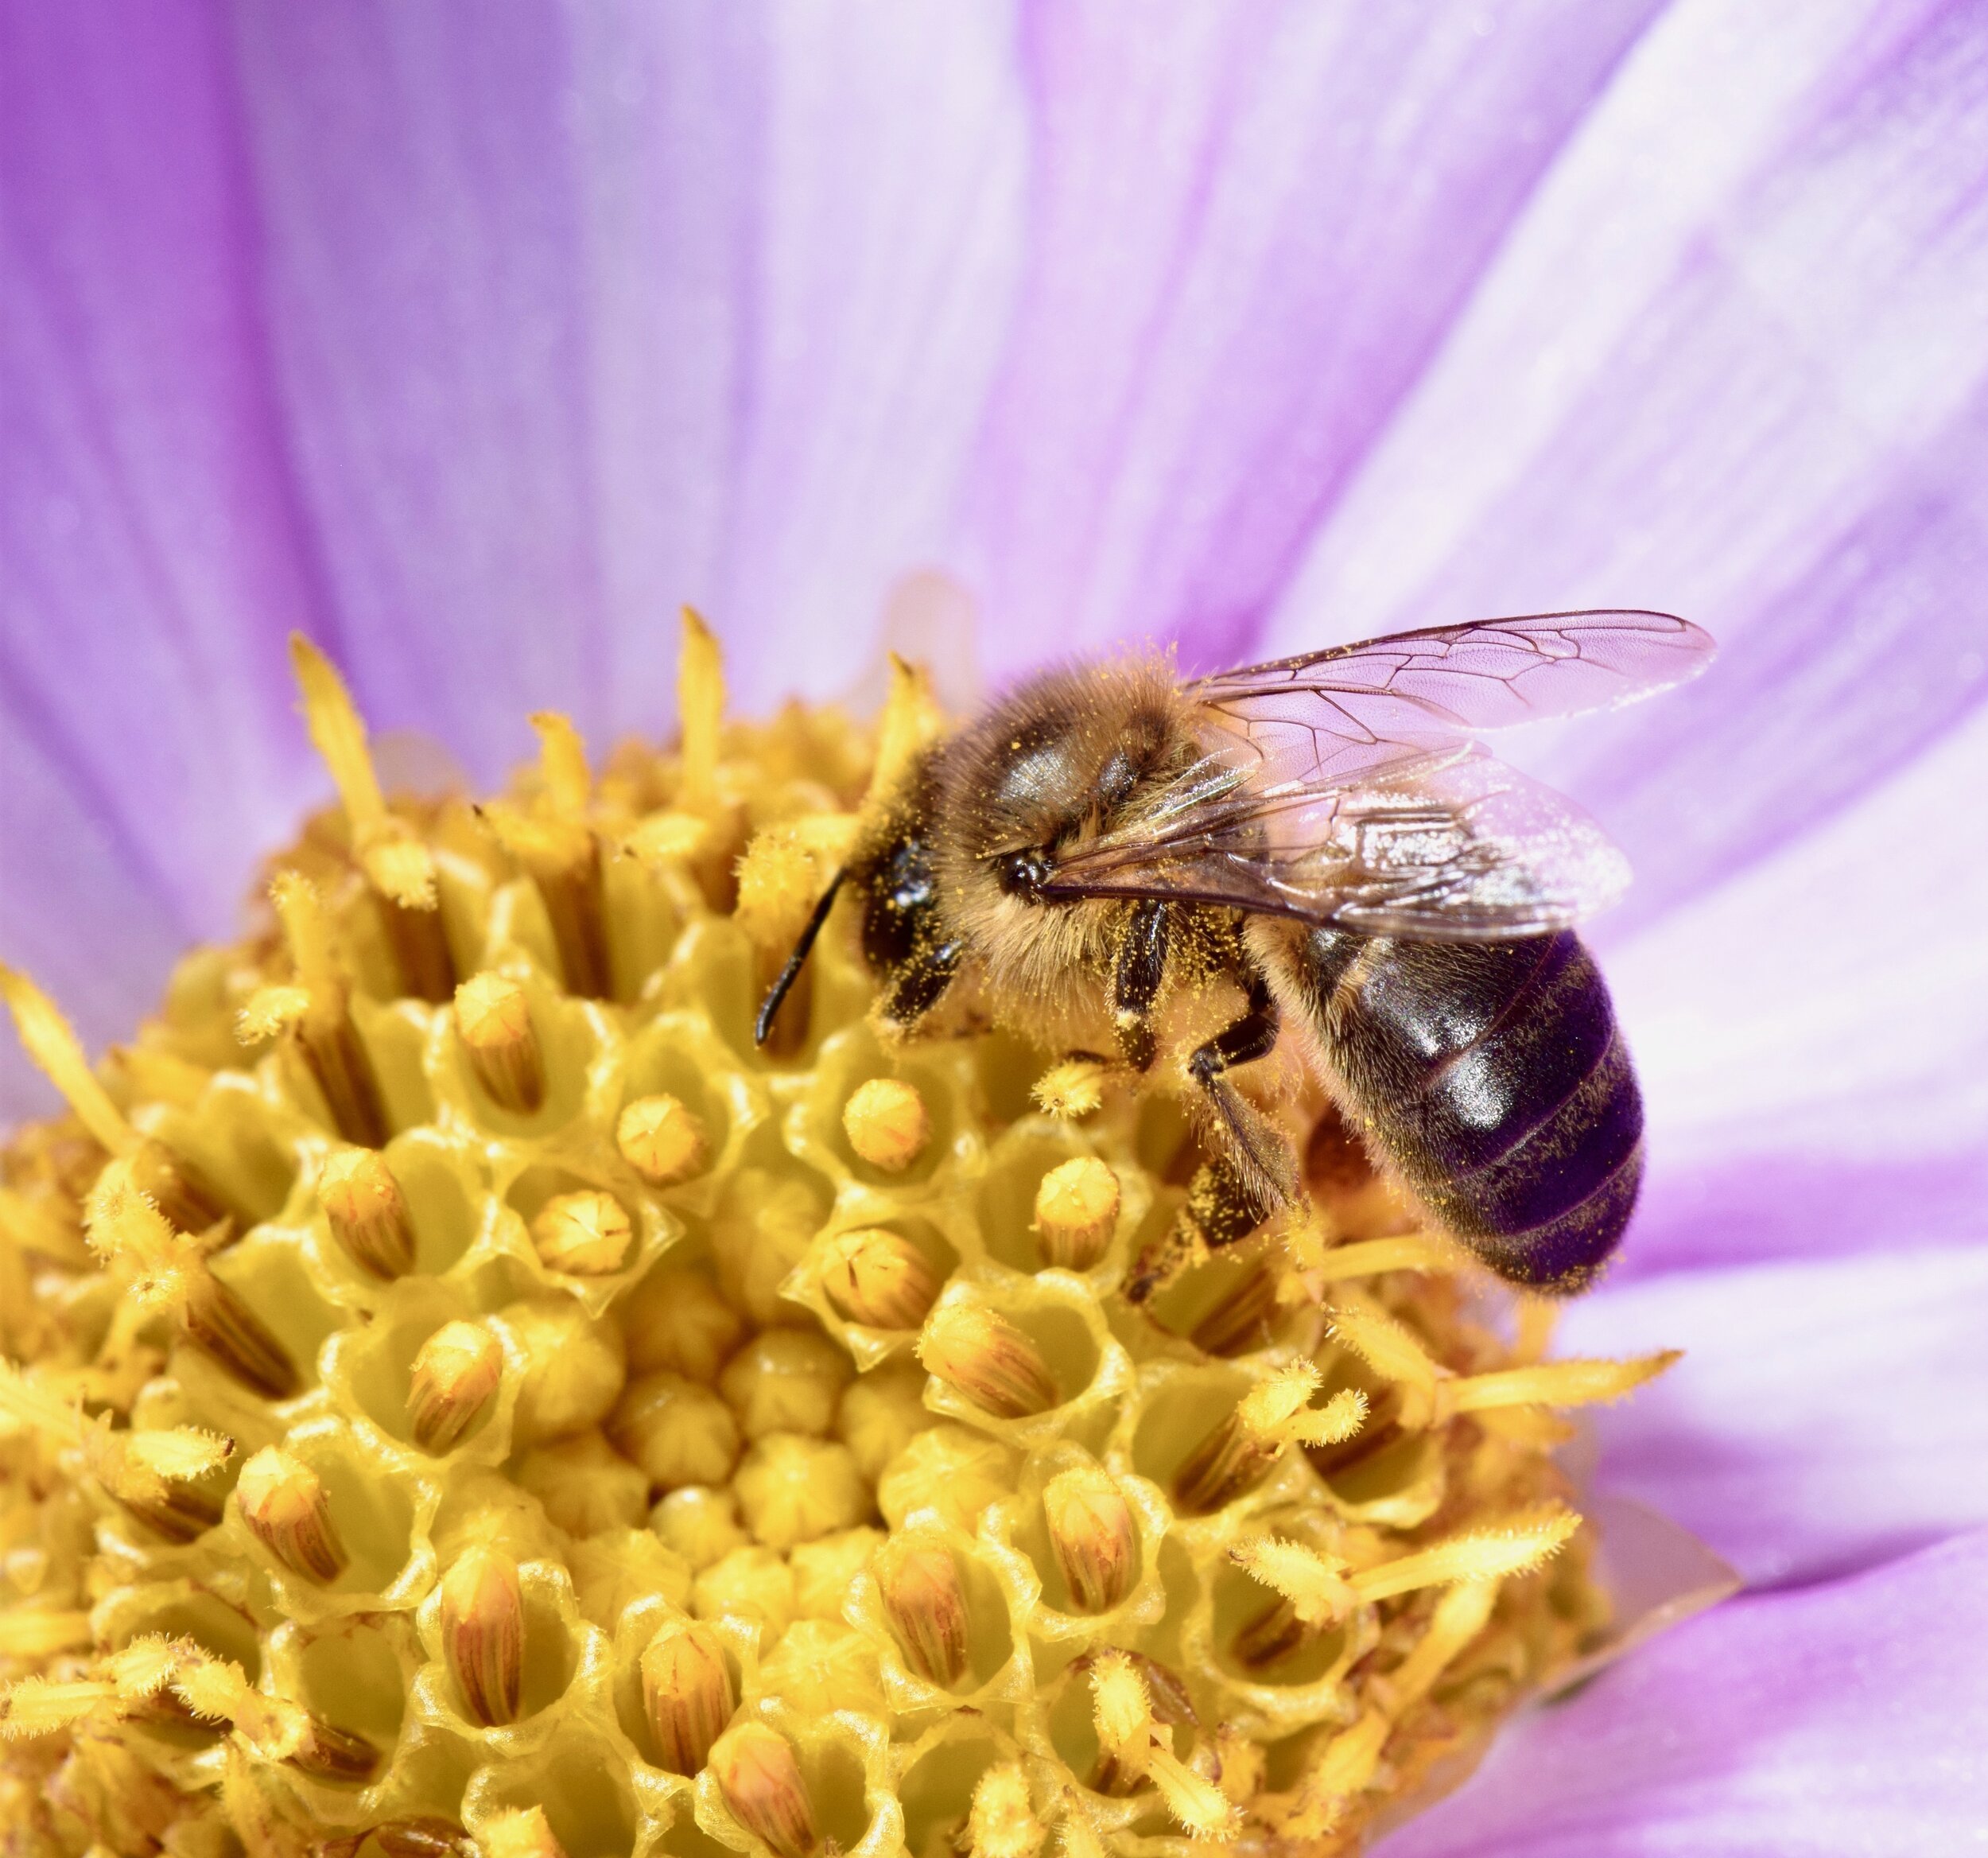
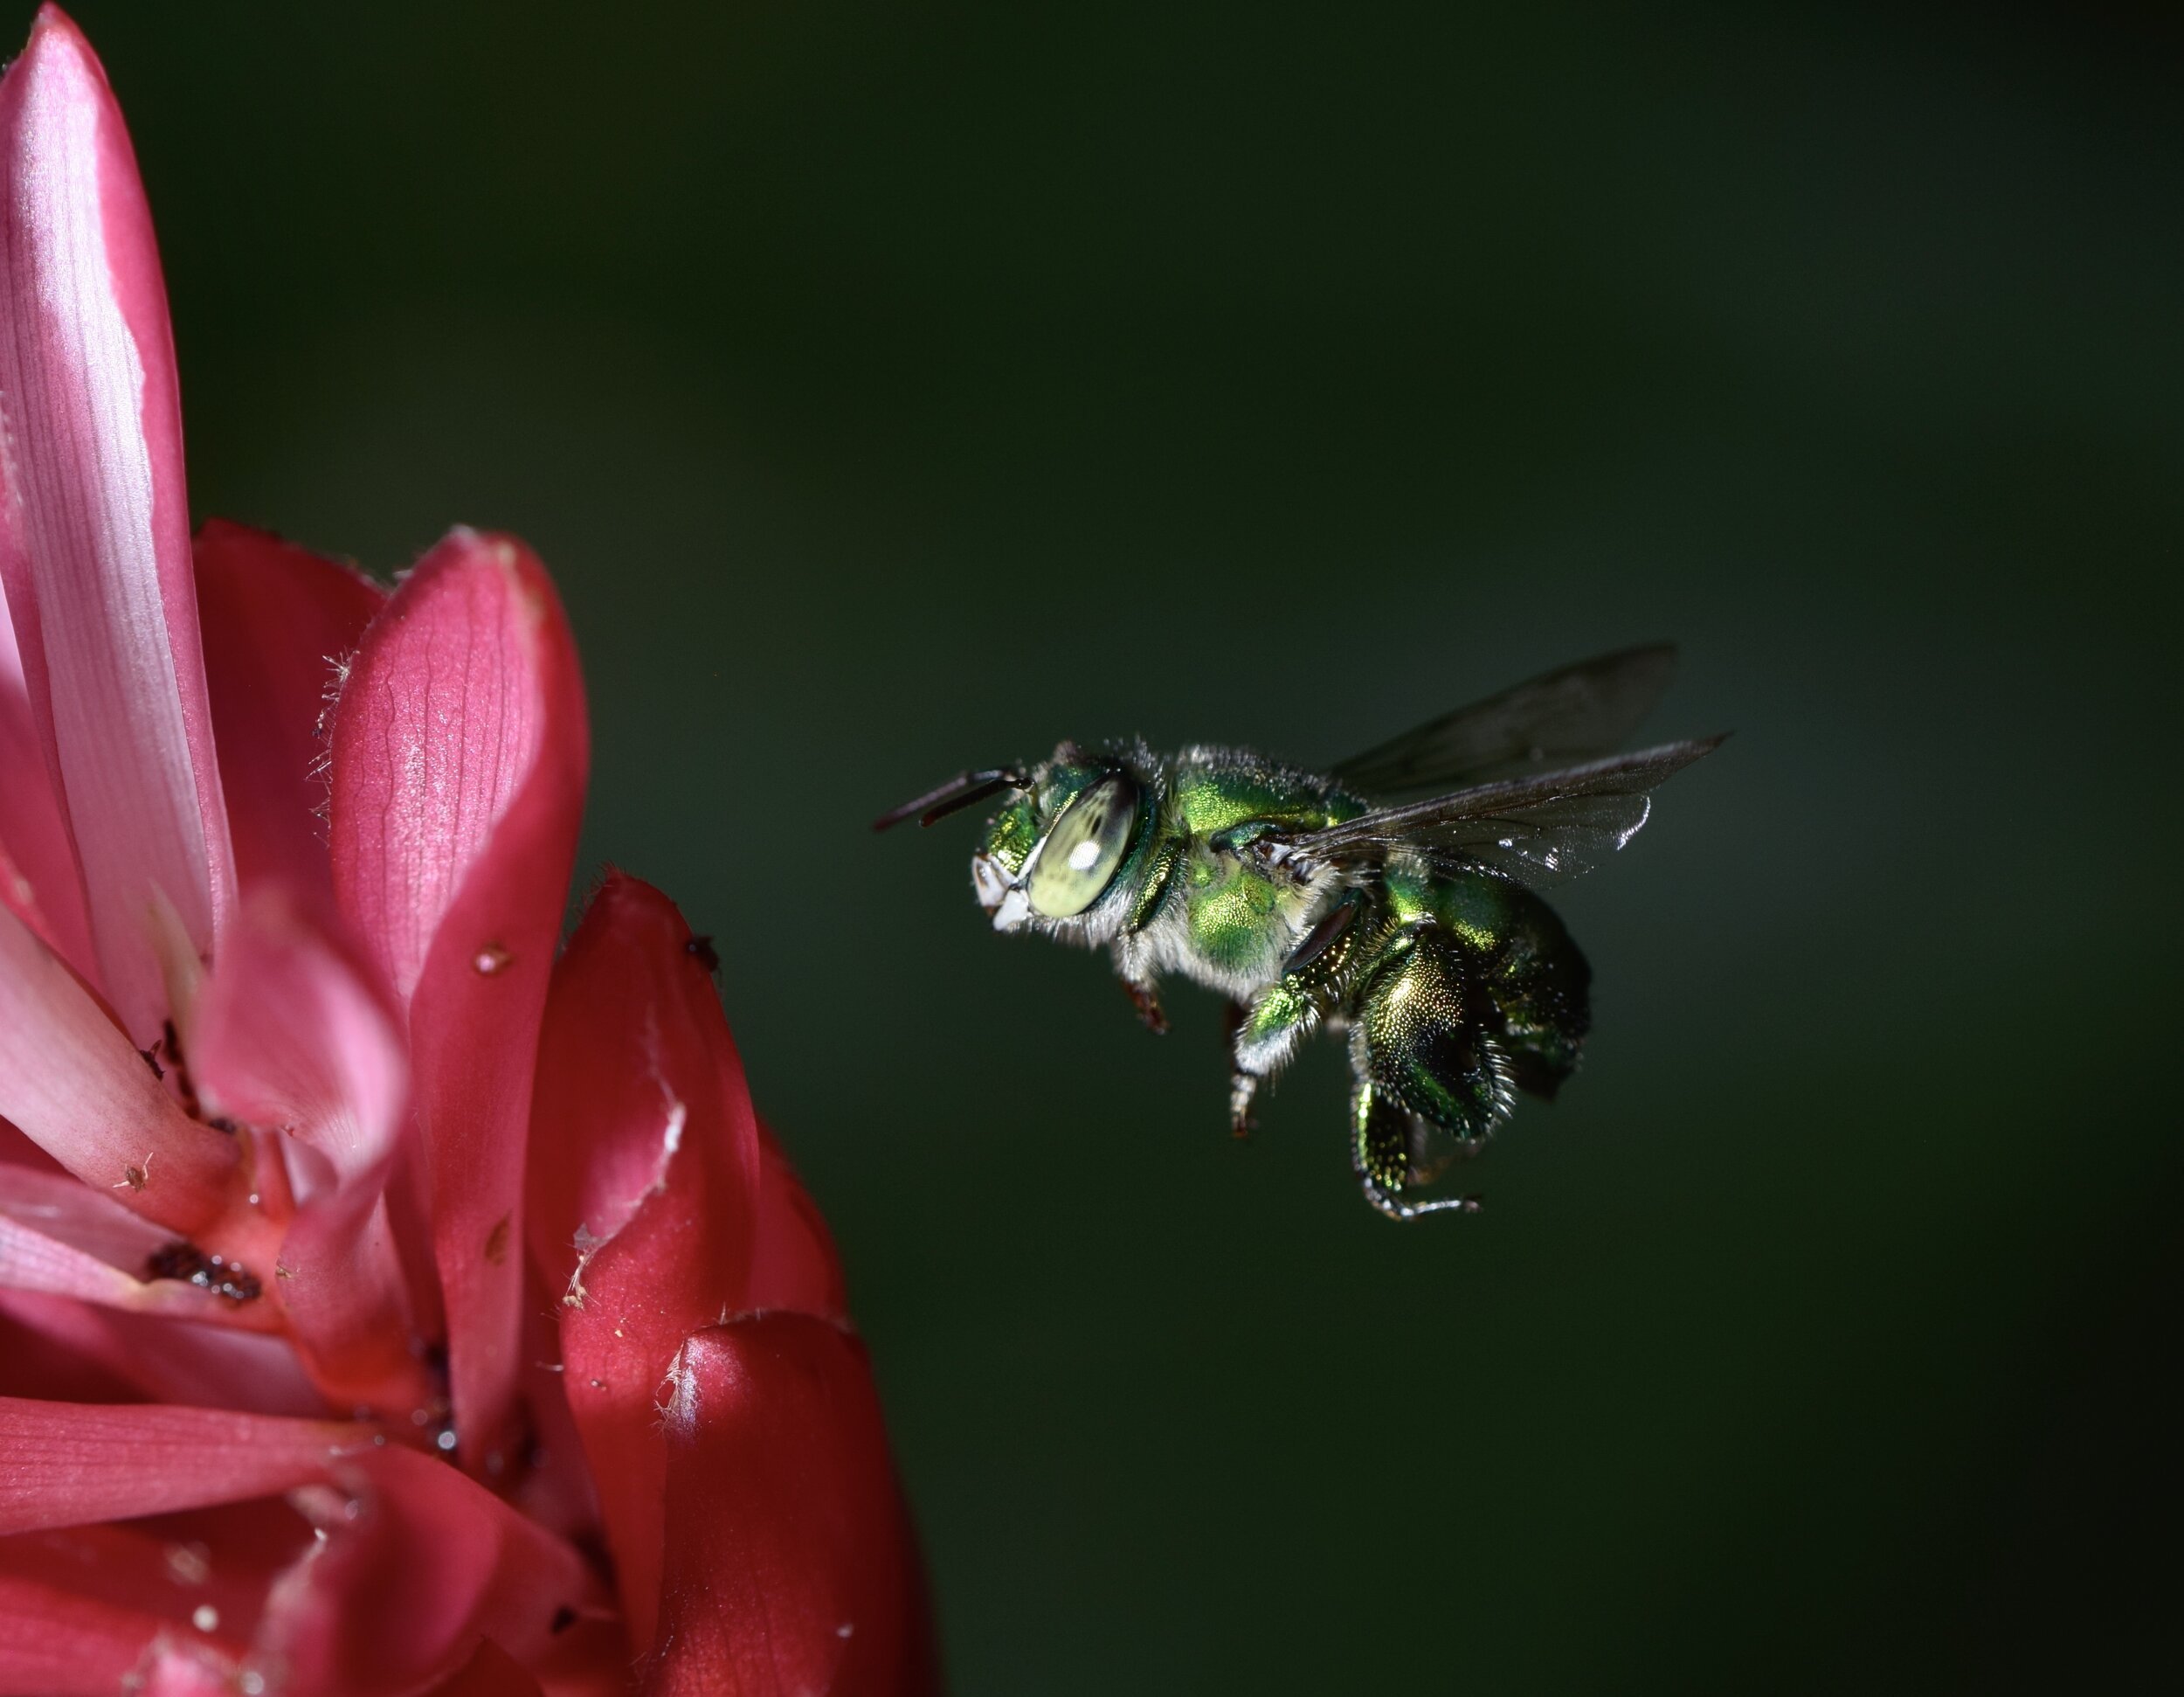
Practical examples of closeups shown above include a honeybee (Apis mellifera) that was photographed pre-focusing and moving close to the flower, until the subject was in focus, this orchid bee (Euglossa sp.) was lured into focus with a drop of clove oil. Good light is essential in macrophotography; not only in terms of total luminosity numbers, but also in quality and direction. While a hot-shoe or lens-mounted light source can help in most situations, I prefer independent handheld units that give me the liberty of choosing where I need the light coming from, as in the image of side lit leaves and stalked glands of a Cape sundew (Drosera capensis) shown right.
How can one get that close to a subject? There are several ways to achieve this. The first is buying a dedicated macro lens. These are lenses with close-focusing lens configurations, and they are sold with different focusing distances. The longer the focusing distance, the farther away from the subject you can be taking close-ups. This comes in quite handy when you want to do close-up work of small animals with a nasty disposition, poisonous or otherwise harmful to the photographer or their wallet. Depending on the lens quality, materials and lens coatings, they can range from about USD 200.00 to over USD 2,000.00. Their focusing range extends from their closest focusing distance to “infinity and beyond”, making them practical for several uses, including portraits (the longer lenses, i.e. >100 mm) and even landscapes (40 mm and less). For some time, we of Los Esotéricos were mostly unaware of the existence of macro lenses with long focal distances. Because of this, we have a lot of recorded evidence of risky stupidity backstopped by an alibi of ignorance to prove it, but have decided to leave Exhibits 1 through 96 safely hidden in our slide collections.
The second option to get a closer look is increasing the distance between a normal lens or macro lens and image plane, to increase the enlargement factor. This can be done with a set of rings or extension tubes that are connected between lens and camera. A similar option, but more expensive is a bellows. This extension allows the photographer a smooth increase in distance between film plane and lens and enlargement factors of up to 8:1, but restrict the focusing range to very short distances.
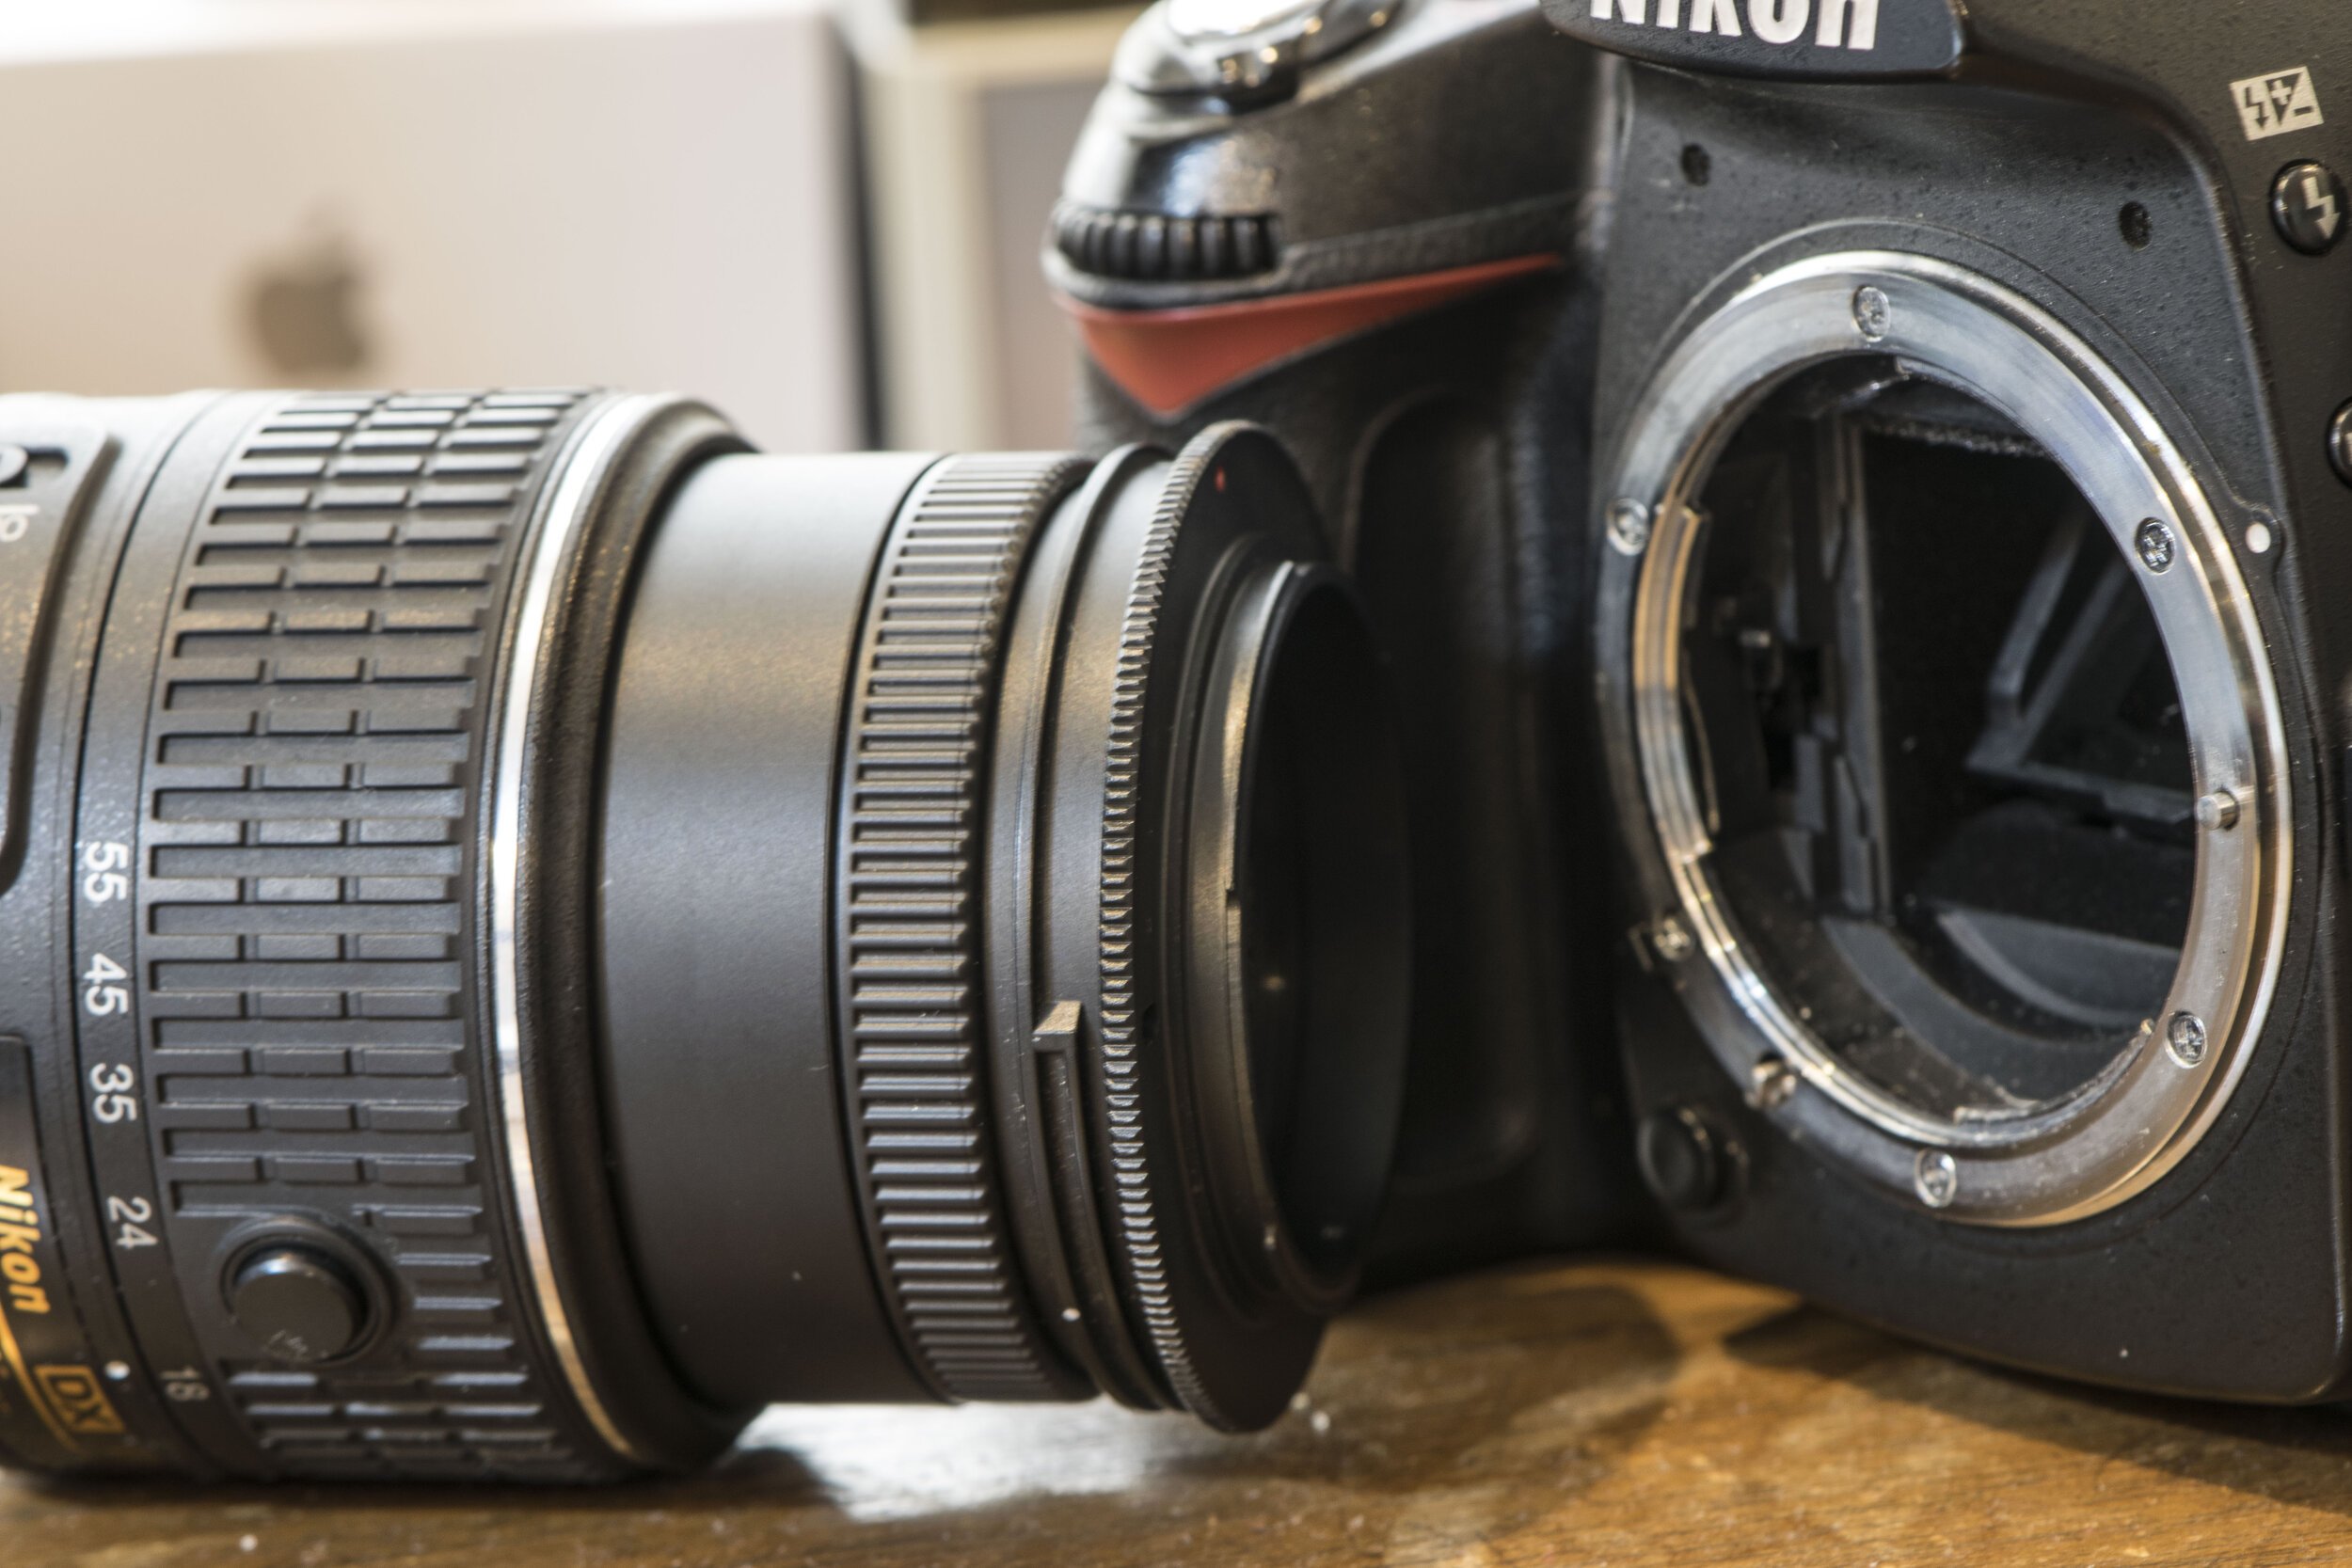
Lens shown mounted in reverse onto the camera body. What is visible of the lens in this image are the pins and conectors that normally affix lens to camera. Bottom right shows the golden dots that are electronic contacts; bottom left shows a square silver lever, which normally controls the aperture
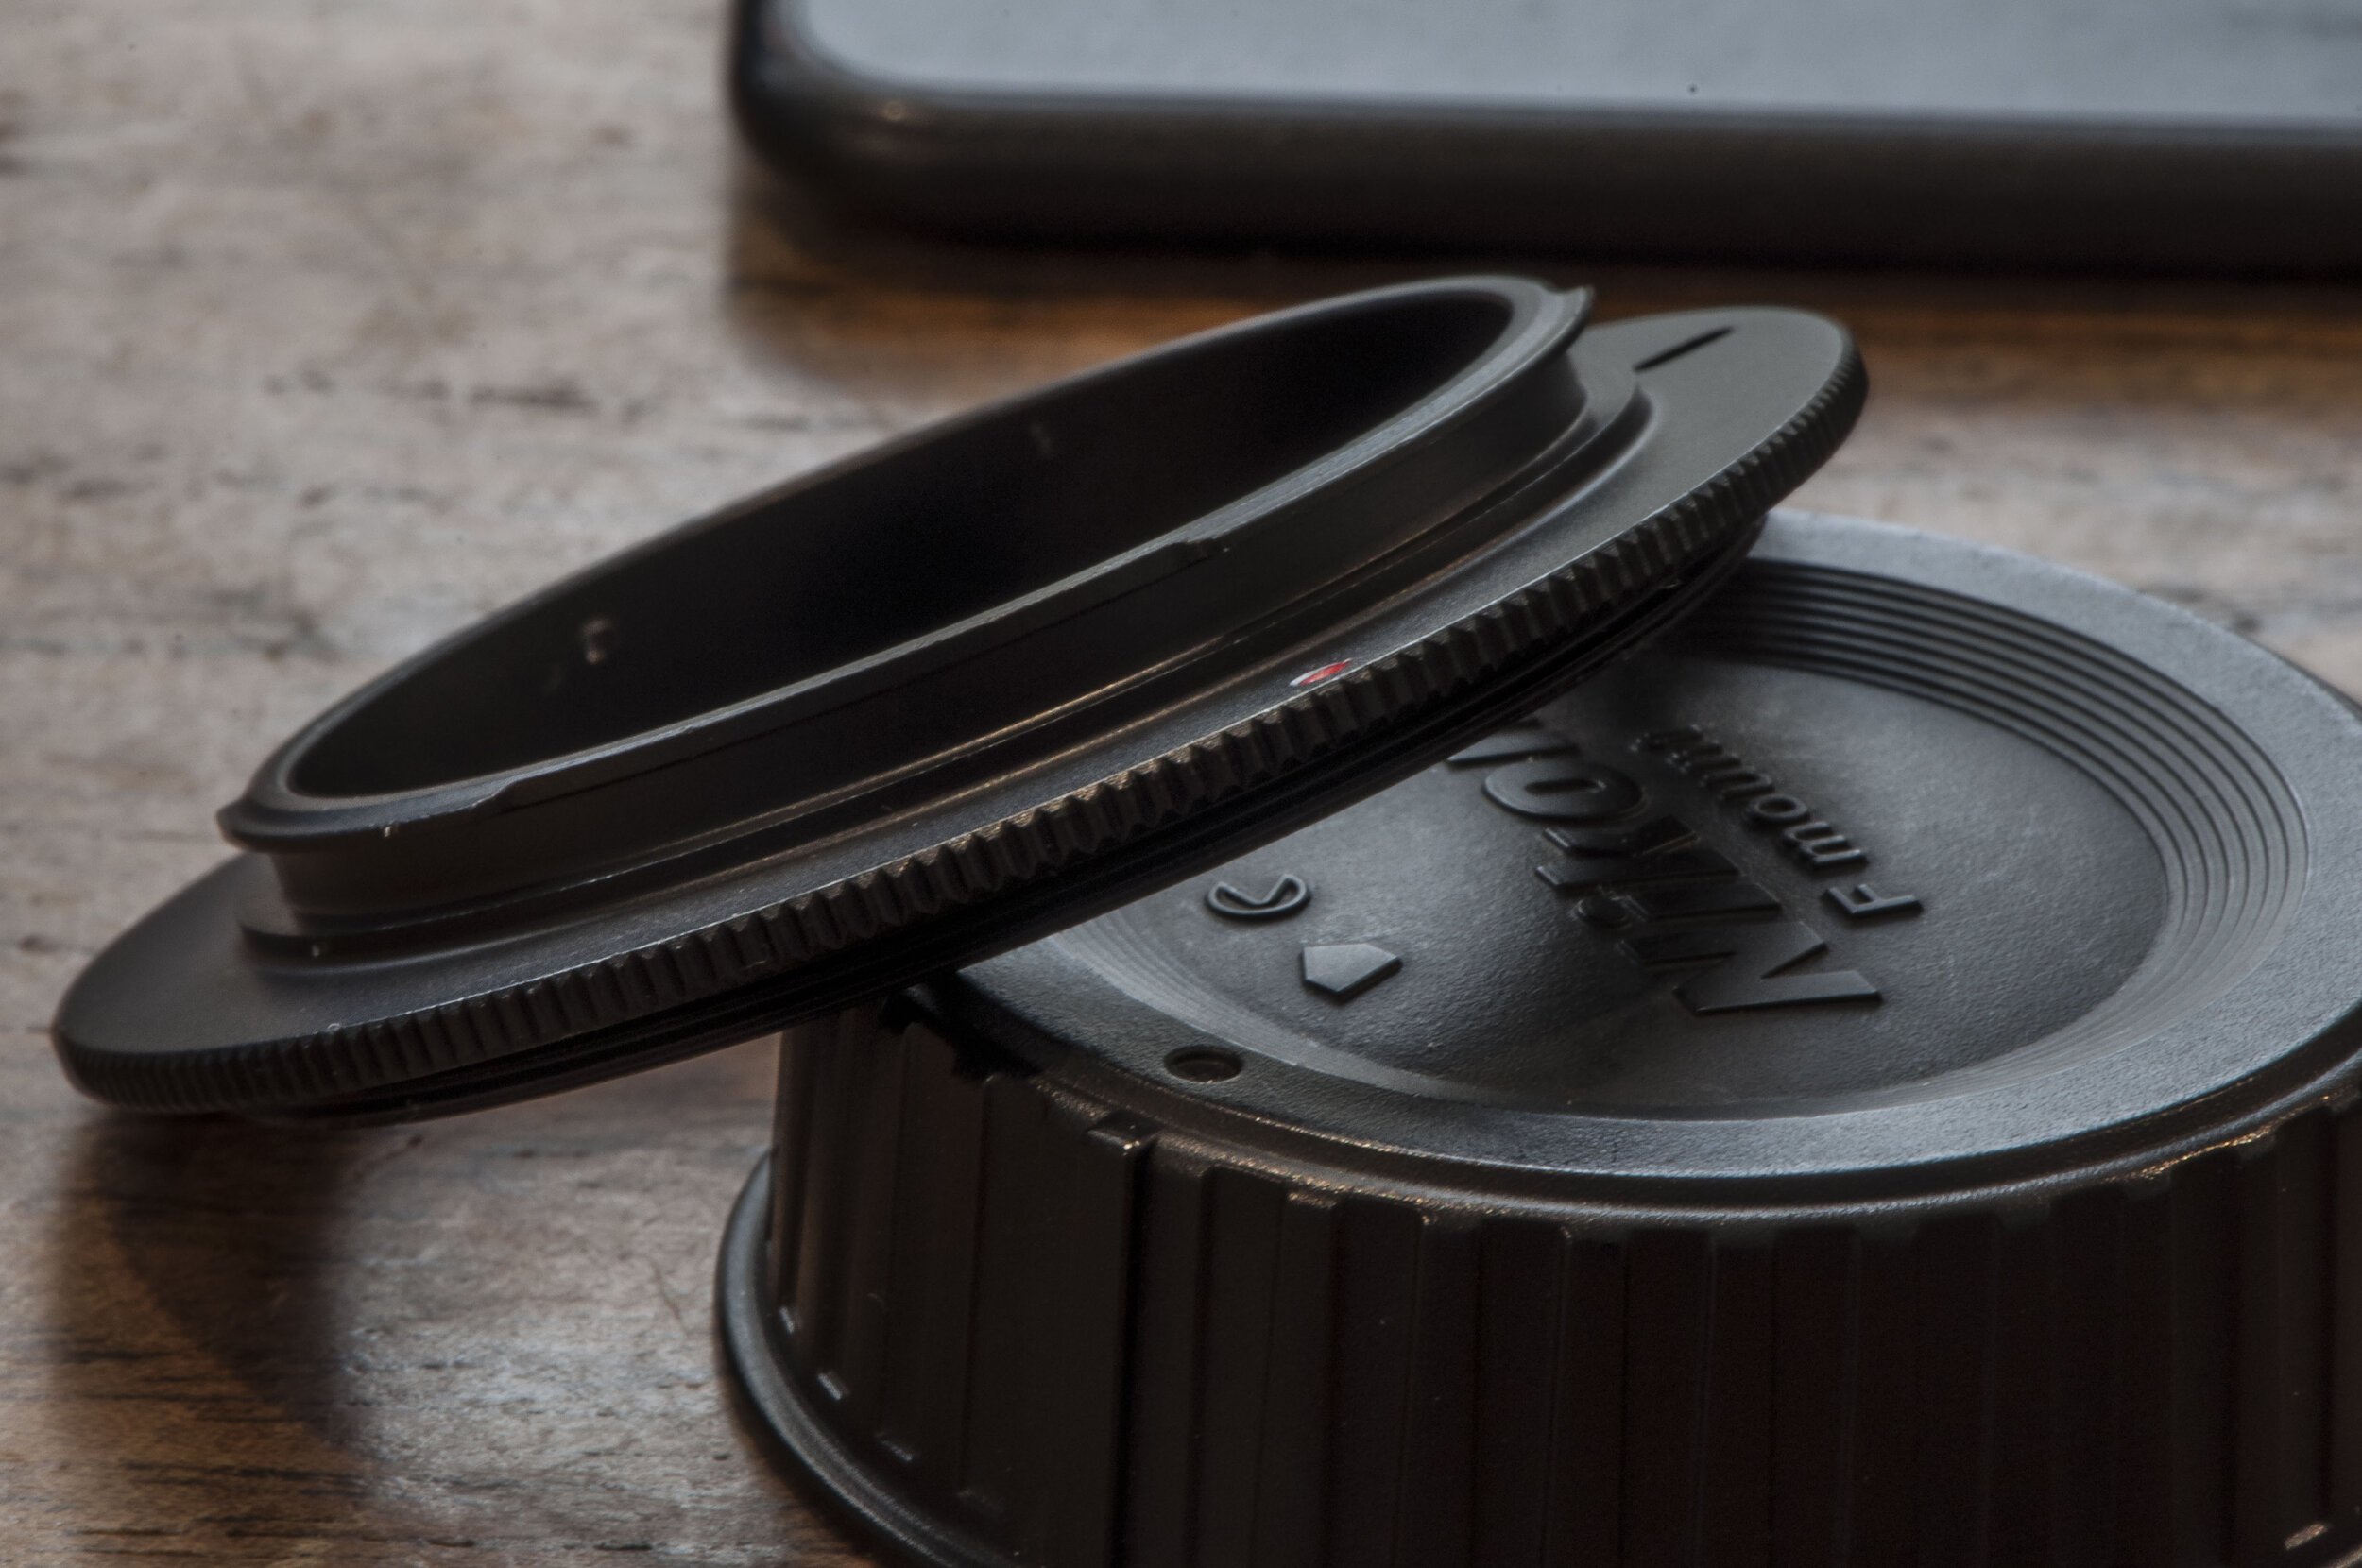
A further option involves buying a reversal mount ring, which allows you to take a standard (50 mm) or wide angle (15 mm) lens and reverse it. This is done by screwing the reversal ring to the front of the lens, which then snaps into the bayonet mount for each specific camera brand. One is shown above left - leaning James Dean-style aginst a lens cap - with a Nikon bayonet mount uppermost and the threads facing down. Shown above right is the reverse mount screwed into the front of the lens. Visible in this image are the two red dots that must be aligned in order to mount the lens into the camera’s bayonet mount. Now one has very close focusing capabilities and at a fraction of the cost of the previous options but, since the coupling mechanism is now turned away from the camera, it is necessary to preset the aperture on the lens before screwing it in. While inverting the lens is the least expensive option for achieving macro range focusing capacities, the exposure has to be calculated or corrected via trial and error, which fortunately is quite simple and fast in digital format.
Other alternatives to get closer to your photographic subjects are diopter filters and macro lens extensions. Please bear in mind that every time you add a glass surface between your subject and the film/sensor, you add more layers that interact with light. Avoid everything but the very best filters. It makes no sense using a high-quality lens and then in an effort to save a few dollars, placing poor optics in front of it. If you can afford great close-up filters, they will certainly make your camera bag lighter, as well as your wallet.
During these past several weeks I have been wanting to do more and closer macro work, so I started looking at gear prices. Definitely, a lens reversal ring was the cheapest way to get closer to my subjects. Looking at the lens structure of a typical 50 mm lens and what it would look like inverted, it looked quite similar to the lens layout of my Nikon 18-55 mm zoom, sans the front elements. The 18-55 mm is a great all-round lens which a lot of people have as their standard go-to lens. I rarely use it, since I prefer fixed lenses for landscape and I take a lot of shots that are telephoto images. Since I had three of these lenses on hand, I decided to try to convert one of them into a macro lens.
DISCLAIMER:
Since I am both old and unwise enough to legally buy costly photographic equipment and tinker with it, I shoulder all responsibility for any of my pieces lost, broken or misused. In this article I am showing you the results of my recent experimentation as an exercise, not a recommendation. Should you decide to take your camera equipment apart, you assume all responsibility for the damages that may be caused to your equipment, not me. Unless you have a lens identical to the make and model that I used for this project you may not see anything like the same results.
Indeed, you may very well end up ruining your lens because you mistook me for a brilliant technician, photographic visionary and all round role model for this generation. I am sorry if I disappoint you, but I hardly consider myself a genius as a photographic equipment tinkerer, so always use common sense when tearing things apart.
In closing, please don’t “borrow” your parent’s, spouse’s, sibling’s or what might end up being a soon-to-be ex-friend’s expensive camera lens to play around with based on things you see in this article.
And now, on to the actual hack:


Above top, a cutaway view of the normal arrangement of lens elements and bottom, the arrangement when mounted on a reversal ring. In both images the light is coming through the lens from the left.

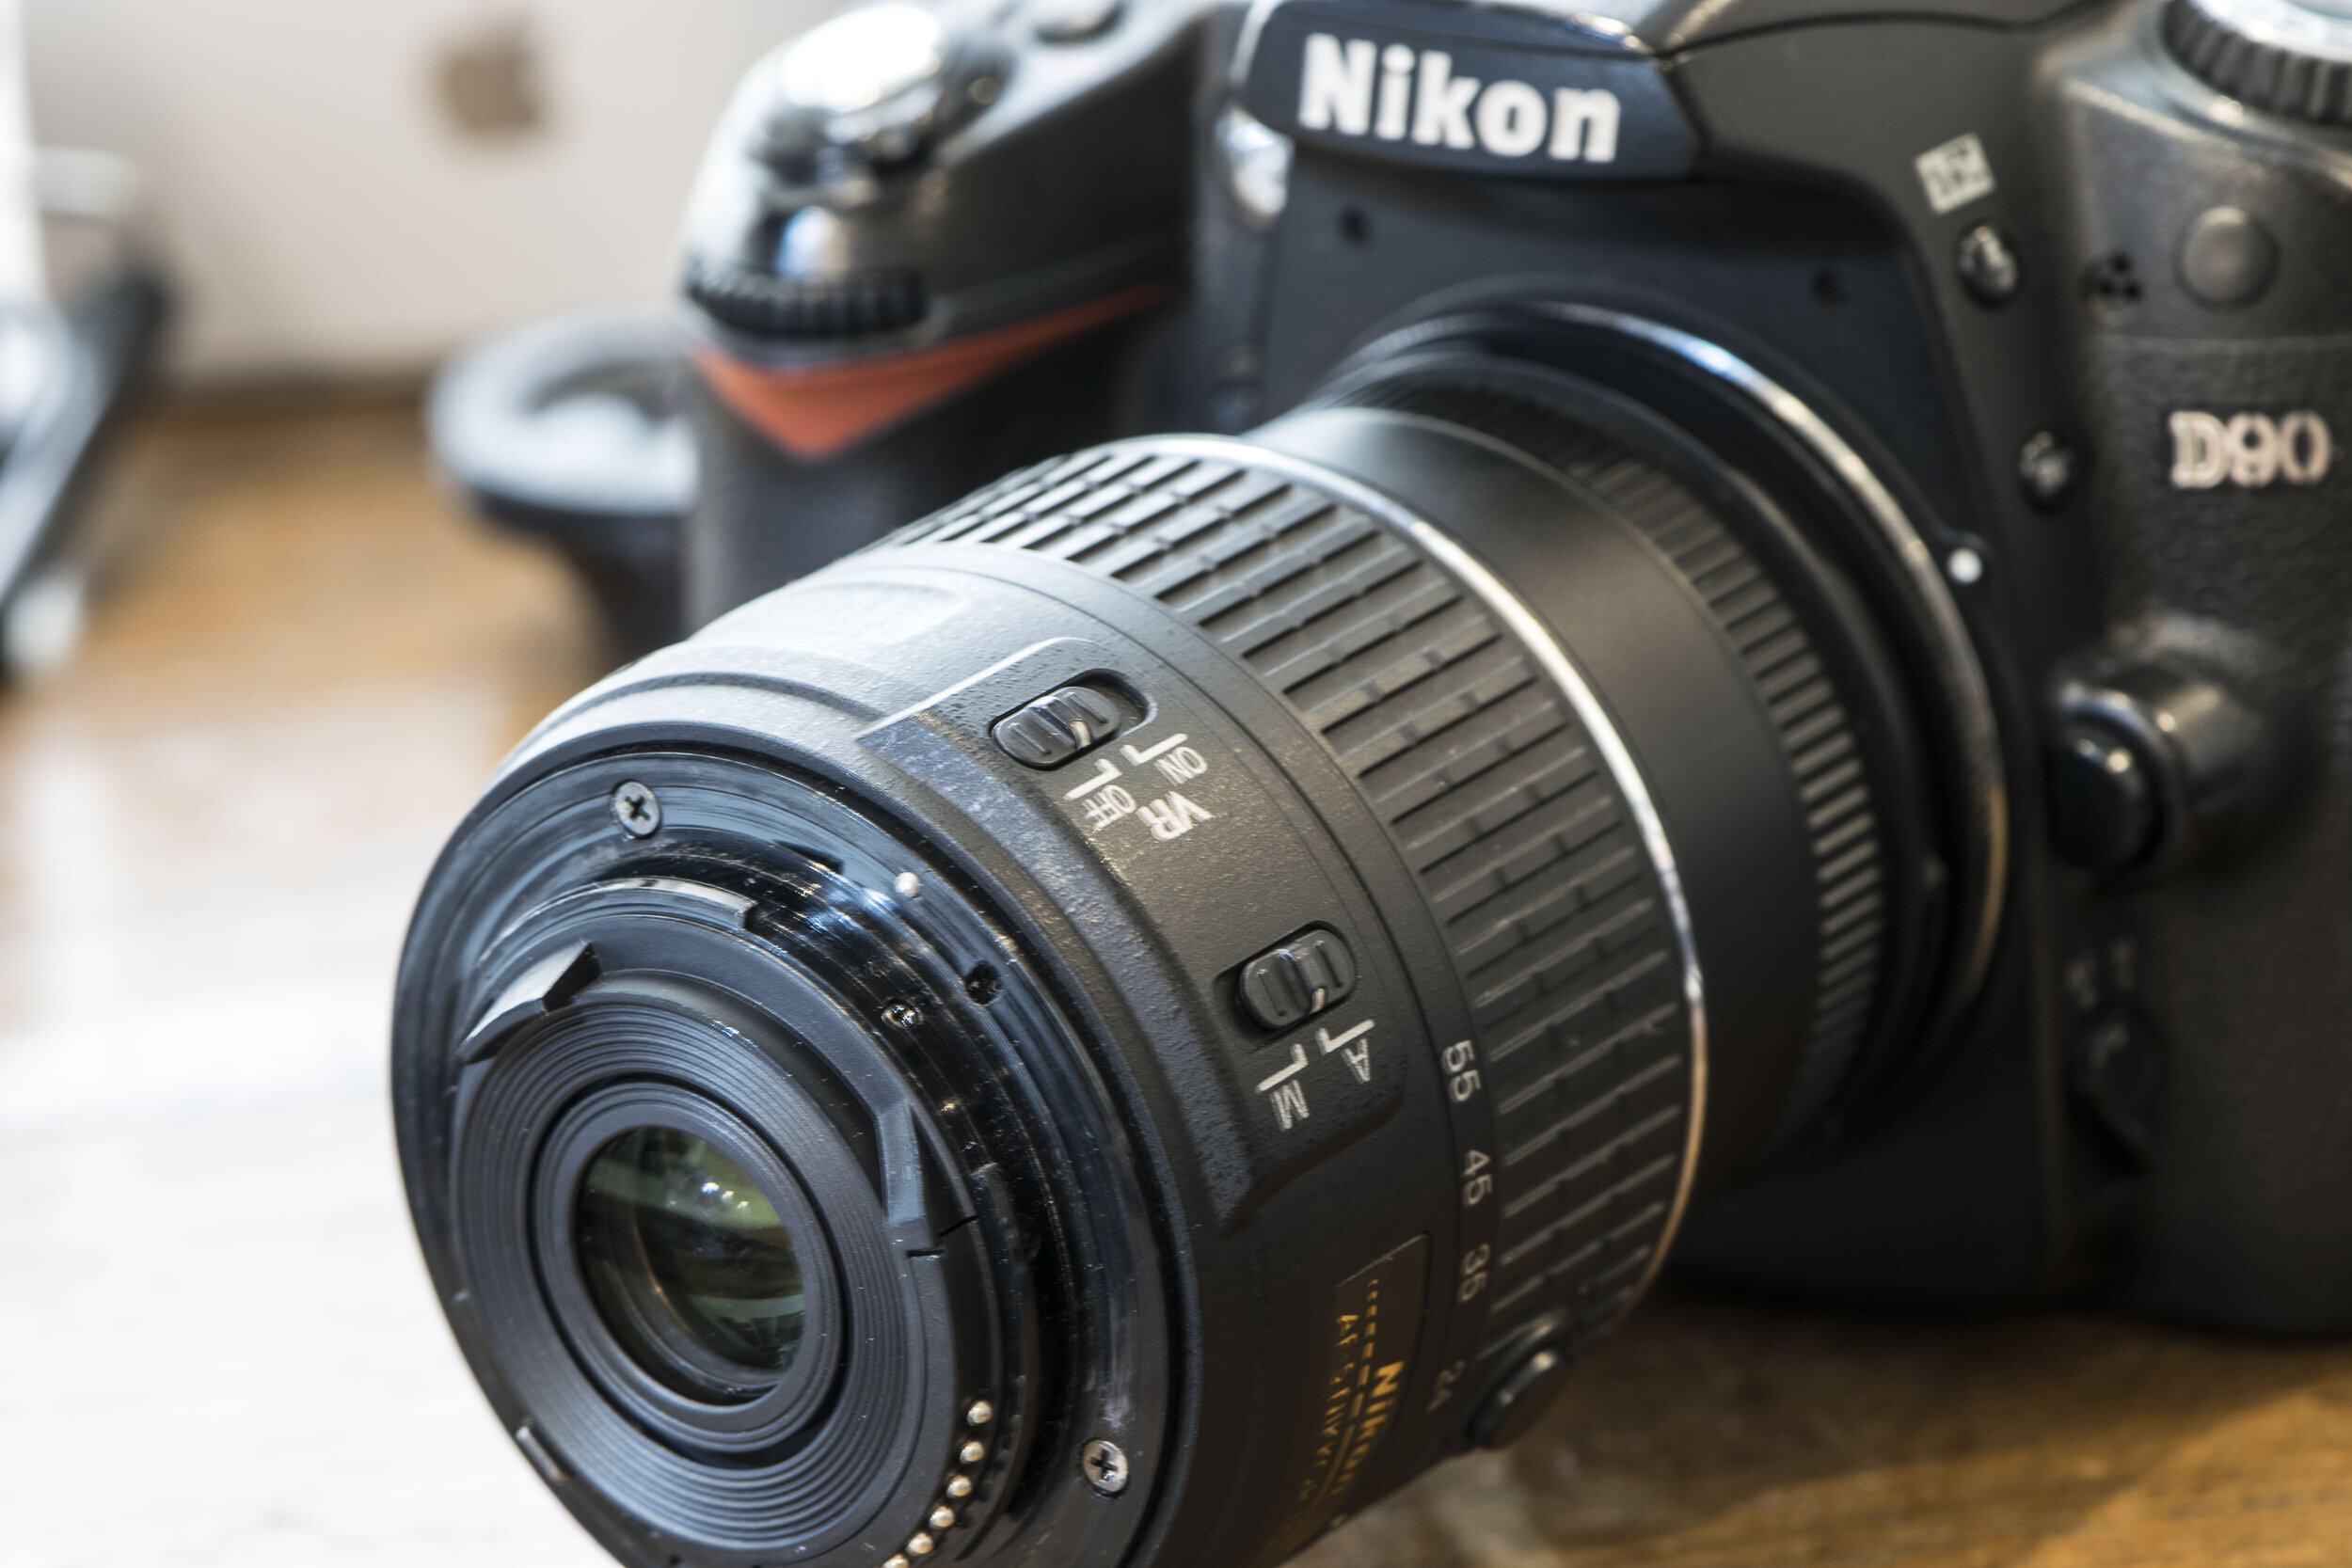
Shown left is the lens setup that normally comes with the camera under discussion if you buy it in a bundle that includes a camera body, lens plus a cleaning kit, strap and carrying bag. It is a reasonably good lens for everyday use, but I rarely find need for it in my work.
Looking at this lens arrangement, the lens group on the right side looked quite like the lens arrangement of the reversed lens above. Being unscrupulous and of a curious and often destructive disposition, I decided to take out the front elements of my 18-55 mm lens and see if I could actually achieve sharp focus without those elements.
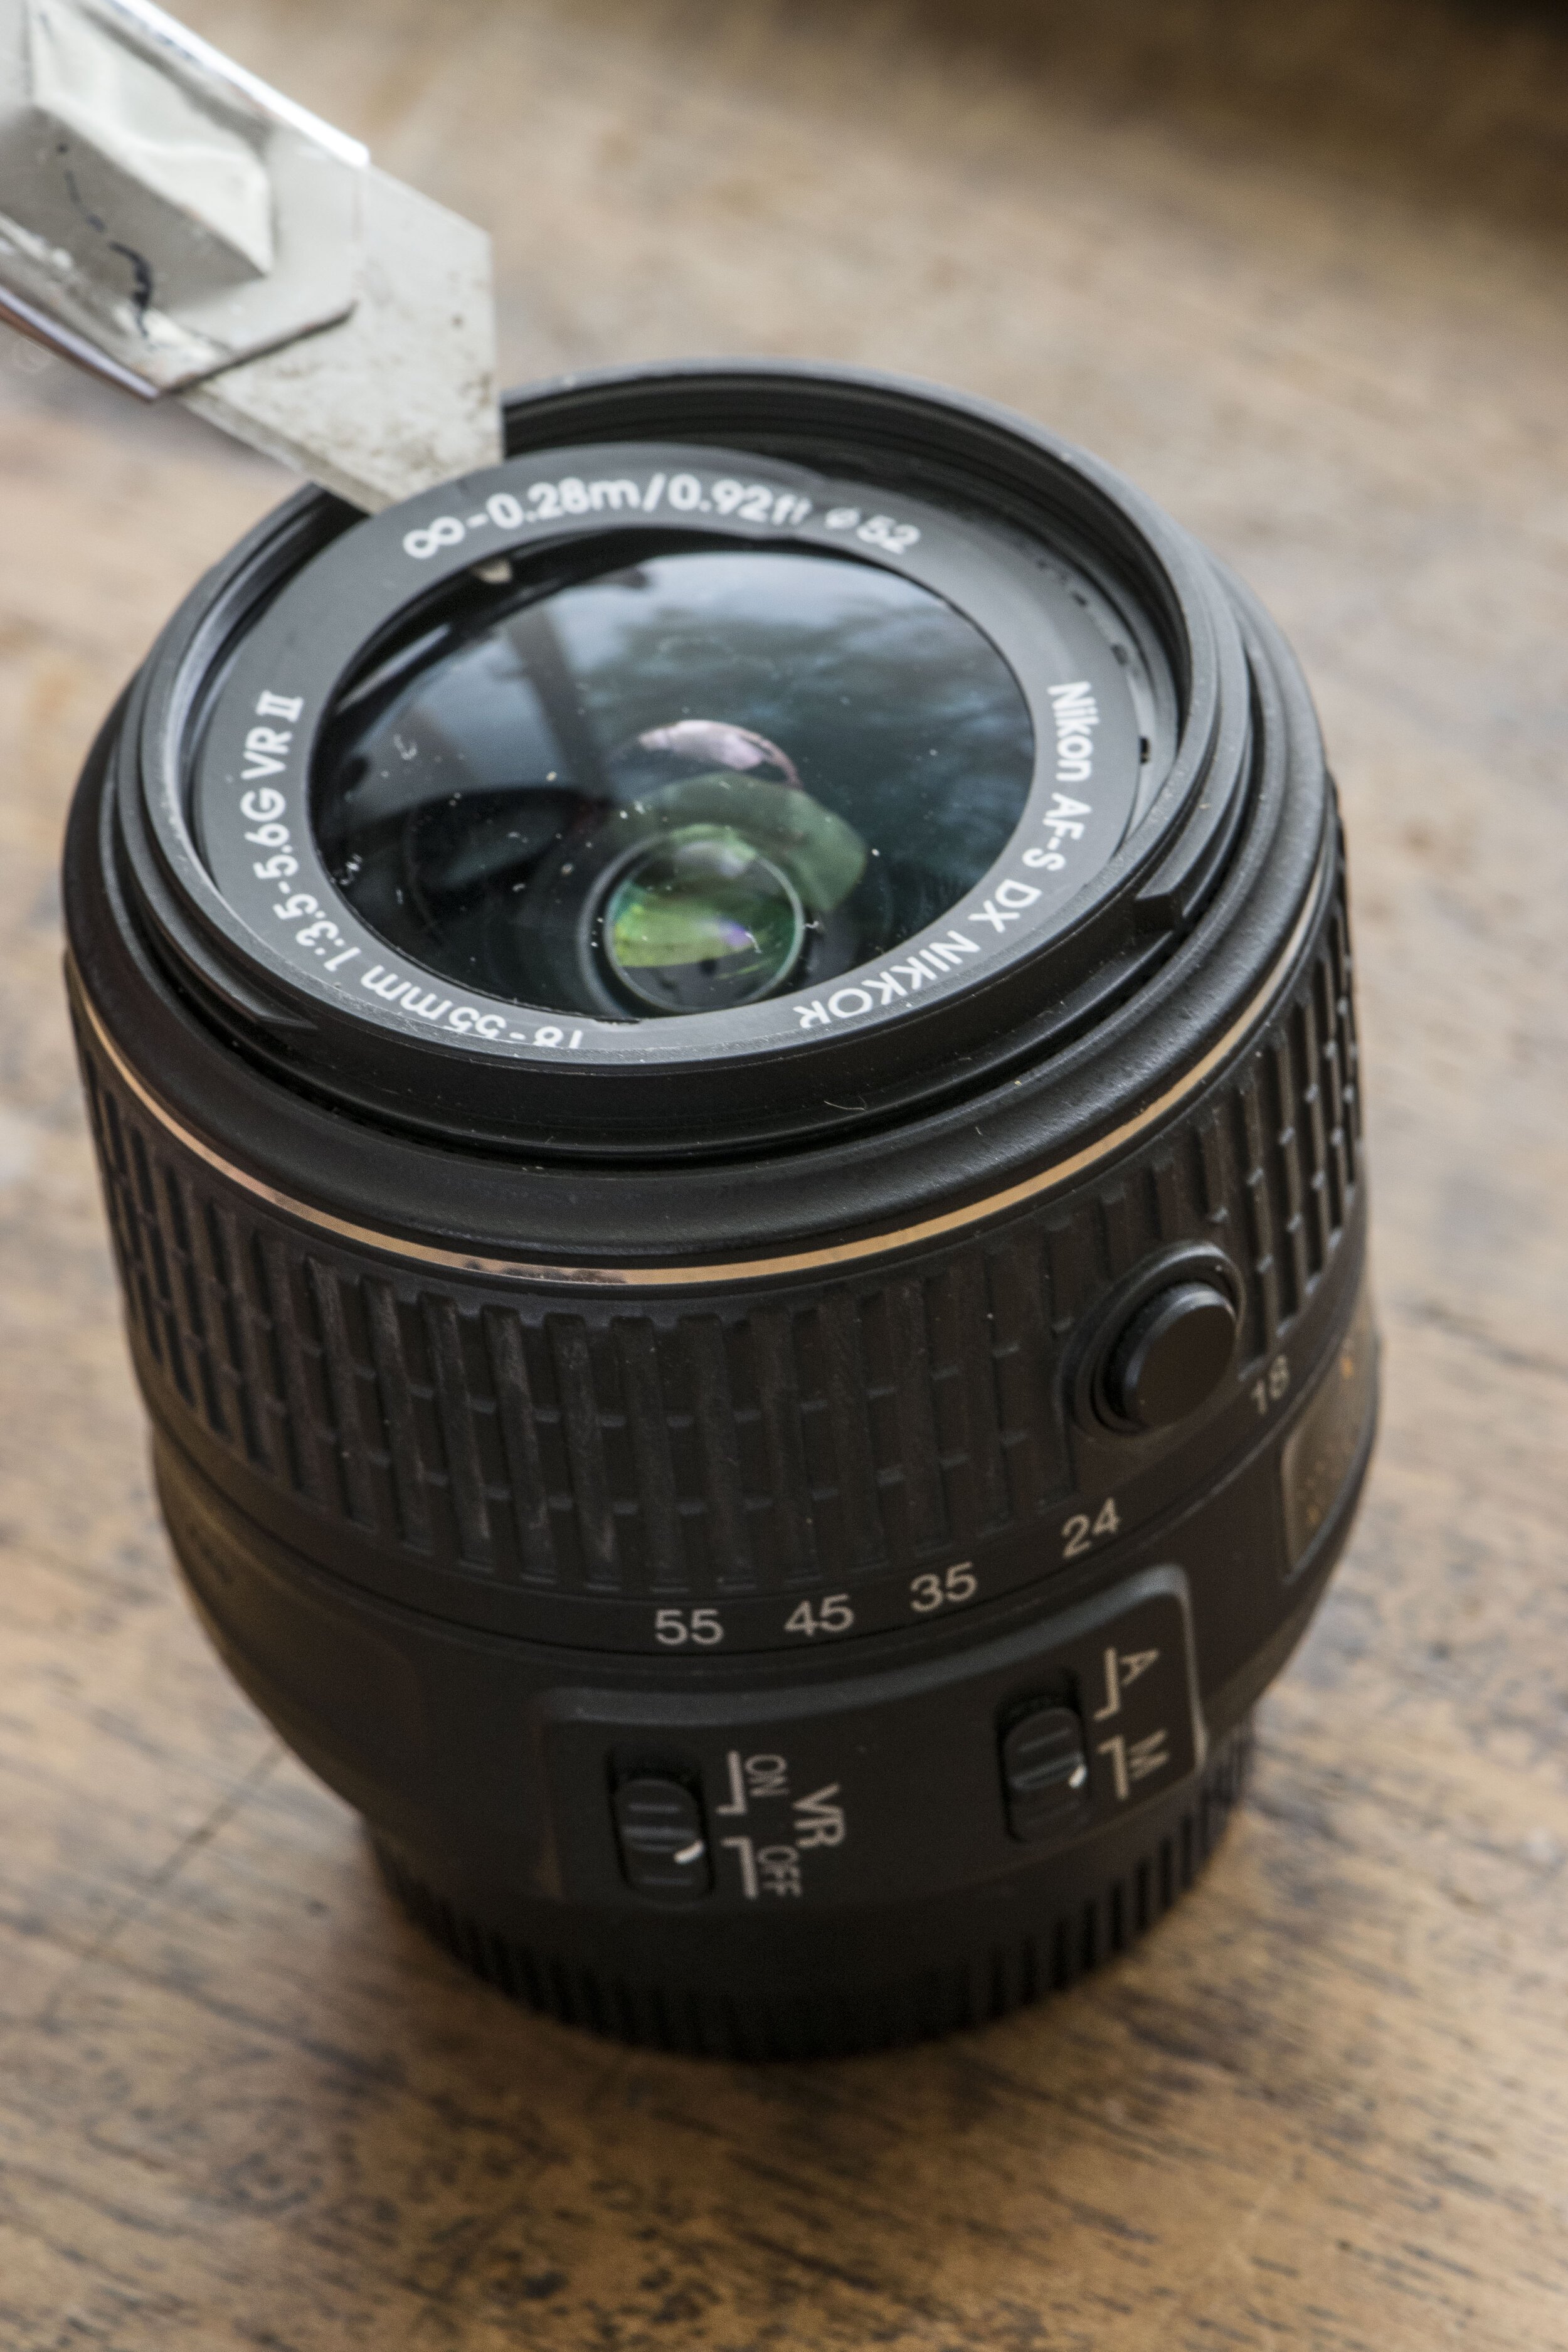
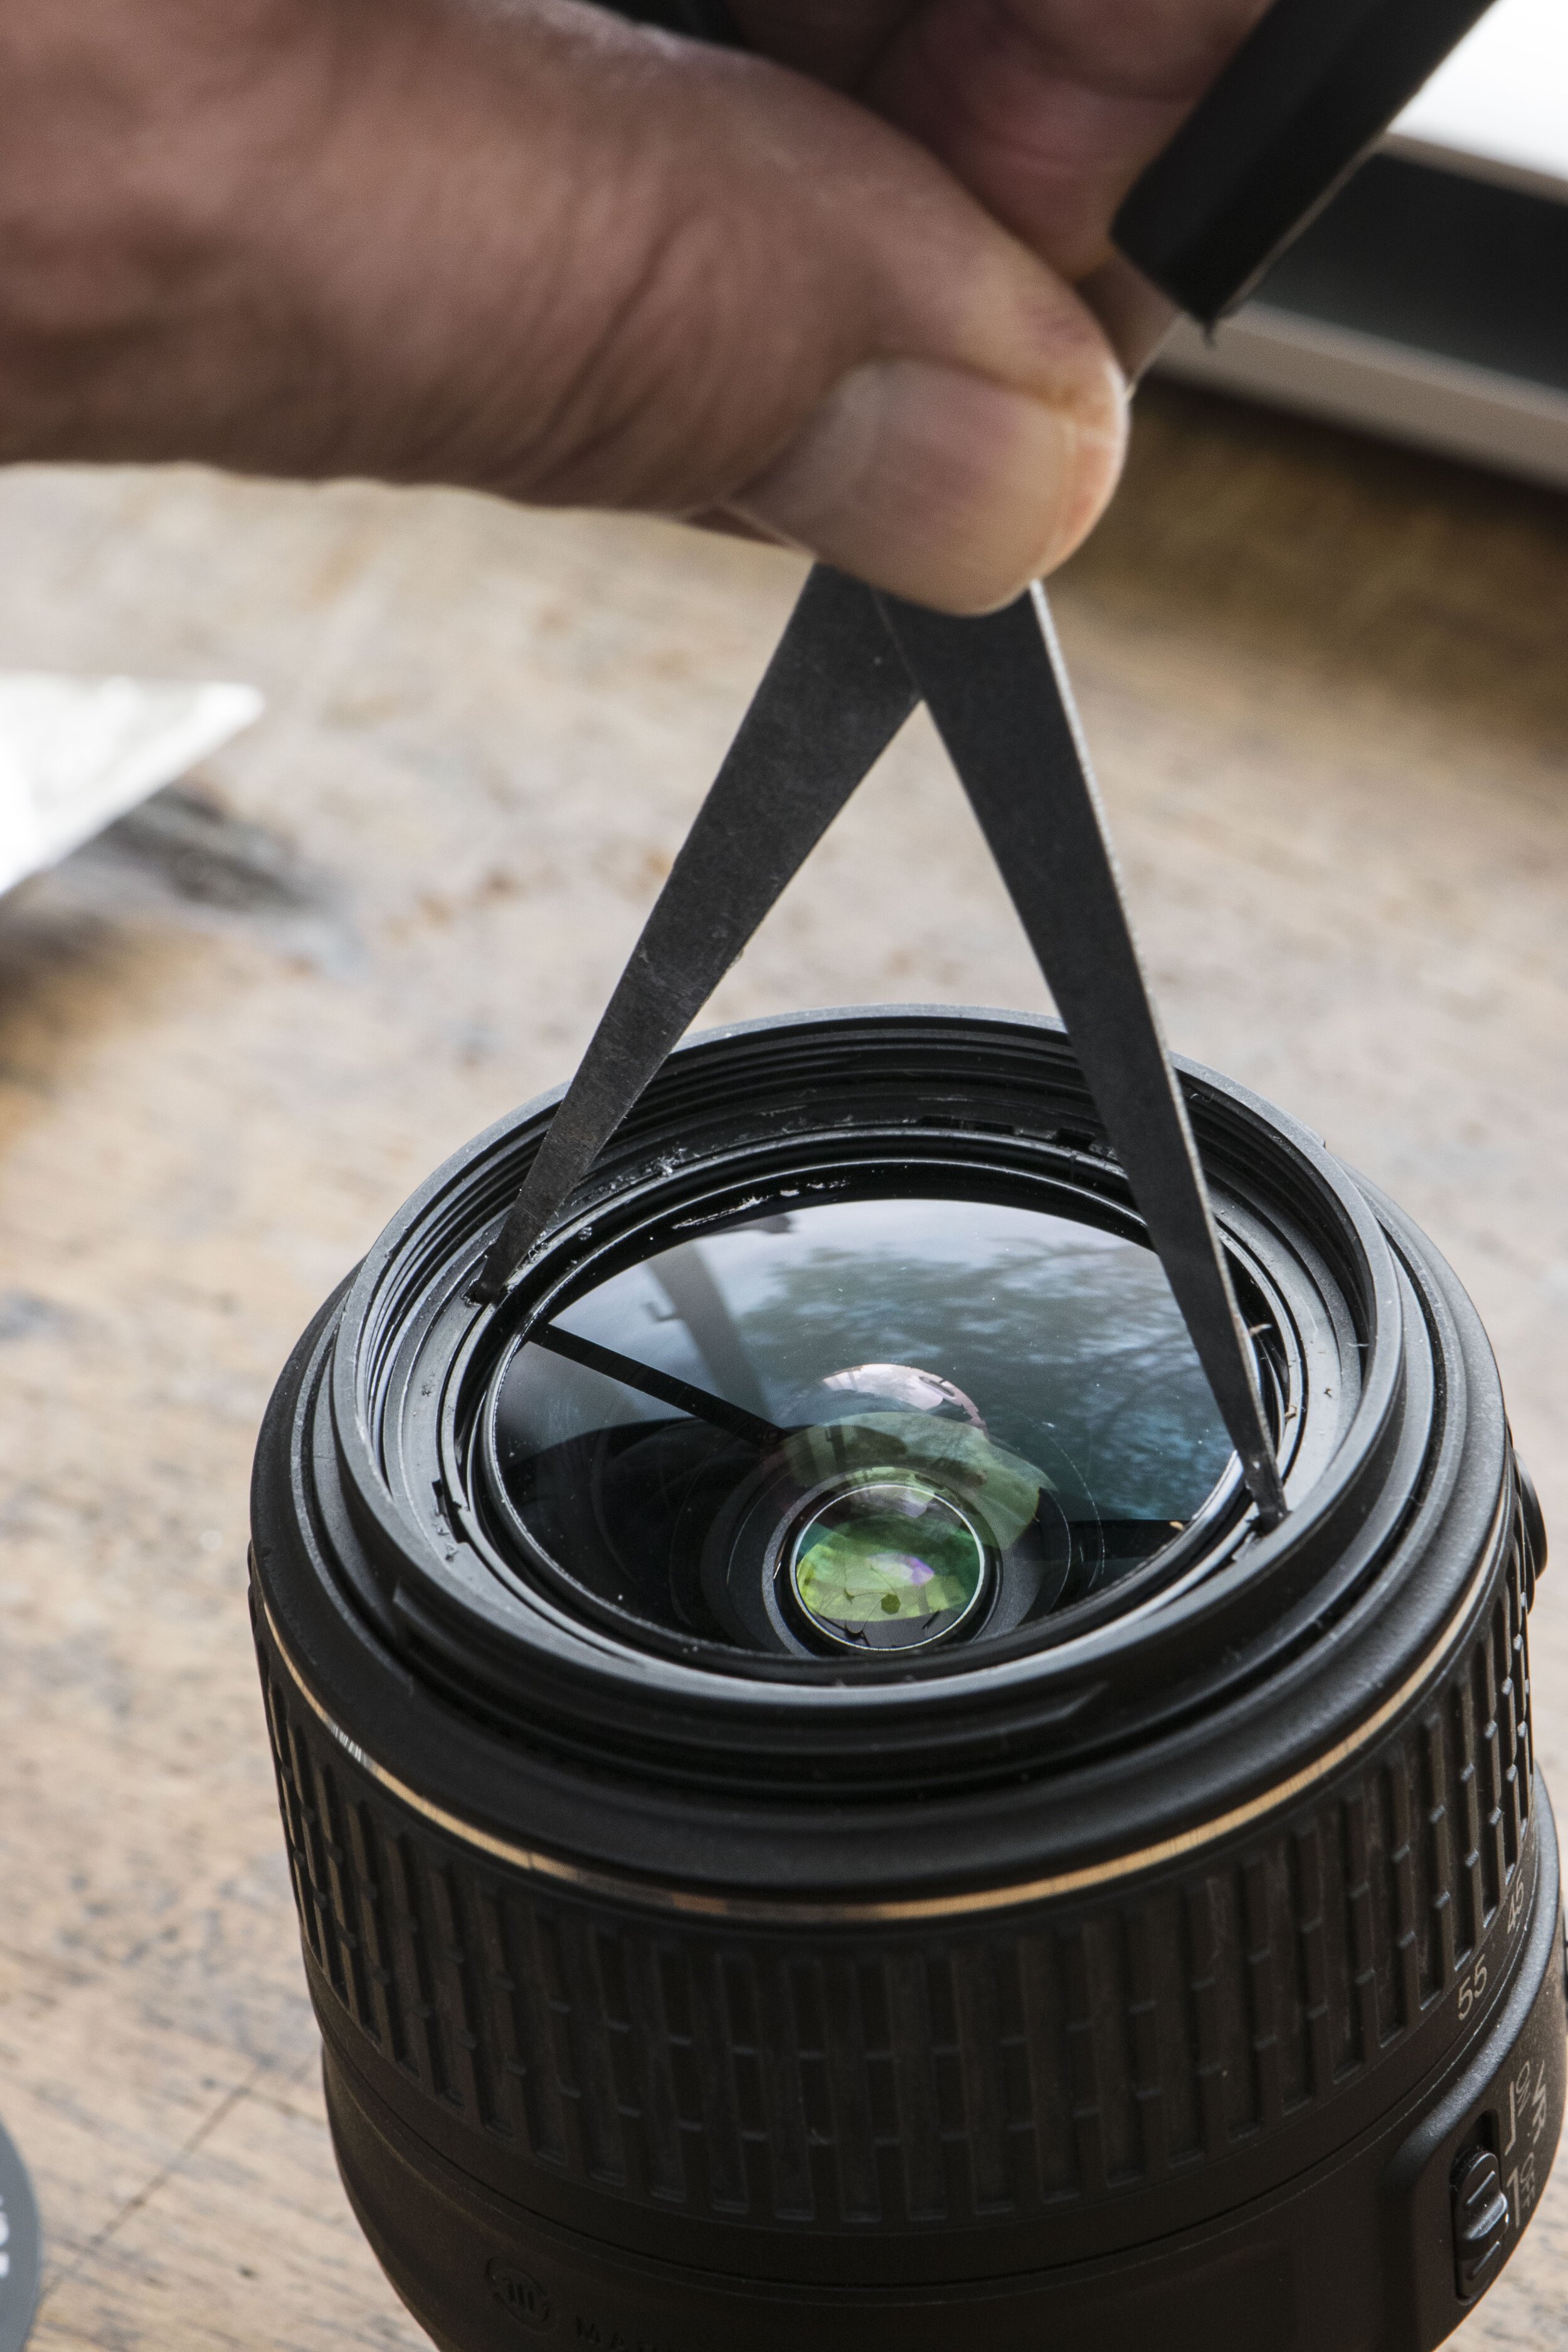
Shown below, using the sliding box cutter that I take to work very night I removed the info ring that seals off the front element of the lens (See illustration nos. 1 and 2). Then, using an open pair of stiff-bladed scissors, I carefully unscrewed the retainer ring that secures the aspherical lens and the unit behind it (illustration No. 3). For the true handyman or woman, there are special spanner wrenches for camera repair that may also be used in lieu of cheap scissors.
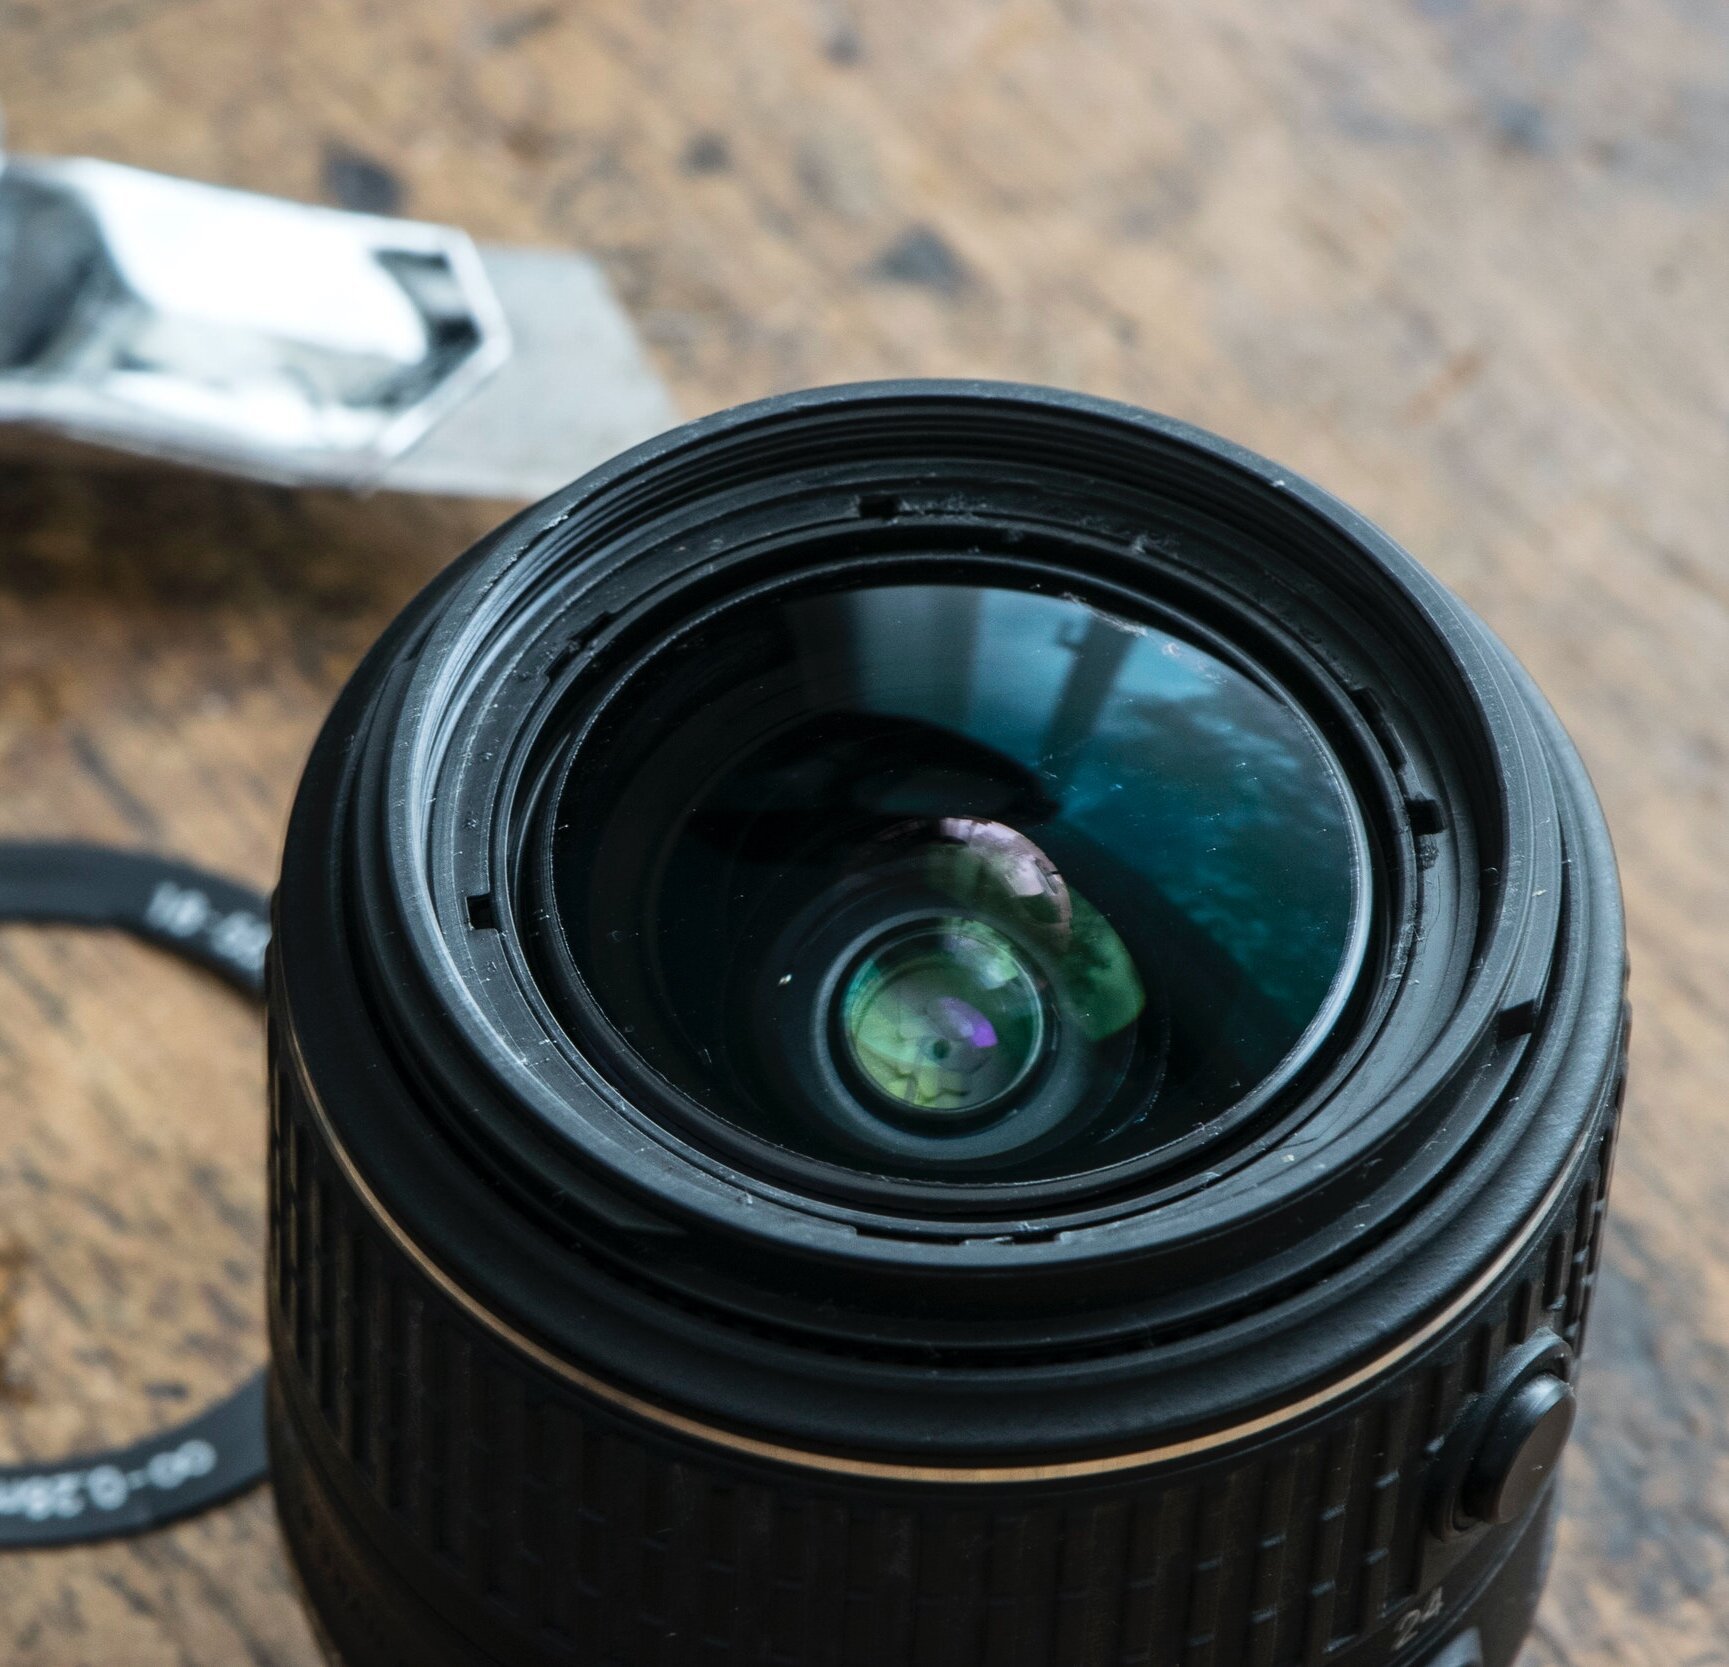
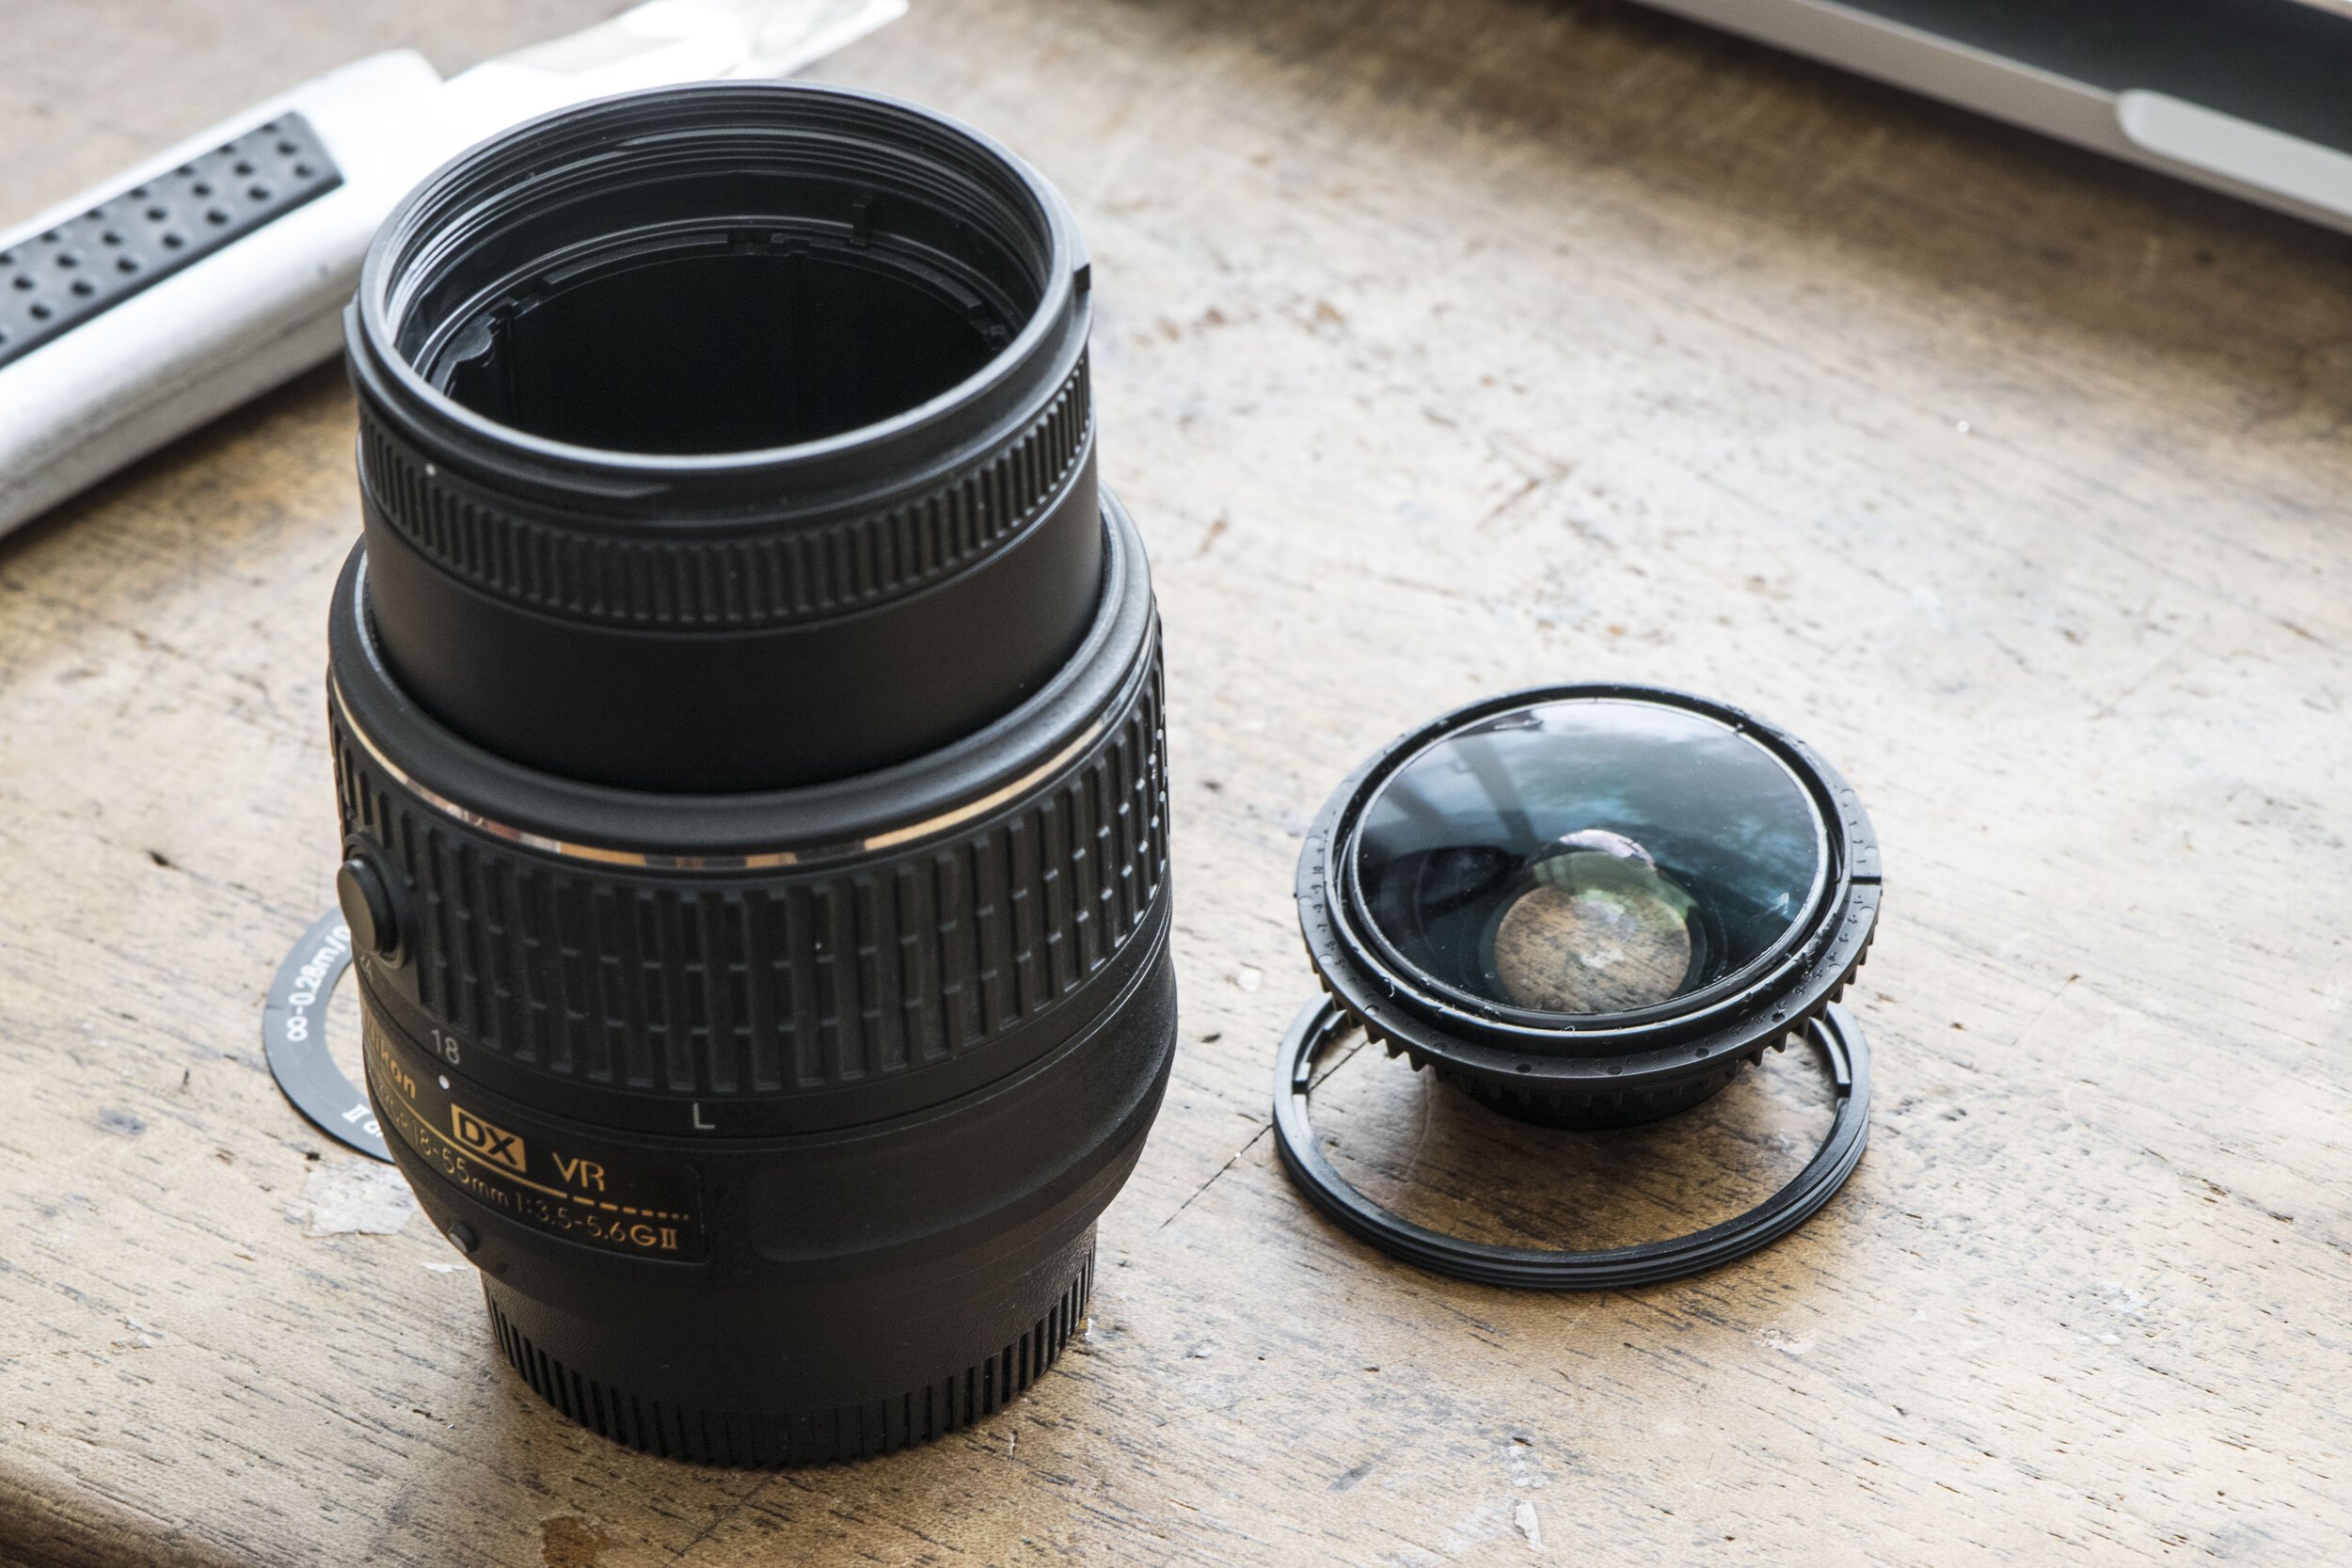

After carefully cleaning the interior of the lens with a blower brush, I capped the lens with a standard UV Filter, as shown above in illustration nos. 4 and 5, with the front aspherical lens and the retaining ring removed.
Upon looking through the lens and trying to focus, I noticed that it had an extremely narrow focusing range. I measured the minimum and maximum focusing distance and ended up having a focusing range of about 1 cm (13/32”), from focusing with the zoom ring on the 55mm position to focusing with the ring on the 18mm position. The field of view @ 18 mm position is 24 mm x 36 mm and with the zoom ring on the 55 mm position it is 9mm x 14 mm. Measuring the enlargement scale on the image, the lens now yielded from 1:1 to 2.5:1.
This is a true macro image, regardless of the authority.
After the first two exposures it was clear that a hot shoe-mounted flash was not a solution, since the lens cast a shadow on the subject. This required a bit more creative engineering on my part.
I tried two bracket-mounted flash units with a diffuser and it worked very well. But it felt a bit like going rabbit hunting with a bazooka. Not that I worried about sportsmanship, but the rig was way too heavy and clumsy for such small subject matter. Thinking about a small soft box with light coming from above, I drew a box attachment to be mounted in front of the flash. If I measured it correctly, I could have the light of the flash unit bounce at a 45º angle down onto the subject and go through a paper diffuser to obtain even and soft light with just one flash.

I built the prototype with 3 mm cardboard, covered the inside with aluminum foil and transparent contact paper. After putting it together, I slipped it over the flash and had a small soft box diffuser above my subject.

Time for a test drive
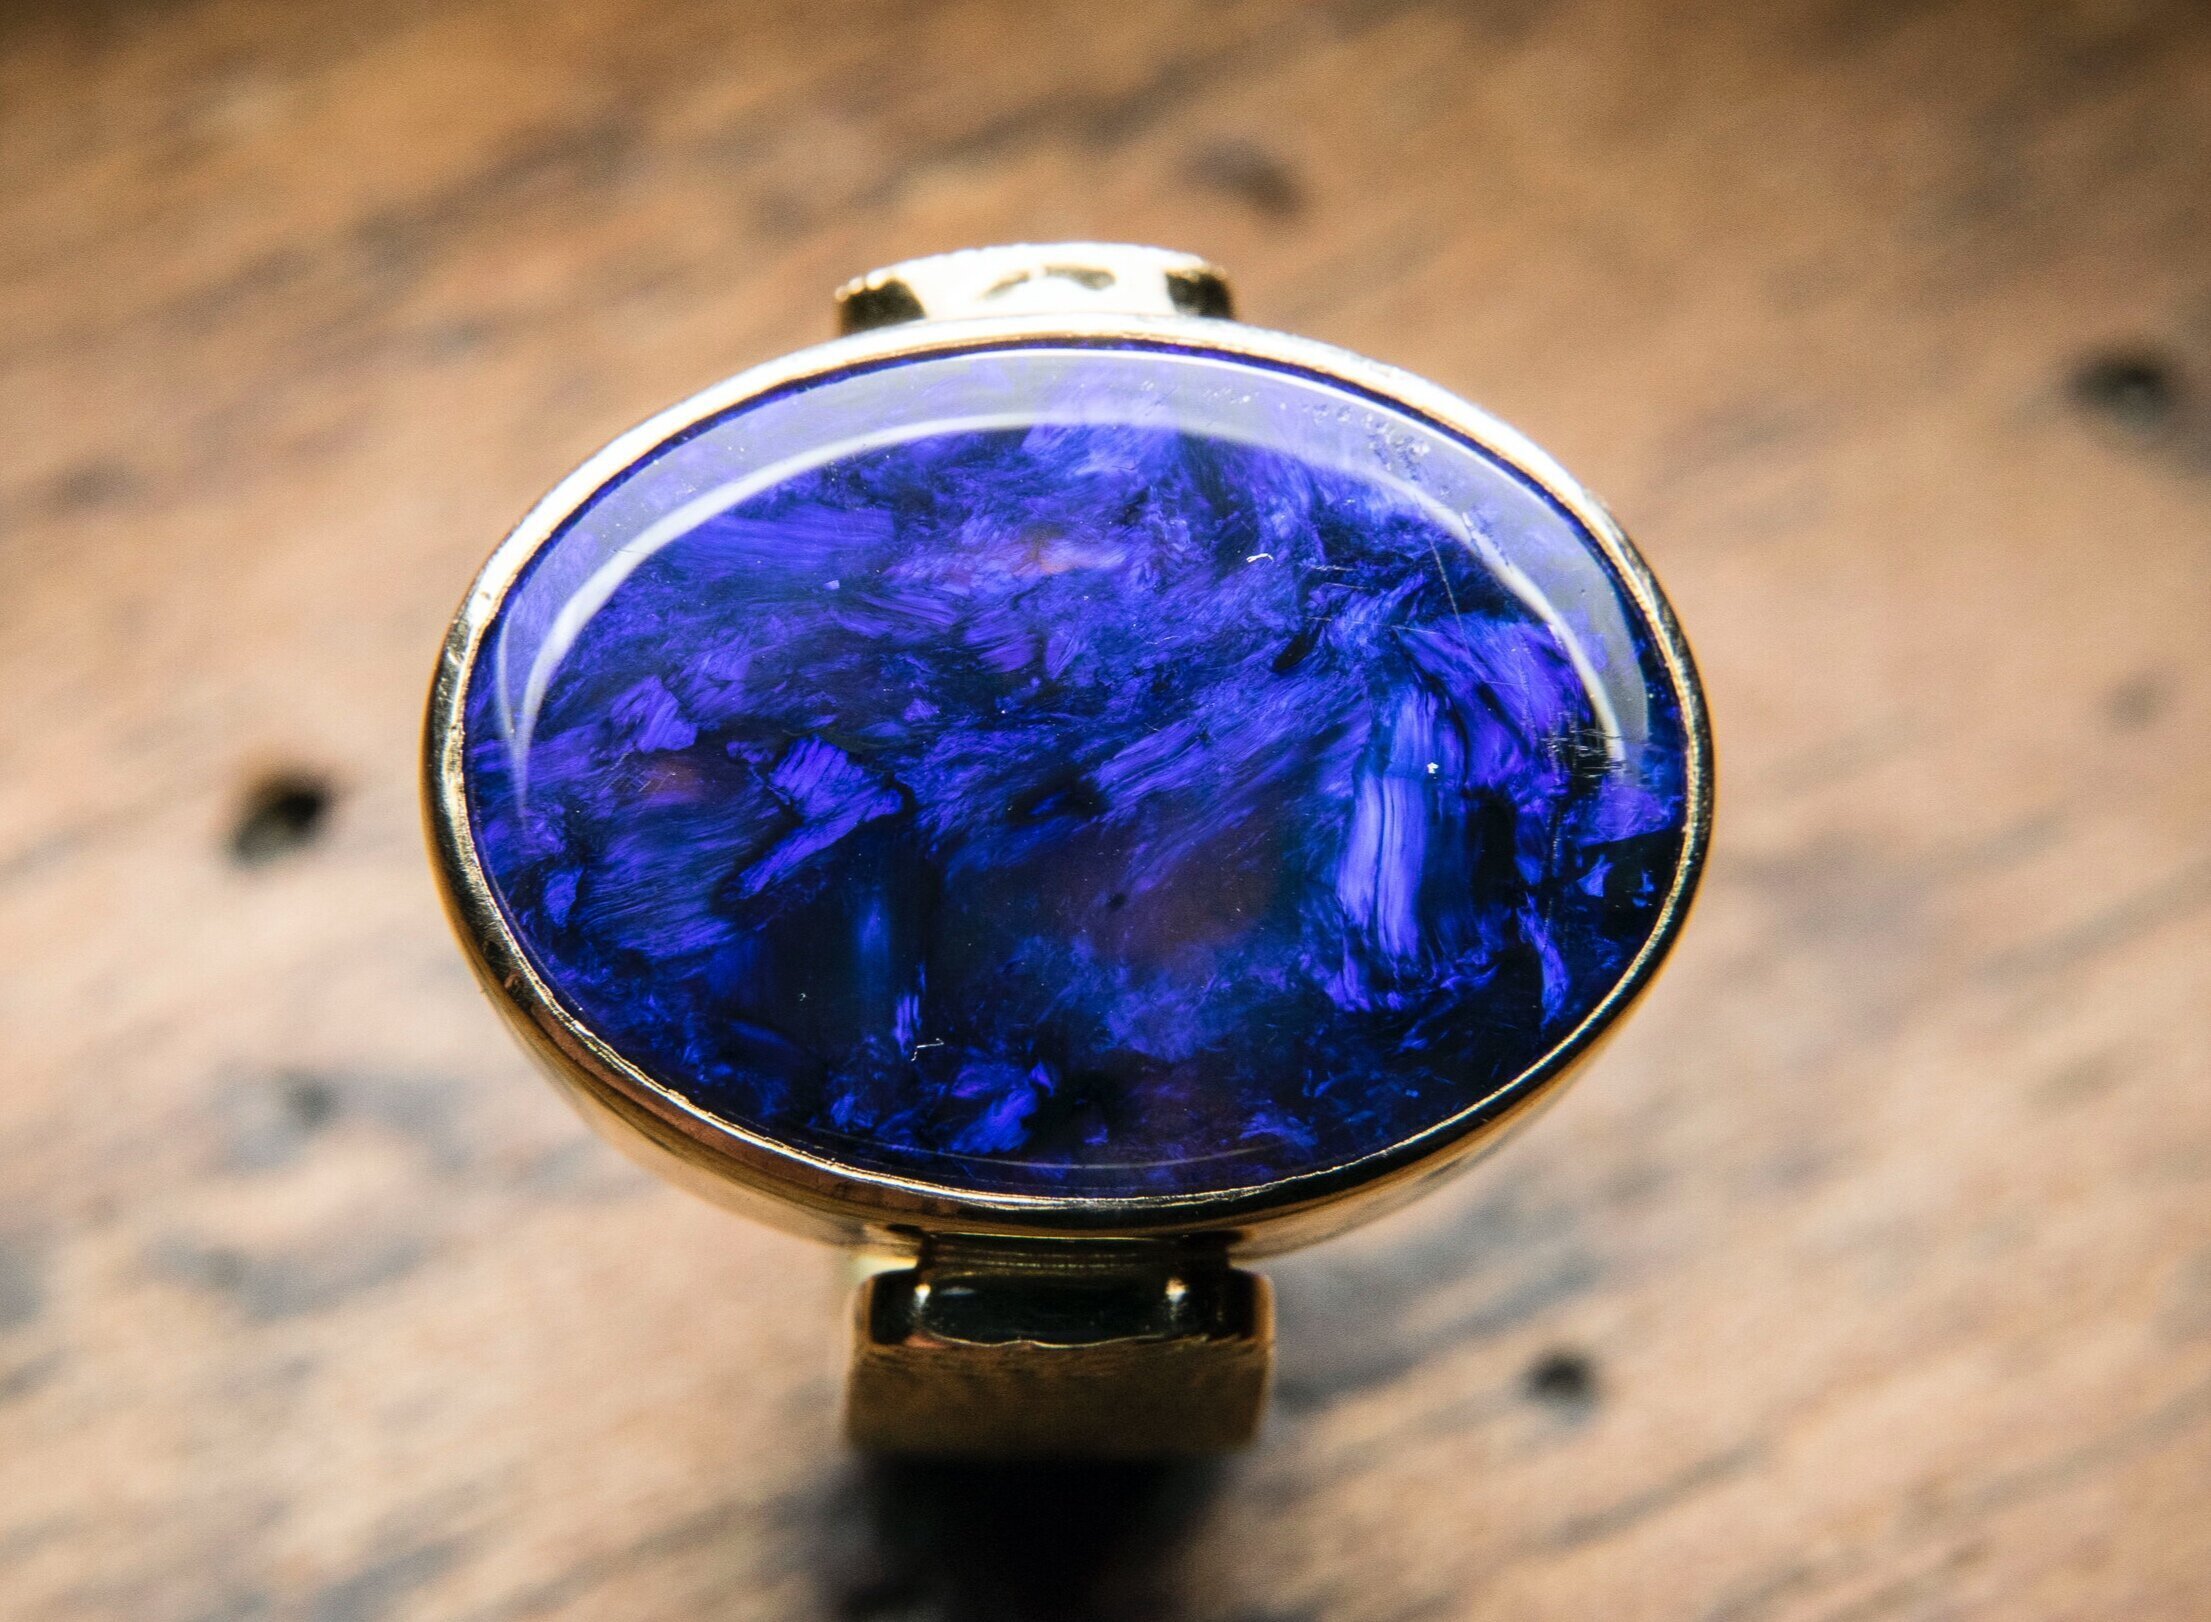
I first tried the equipment with a few pieces of jewelry, to see if the light source would deliver even illumination without harsh specular reflections. It worked like a charm. Perhaps the only practical drawback with this design for field use was that I probably couldn’t stick that clumsy contraption into vegetation because the structure would get stuck.

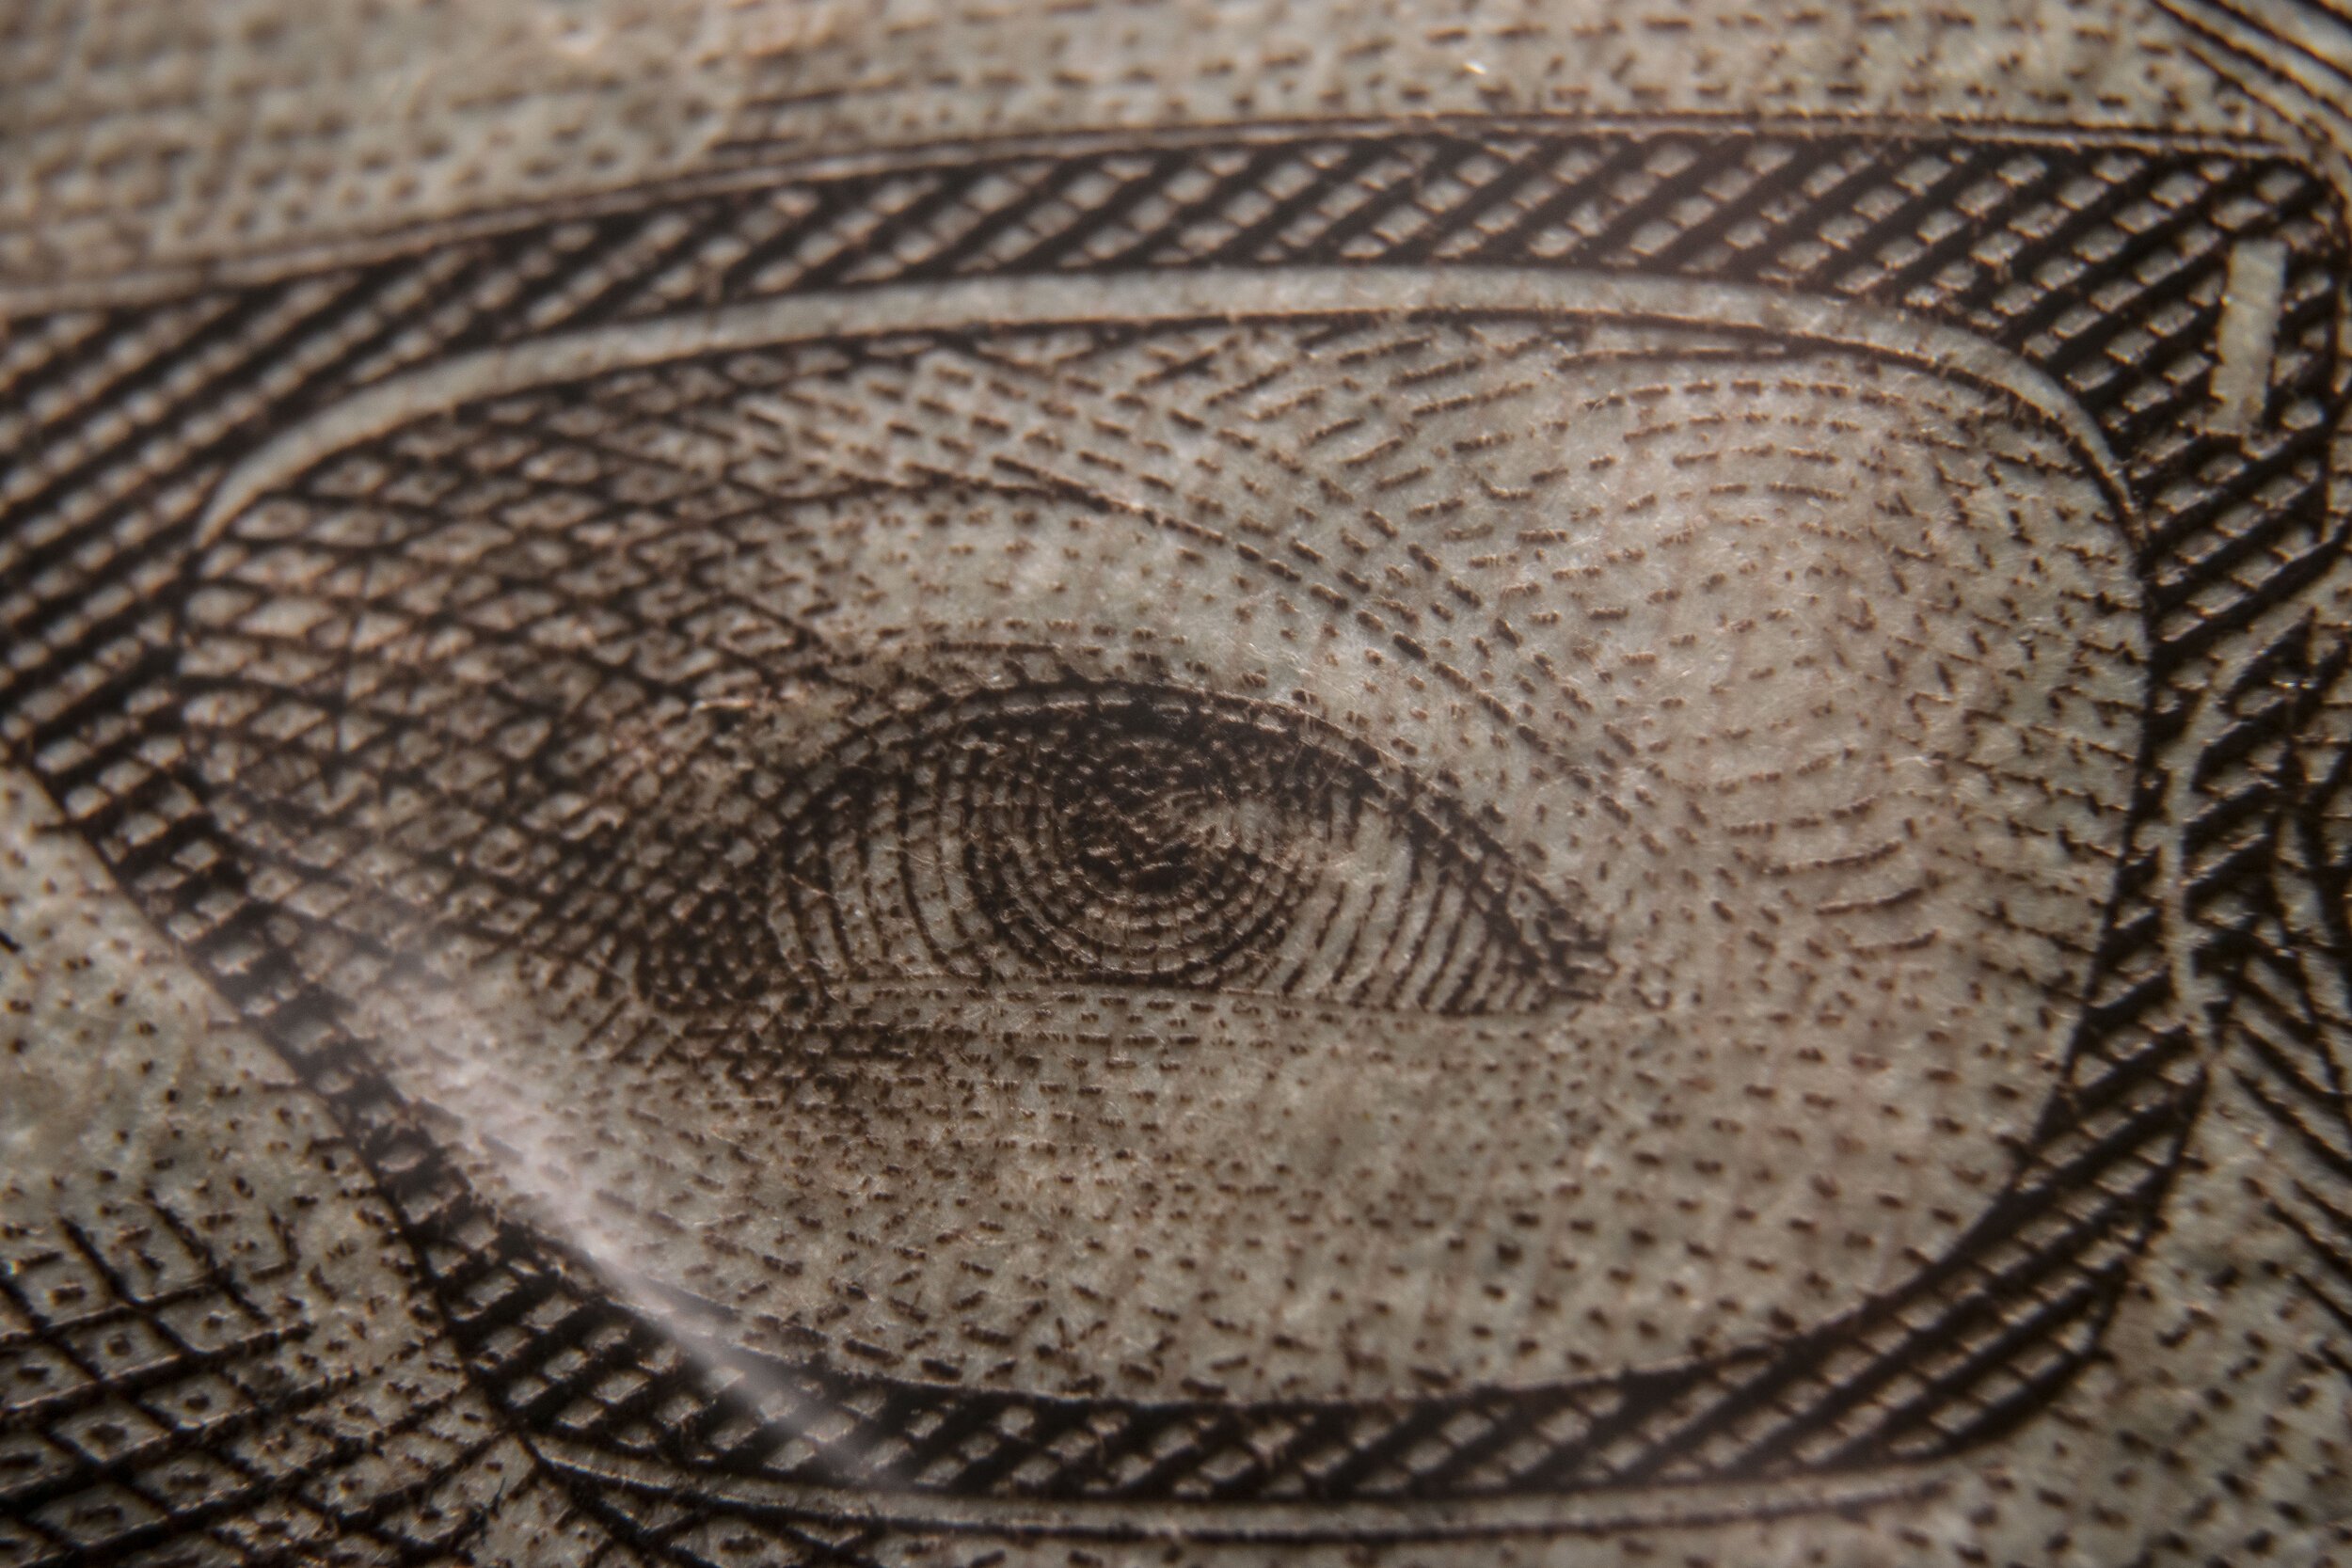
Then on to the details of a local 20,000 peso banknote, shown below.
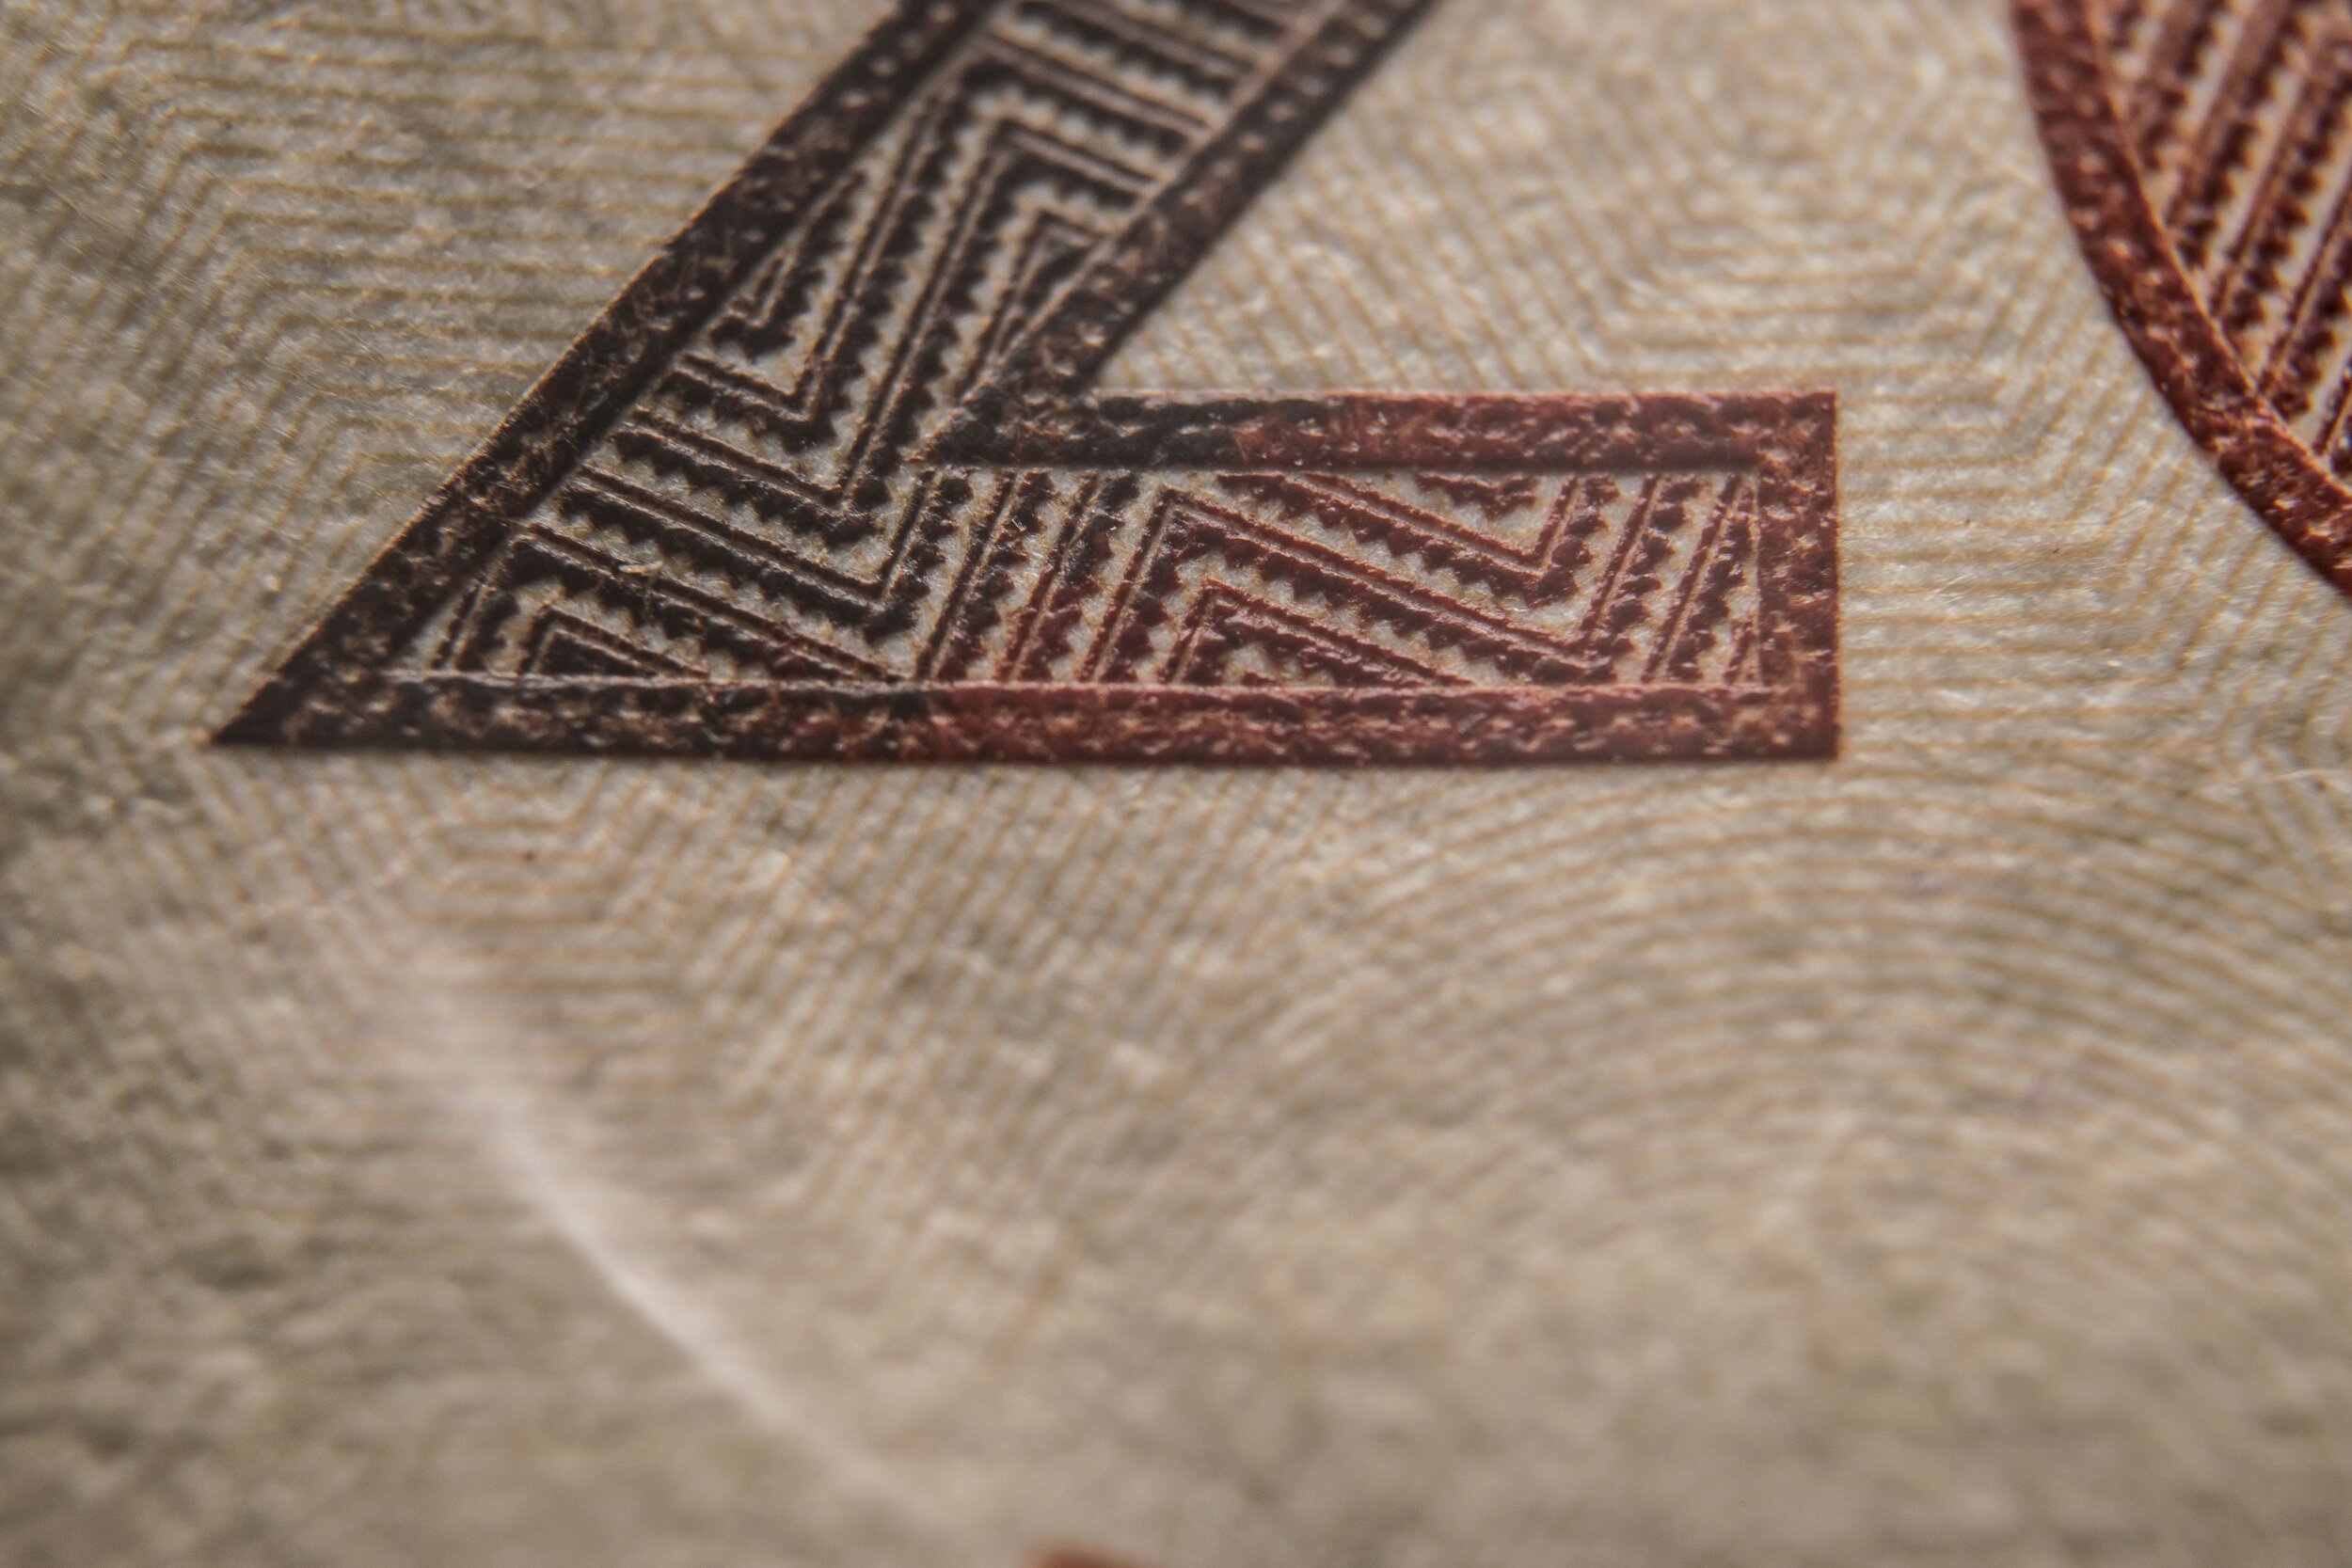
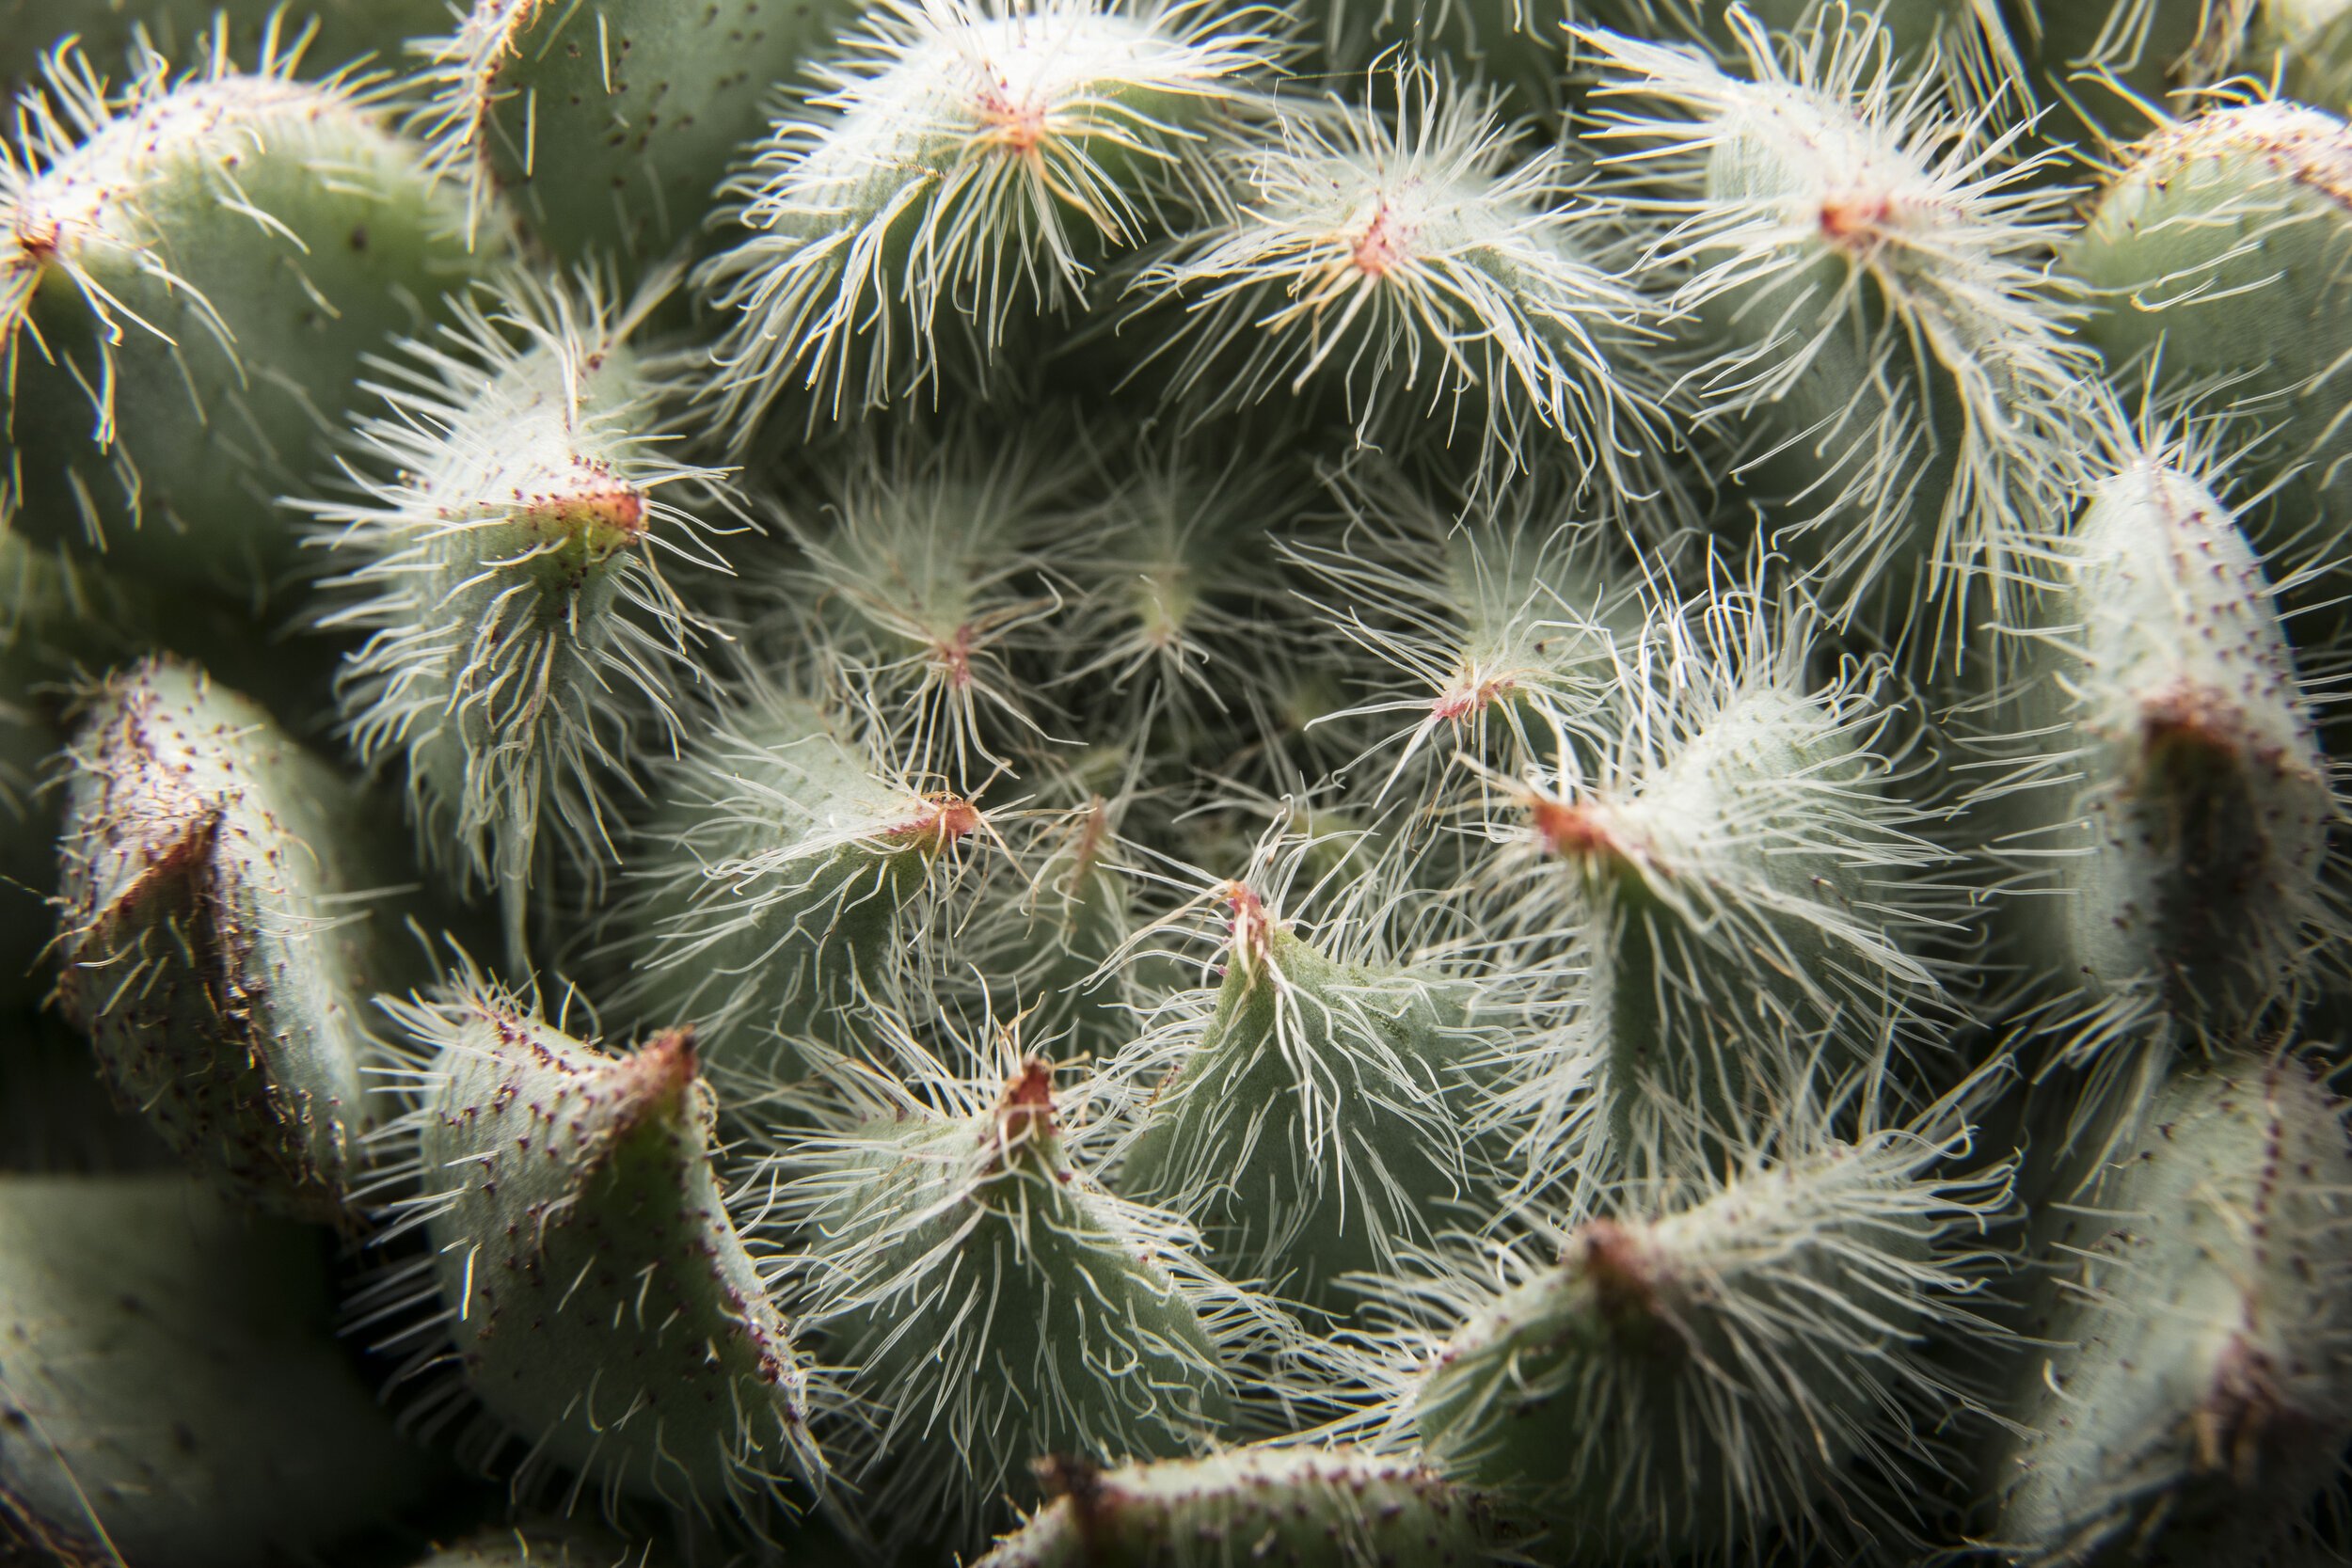
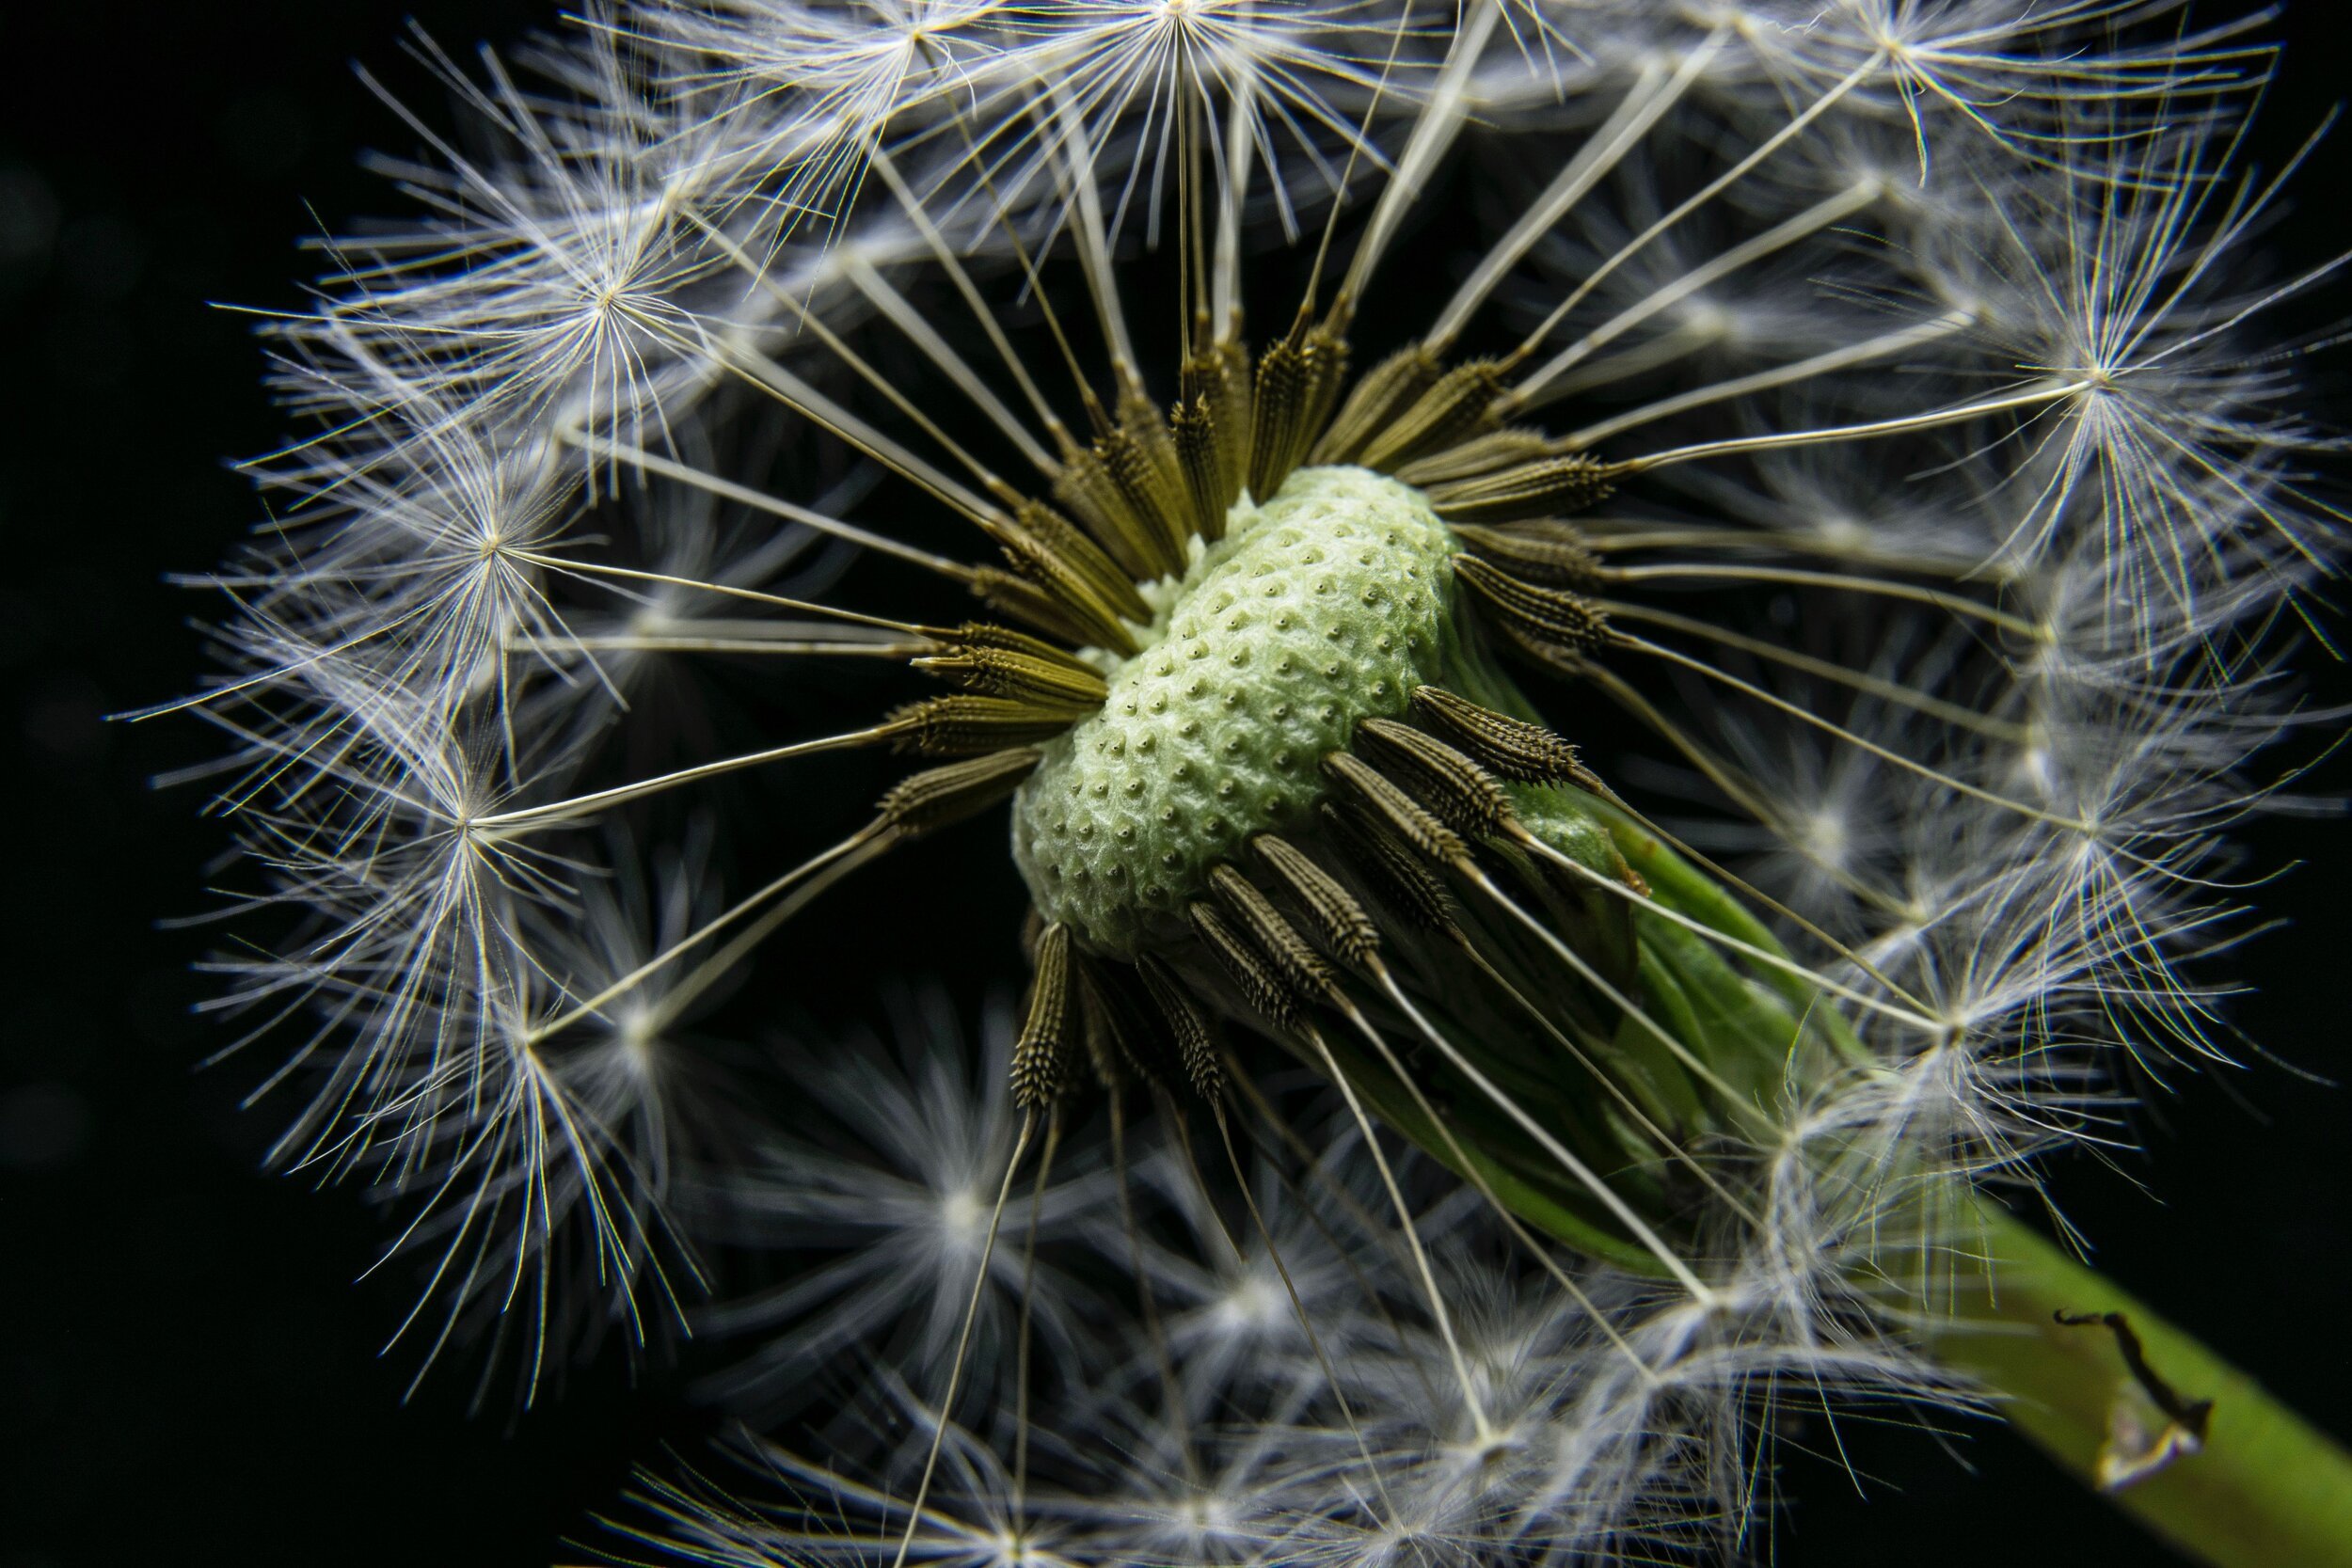
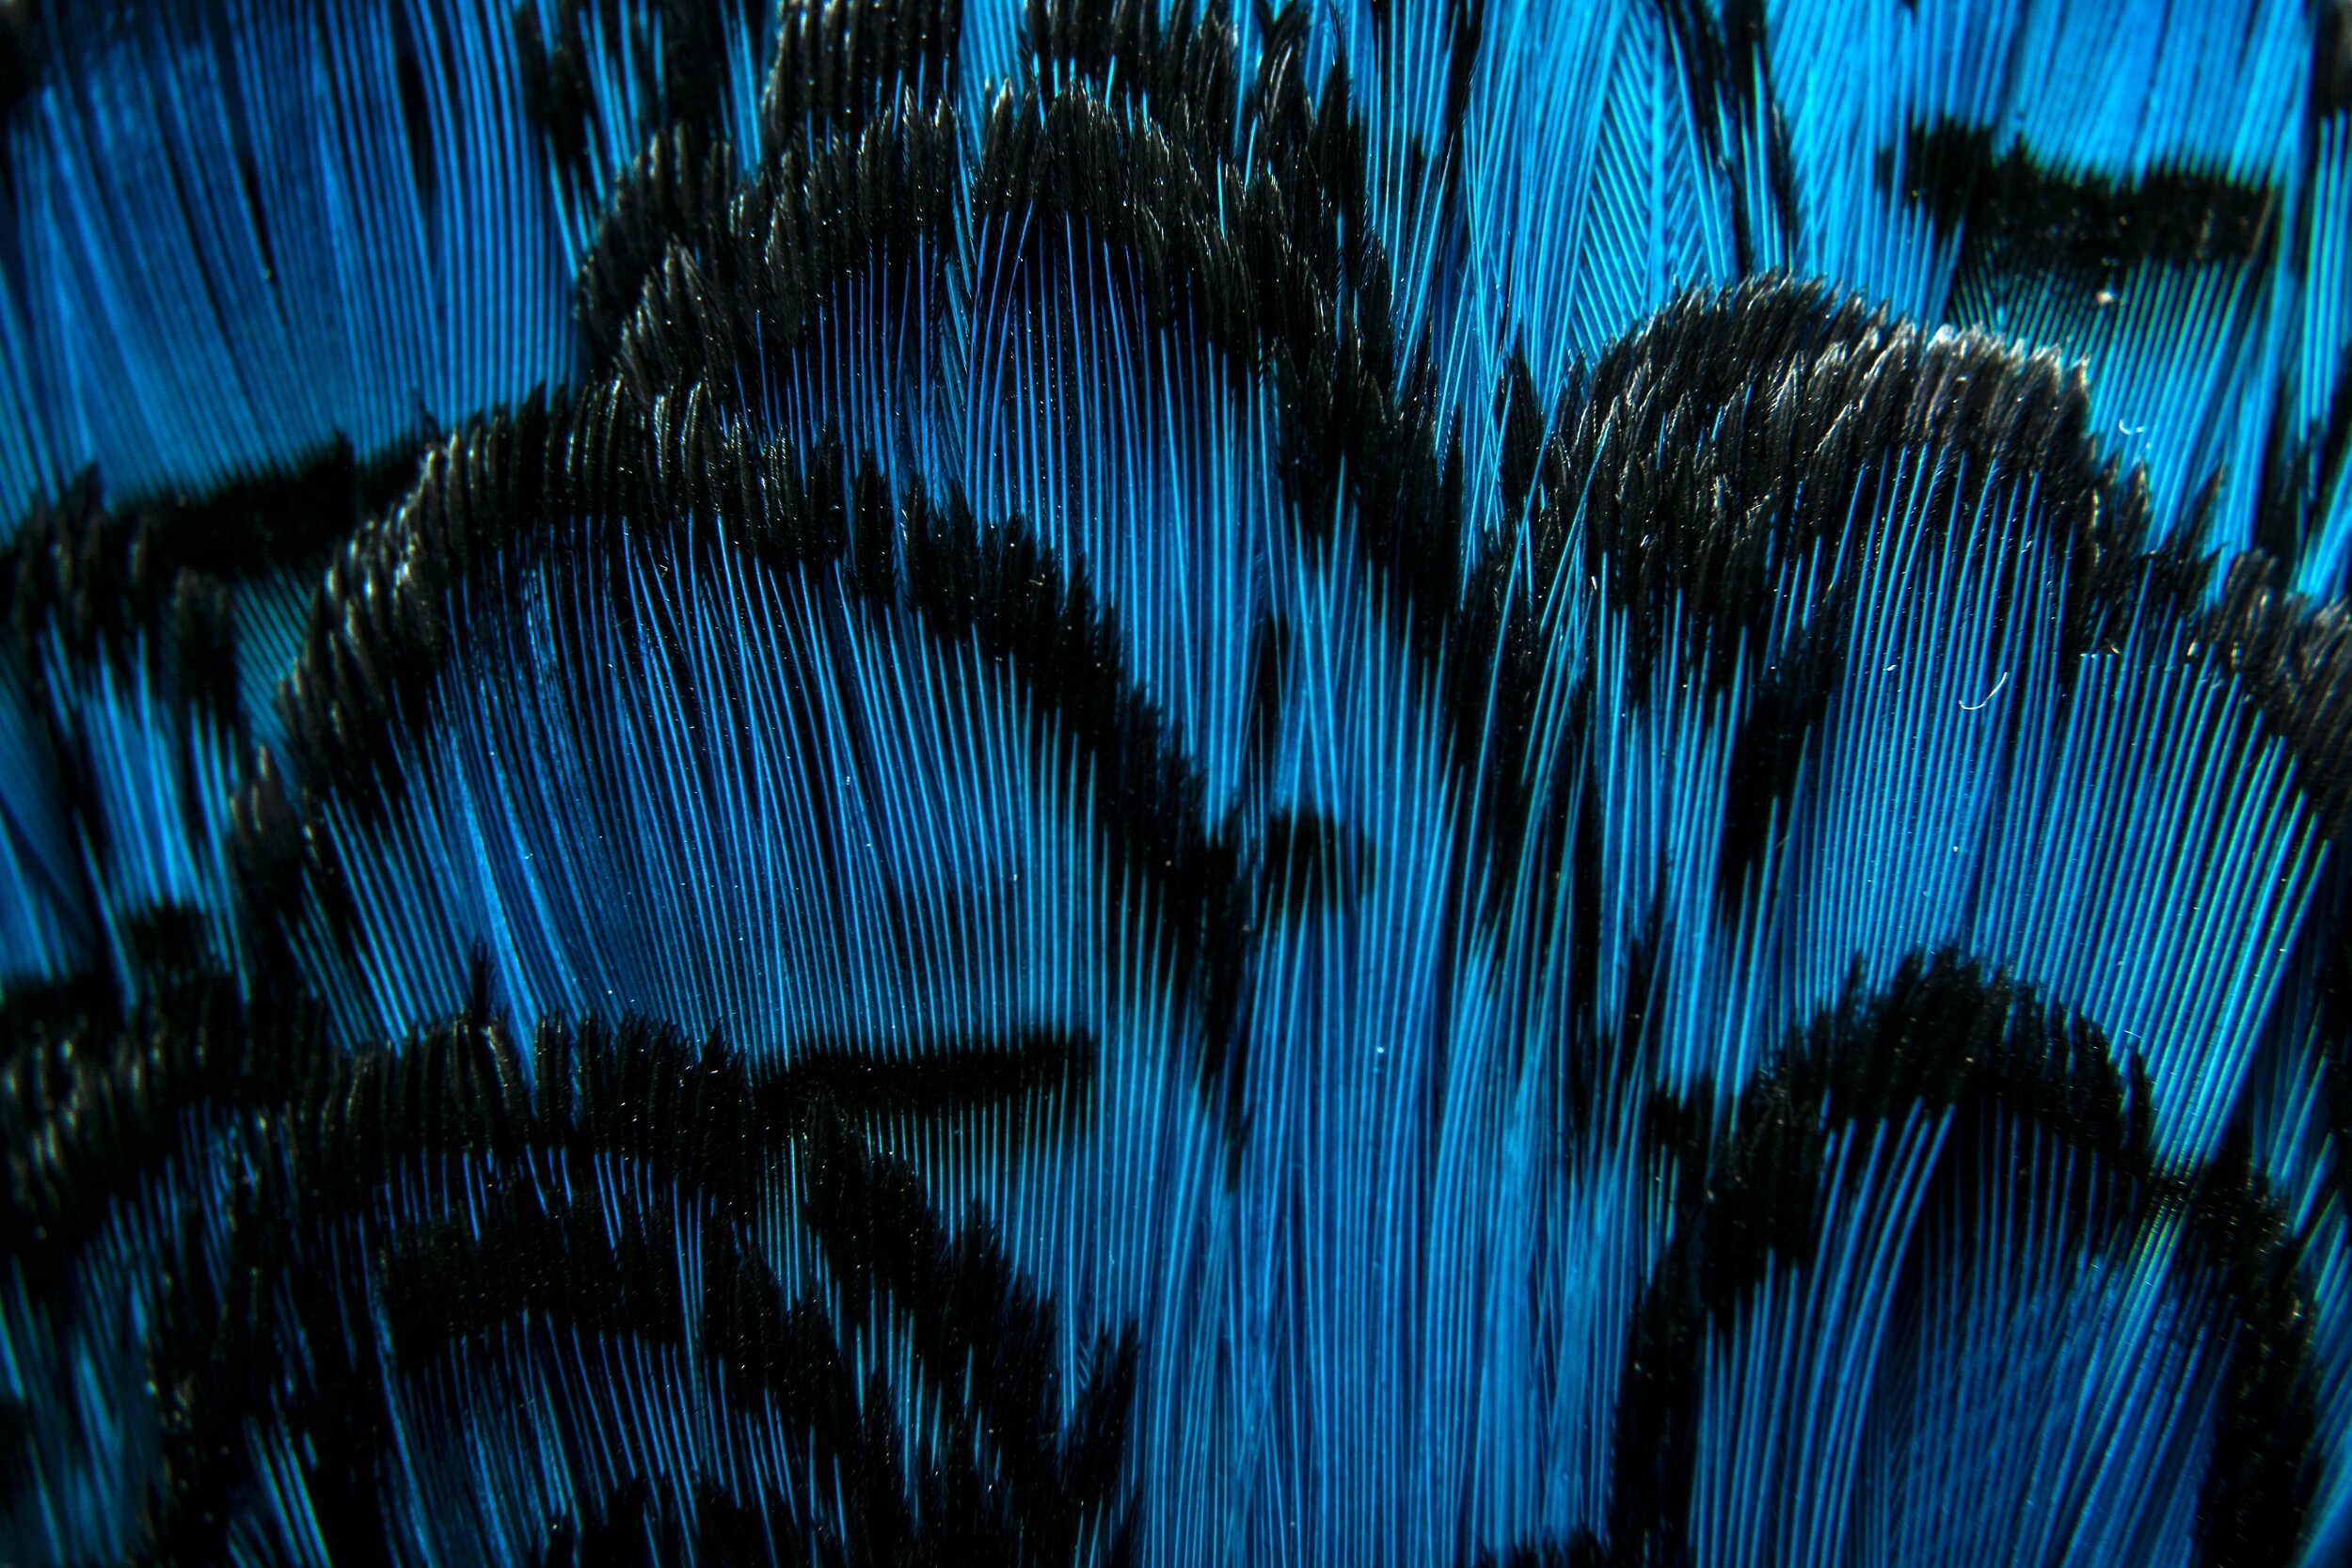
I continued to do trials with other detail-rich natural history objects such butterfly wings, details of vegetation and feathers that I use for fly tying. As long as the photographer makes certain that the film and lens plane is parallel to the surface they are photographing, there is very little focus fall off at the edges and the overall sharpness is surprisingly good.


Below, flower detail in the miniature orchid, Restrepia elegans shown in an image taken by Wilson López with another Nikon 18-55 mm lens modified for macro by me. Note the detail, with pollen suspended in a water droplet perched on the staminode.

Good luck!
All content ©Exotica Esoterica LLC® and ©Peter Rockstroh 2021